
This follow-up article brings us back to the subject of light wind flying techniques, except this time we’ll address how we apply them to your quad line kite!
One might imagine that flying a quad line kite in such conditions is harder than doing it with your dual line, but this is not really true… The very nature of a dual line kite is based on forward orientation, or that fact that it flies under power in only one direction, whereas a quad line kite can create lift from most any angle (i.e. front, back, the sides, or in-between)!
The techniques that will be outlined below are provided assuming that you’ve achieved the basics of quad line flight, so that you can already fly it forward, stop it, hover, and land… Now, by using these techniques you will also notice an improved degree of control in even the most ideal conditions.
Having been a quad line pilot since 1992, I’ve spent literally thousands of hours refining my approach and used what I’ve learned to secure several national championships in ballet and precision… So these tools work, but are also accessible to anyone so don’t be discouraged – it just takes a bit of practice, and I’ve already put the time into figuring this stuff out for you!
For ease of understanding, I’ll stay true to the format we used in last issue’s segment of “Milking the Breeze”.
Flight conditions and equipment used in photos:
- 0-2 mph winds.
- Revolution I w/two wrap frame.
- 100 foot, 80 lb. lines.
- SUL Extended Rev Handles.
Launching
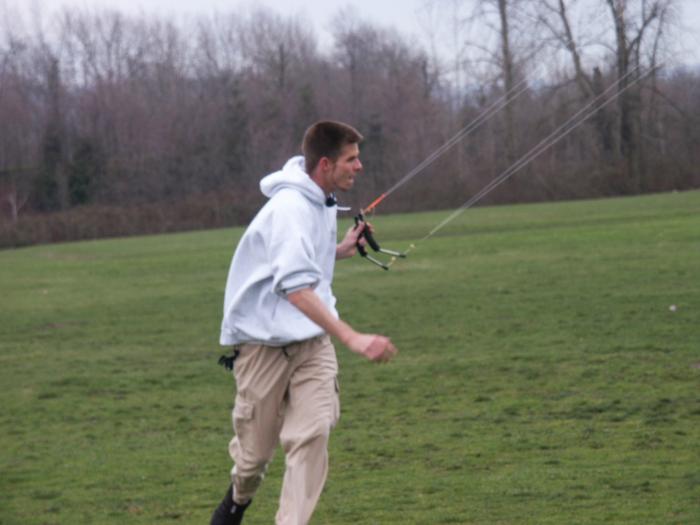
Again, we’ll start with getting off the ground… Which is much different from a dual line in that you’re not moving your hands down past your hips, but rather in an upward and back motion toward your chest or ears (see picture lower down).
The reason for this is simply that if you go with a downward motion, your hand naturally want to apply reverse and it fights what you’re trying to accomplish… By pulling upwards and back, you naturally apply forward which is what you need.
- As with a dual line kite, if you just pull back from a flat-footed stance and release you’ll give the kite a great launch into the sky and promptly take away all the lift you’ve generated upon letting your hands back out in quick fashion.
- Or, just start walking back as if there’s enough wind will generally not initiate sufficient lift to gain forward drive… The kite hesitates, floats, and just might go with a lot of luck.
 The ideal quad line launch in light winds is to pull your hands back toward your chest or ears, letting the bottom lines out, and walking backwards at the same time while you slowly let your arms extend again… This gives you a solid launch, doesn’t jolt or stall the kite, and allows you to keep tension on the lines as you start to fly around the sky.
Staying in the air
Now, with a quad line kite this part gets a bit trickier! You’re essentially dealing with a flat sail, so there is much less of an existing “tunnel” or cup in the sail which would channel the wind you are trying to create… So, in light winds you will more frequently find yourself walking away from the kite in order to fill the sail.
Let’s assume you are keeping a steady walk backwards… No matter which way your kite is facing, the upper most lines should be pulled in and the lowest lines let out almost as much as possible.

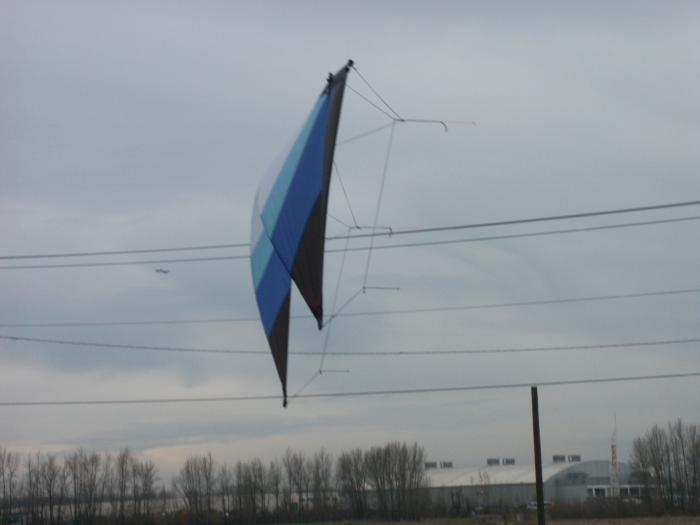
Upright Hover
Kite is upright and stationary, and I am keeping the top lines pulled in while walking away and keeping tension.


Right Hover
Kite is stationary and facing to the right, so I have the left lines (top wing, in this case the left wing) pulled in while walking away and keeping tension.
(note hand across chest, like drawing a bow and arrow)
Left Hover
Kite is stationary and facing to the left, so I have the right lines (top wing, in this case the right wing) pulled in while walking away and keeping tension.
(note hand across chest, like drawing a bow and arrow)

Upside-Down Hover
Kite is stationary and upside-down, so I have the bottom lines pulled in while walking away and keeping tension.
Understanding the essential principle that the lines going to the uppermost part of your kite should always be pulled in and the lowermost lines let out, follow through with this while you’re flying around the sky:
- As the kite is flying (leading edge first) from left to right, you’d have your left hand pulled in…
. - As the kite is flying (leading edge first) from right to left, you’d have your right hand pulled in…
. - As you’re flying straight up (leading edge first), you’d have your top lines pulled in…
. - As you’re flying downward (leading edge first), you’d pull back on your bottom lines just enough to slow your descent…
. - If you’re rotating the kite to go another direction, you change the position of your hands so the uppermost part of the kite is pulled in towards you at all times.
Without rushing or exaggerating the motion, walk backwards and keep the lines just taut enough to hold onto your lift, then try to walk forward only when the kite is pointed downward (leading edge first) or if you are in a stationary sideways position (see gaining ground section).
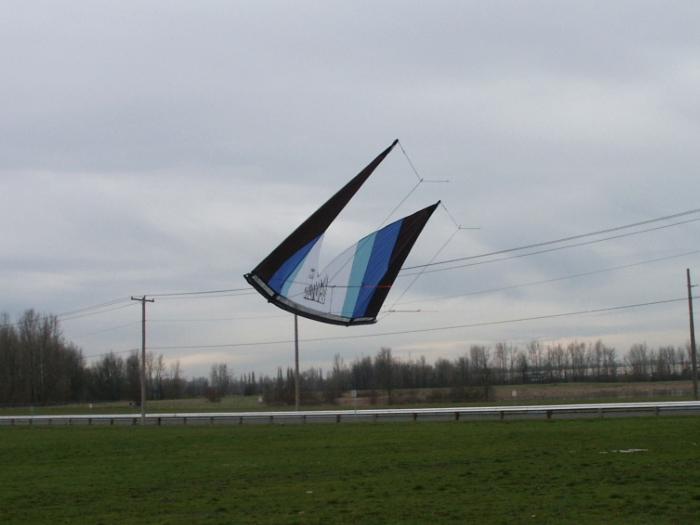
Because of the design of a Revolution, it’s longest sail area is lengthwise… So, it stands to reason that it has the most lift when it is facing right or left, and you have the top lines pulled in… Even while flying forward.
Use the length of the kite to your advantage, knowing full well that the wind is sliding across the longest portion of sail… Again, providing the most lift.
Another technique you can apply is to give the kite a little extra tension through any upward turn (particularly sharp ones), and then giving some degree of slack on the downward swoop.
Gaining ground
Now, you’re managing to stay in the air for the most part, but as one often does, you might notice that you’ve walked backward quite a ways and are running out of room…
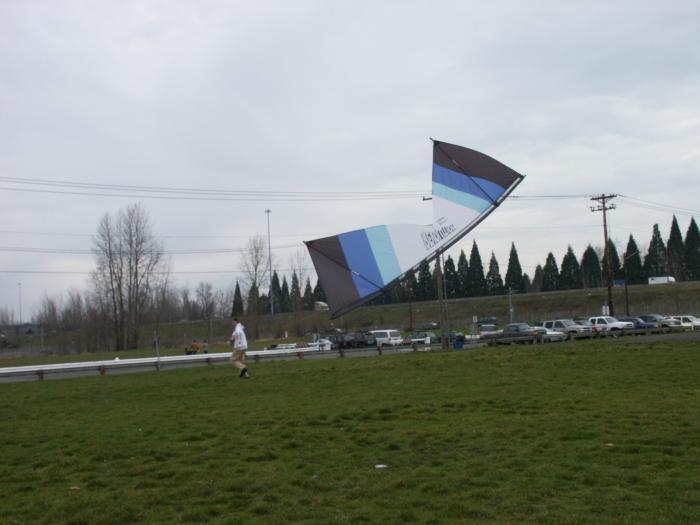
Use the tension or taut lines (pulling back toward the chest and walking backwards) to get the kite to the top of your wind window, all the way through your turn at the top until the leading edge is pointing downward. Just as the kite starts to gain momentum, pull your bottom lines (bottom on the handles) way back and start moving forward.
Do it slowly at first and then speed up your step, you’ll find that the leading edge of the kite will tend to float out away from you and the bottom tips of the kite (now on top) will start to point towards you… With a Revolution, this always reminds me of a glider sailing downwind from me.


As with a dual line kite, this position allows the kite to slide down the wind away from you and presents much more surface area to the wind it’s pressing against, thus slowing it’s descent and giving you more time to jog forward and gain field.
Whereas a dual line kite can flip on you if you give too much slack, the Revolution will tend to lose sail tension… At this point it will “flutter” and drop like a stone, so there is a little less forgiveness.
However, when executed properly, I can gain even more field than with a dual line kite, as much as 100-300 feet of field in a single jog!
Keeping your ground
Now, just like we addressed in our last issue of Kitelife… How do we tie it all together dynamically so that you can stay within the same relative area of your field at all times?
It’s still a lot like rowing a boat, but with a slightly different technique than with a dual line… Primarily done more so with your arms, and less walking forward and back.
Let’s say you’re starting with the kite flying left to right, leading edge first… Normally you’d just pull in the line on the bottom of your left handle in order to make a left turn and have the kite going the other way (flying right to left, leading edge first).
This is still true with one exception:
- As you do make that left turn, start to pull your entire right handle in toward you about half way through the turn…
. - So as the right wing comes around and ends up being the highest part of the kite you’re pulling it in towards you…
. - Now with the kite flying right to left (leading edge first) pull in the line on the bottom of your right handle to start your upward turn heading the other way…
. - As you do make that right turn, start to pull your entire left handle in toward you about half way through the turn…
. - As the left wing comes around over the top and ends up being the highest part of the kite you’re pulling it in towards you…
. - Repeat as needed.
All we’re doing is switching back and forth between left hover and right hover without actually putting the brakes on… The key is to keep whichever portion of the kite is highest pulled in towards you, with the lower portion of the kite naturally being further away from you.
In light winds, downward turns will be more challenging at first because the kite tends to dump more wind when it’s flying at the ground.
Once you get comfortable with keeping the uppermost lines pulled in, you can fly little figure eights (using up turns) and get a good rowing motion going… Using the equipment you see in these photos, I can pretty well stand still in about 1 mph just by rowing my arms as I go back and forth with the kite.
Powering up
So, we have the basic principles to quad line flying in light winds… But I just can’t be totally happy unless I can whip out a series of clockwork turns now and then, and have to give it some gas somehow!
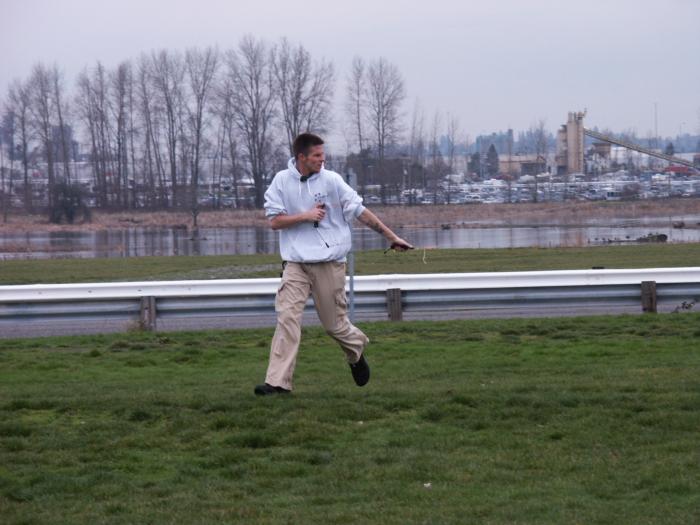
Using the light wind techniques, get the kite flying into the space you want it… Then start stepping backward real fast just before you make those faster movements, and keep going back until you’ve done what you wanted to do or simply run out of room.
While you’re headed back, you’ll feel that the kite acts as if it’s got 3-4 mph more wind, which gives you the brief opportunity be more aggressive in your movements… As long as you’re walking backwards.
After you’re ready to get all that ground back, get to the top of the window do the “ground gainer” I outlined earlier in this article.
360’s
Okay, so there’s just no wind at all, you’re stuck at the back of the field, or you simply feel like showing off a bit… There’s nothing like a 360, and it’s actually easier on most quad line kites than with a dual line.
The principles at work here:
- You can generate lift off any side of the kite since you have four lines.
. - You can turn your body (like drawing a bow), which makes walking easier.
. - Also, the length of the kite gives it a distinct advantage when flying sideways.
Start with the kite in an upside-down hover and then pull in on your right handle… The kite will start to slide left, so you will start walking right.
As the kite is sliding, bring that leading wingtip up ever so slightly (see photo below)… In just about any wind condition, when doing 360’s, I’ve found that a quad line kite is most stable in this position.
Visualize two wolves circling each other… This is you and the kite! You’re looking at it across your left shoulder, walking forward with your feet and moving slightly away from the kite.
Walking forward, leading the kite through it’s
slide with that hand across my chest.
As you build up speed, you’ll feel the added power in the kite even though it’s now probably outside of what you thought was your wind window… And the kite is still going!
I have to emphasize… As the kite starts getting around “behind” you in relation to the wind window, you should be curving your running path around so that you and the kite are essentially circling each other, and you’re always moving away from the kite… The principle of the 360 is to run faster than whatever wind is actually present. If there’s 3 mph of wind, you’ll need to run a minimum of 6 mph so that you ‘re going 3 mph faster = 3 mph wind as you come around the back side of your 360.
One last suggestion:
As you find your body approaching the downwind side of the kite in a 360, start jogging even faster, slowing down only when you and the kite are on opposite sides (right/left) of the window… What this will accomplish is to get you and the kite further downwind, so that when you come to a rest there will be more field behind you for walking backwards.
Bending the spoon
I’ll happily reiterate this snippet from our previous installment of Milking the Breeze:
“Those of you who are Matrix fans will understand, there is no spoon… Visualize the relatively still air as a solid jello substance, and always be pulling the kite against it or float through it. Although it’s not really moving, all you have to do is move your kite against the wind and you have power!”


Every photo in this article was taken within 30 minutes of each other, all in 0-2 mph winds. As you can see just above, clockwork turns, hovers and one-handed flying are not beyond your reach… It’s just a matter of how far you’re willing to go, and how important it is to you.
Never doubt, always remember it’s possible… If you really want to fly on those light days, or that’s all you have to work with in your area, just decide ahead of time that you will achieve your goals and apply the needed techniques before long.
This is indeed a difficult subject to illustrate simply through an article, but do what you can and try to share experiences with other fliers in your area… More often than not, you’ll have some useful information to exchange.
“There is no such thing as a stupid question”
I’m always eager to answer any question regarding dual or quad line flying, or just about anything else for that matter… If you see me at an event, make sure to catch up to me (if I’m not running a 360) and say hello!
Good winds,
John Barresi
(Photos by Moon Kushner)