
There is one aspect of bamboo spines in fighter kites I have never liked. I really like bamboo as a spine material, and I think it is the best spine material available. However, when flying in humid or damp weather, often, the bend I put into my bamboo spine will begin to straighten or sometimes the spine will become almost straight as a result of the dampness. And, the more I fly the kite without re-bending the spine the straighter the spine becomes. Or the bamboo becomes much more flexible because of the dampness and won’t provide the rigidness required for quick responsiveness or fast forward speed. If you’ve experienced these conditions, you know how annoying they can be.
I have always accepted this aspect of bamboo as a natural part of bamboo’s response to natures’ conditions. The fact is not every bamboo spine reacts the same way to humid and damp weather. But when a spine loses its bend, I simply re-bend the spine and continue flying…..it’s really not a major problem, more of an annoyance. However, when the spine becomes too flexible because of dampness and the kite is not very responsive or not very fast, there is nothing to do but select a different kite.
I have noticed that thicker and heavier bamboo spines are a little less affected by the damp conditions compared with smaller cross section spines. And of course, I prefer the smaller cross section spines because I like their light weight and responsiveness.
A relatively simple cure for this is using carbon fiber for the spine of a fighter kite. Using a carbon fiber spine totally eliminates this issue because carbon fiber doesn’t change characteristics with changes in humidity. It remains constant. But I like bamboo. I like working with it. I like its looks and feel. I like its properties and especially I like that it is a natural product and is naturally renewable.
So I began experimenting with different methods to reduce or eliminate the effect of dampness on the spine’s bend and flexibility. I tried paints and coatings of various types….some did seem to help. But what has worked best so far is laminating the bamboo spine.
In the spirit of sharing results of experiments, I thought other fighter kite makers may like to know about this idea if they haven’t already thought of it. Here’s how I do it.
PART 1
 Cut the bamboo spine to the length specified by the kite plan you’re using. Draw a straight line between the wingtips of the kite template or the cut out kite skin; this line is what I call the wingtip line. Lay the spine on the template or cut out skin and make a mark on the spine where the wingtip line intersects it.
If you want to shape the bamboo in a specific way you can do it before and/or after you laminate the spine.
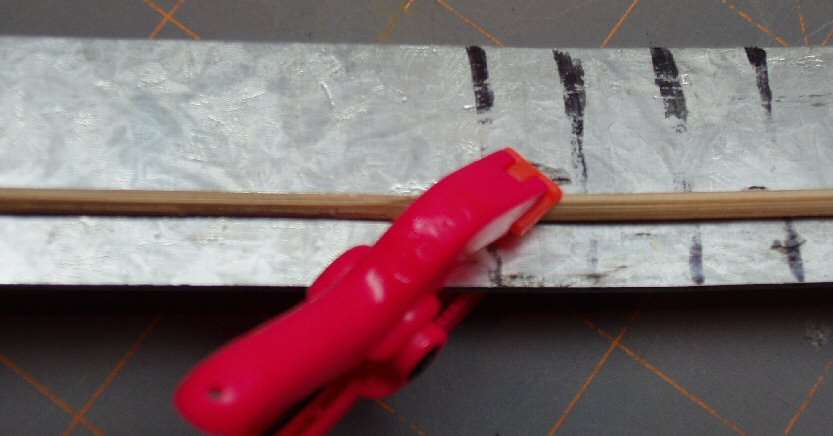
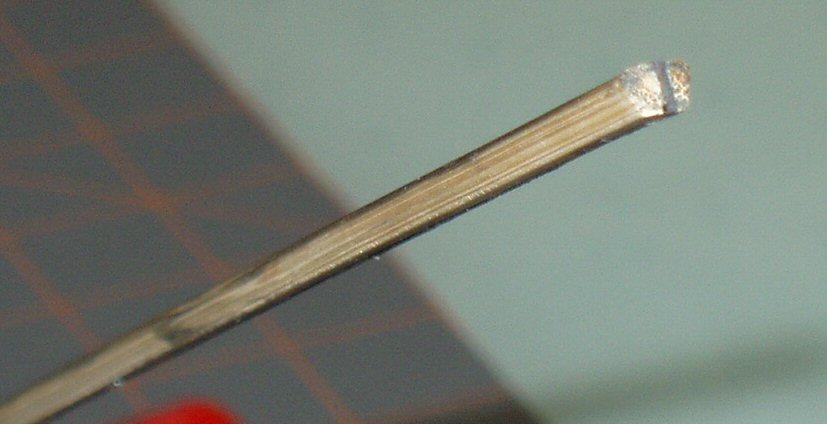
Split the spine so the split is parallel to the skin side of the spine. I use a ‘break-off’ utility knife to split the spine, but any stiff bladed knife will work fine, like the knife Mathias Rosbund used in the photo; thanks Mathias for the photo. Try to start the split in the middle of the spine’s thickness although it isn’t critical. Start the split at the nose and continue it to the wingtip line mark you made on the spine. The location of this point will differ with different kite plans.
This diagram, courtesy of Manjha Club International, shows how to control the direction of a bamboo split.

This may be useful if you’re relatively new to working with bamboo. When the split is tending toward the top surface, as in the diagram, by pulling down with the knife, bending the lower split portion of the bamboo, the split will begin to move in the direction of the bend. This will direct the split more toward the center of the bamboo spine in the diagram. The reverse is true if you want the split to move toward the top.

After the spine is split, apply glue to the split surfaces. A toothpick is a good tool for spreading the glue.
 I use glue by the name of ‘WeldBond’, it’s waterproof white glue, but I think any waterproof wood glue or contact cement would work fine. I just happened to have some WeldBond so I used it. White glue remains slightly flexible after it dries, so the spine can be re-bent. If you use glue that is rigid when it dries the spine may not bend easily in the glued area after laminating. Choose the glue you think will work best for your desired result.
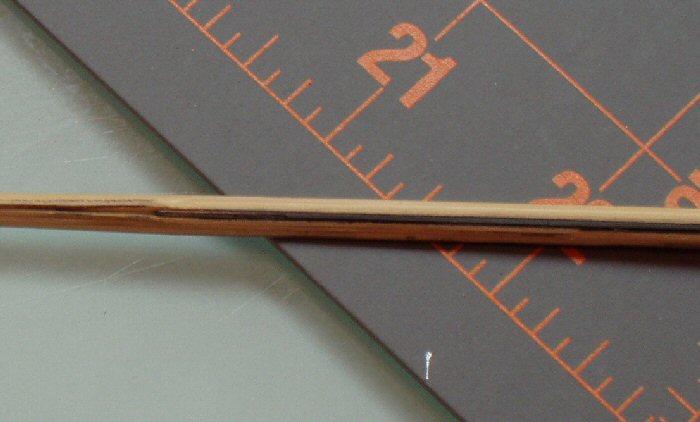
After applying the glue along the entire split surfaces, use a paper towel and bring the split parts together and wipe the excess glue from the spine. After the bamboo split has been ‘reconstituted’, clamp it and let the glue dry.

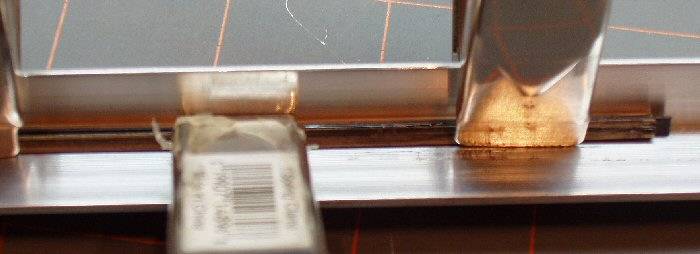
Clamp the spine to a piece of metal such as an aluminum yardstick or ruler or a piece of construction metal. Pre-bend the metal to a shape that is similar to the bend of the spine in your best flying kite.

The shape of the bend is something you’ll want to experiment with to get the bend you like best.
 A NOTE ABOUT CLAMPS: One thing I noticed with clamps is that some have a strong enough spring to create a dent in the bamboo. The point were the dent is located is a weak point in the bamboo spine. Use clamps that will securely hold the two split parts together without denting the bamboo. That’s why I use plastic clamps.
When the glue dries, the spine has a ‘permanent’ bend duplicating the shape of the bent metal. An additional benefit is the laminated portion of the spine is much stronger and stiffer than before laminating it, but it doesn’t weigh any more, at least not that is measurable by any means I have.
Because the spine is stronger as a result of the laminating, if you want, you can further lighten the spine by making it a smaller cross section and still have a strong durable spine.
The interesting thing about the ‘permanent’ bend is that it can be adjusted; either add more or reduce the bend in the normal way you would adjust the bend of any bamboo spine. For me, this laminating idea has given bamboo entirely new life as a spine material! I like bamboo as a premier spine material even more now!!
If you want to extend this idea further; after you laminate the bend in the nose portion of the spine, split the tail section of the spine in a similar way and laminate it. You can make the tail portion absolutely straight……or curved if you prefer. But however you laminate the tail portion, it too will be more rigid and stronger after you laminate it.
PART 2
An interesting aspect of one person’s ideas is that they often spark new ideas, especially among enthusiastic fighter kite fans! That is what occurred with the idea of laminating a bamboo spine that I described in my original article.
A couple of days following my email to Mathias Rosbund that included my article about laminating a bamboo spine, I receive an email with the photos in this page of this ‘Part 2’ article. What is interesting is Mathias saw a solution to a problem differently than I did…..he saw a clearer and more complete solution.

Rather than using a flat piece of metal as a form to clamp the glued laminated bamboo spine to while the glue is drying, Mathias thought if the metal had a vertical edge, it would serve two purposes. One to clamp the bamboo in a curve parallel to the skin side for the nose portion of the spine, but also it would serve as a clamping form for the laminated tail portion of the bamboo spine to make it perfectly straight. This is true even if the bamboo was split perpendicular to the skin side in the tail portion of the spine.
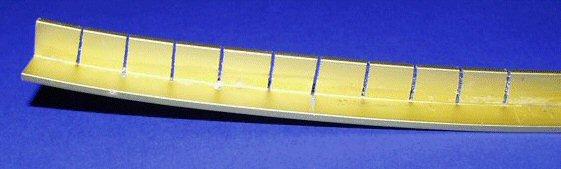
Mathias used an angled piece of aluminum into which he cut several slots along part of one edge to allow him to bend that portion of the aluminum.
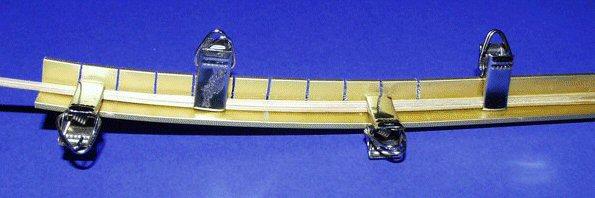
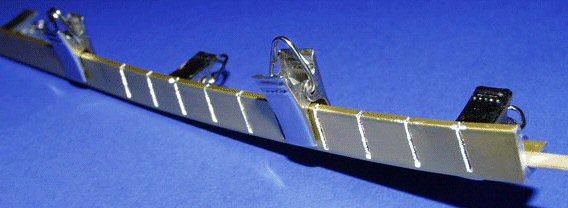
This ‘jig’ or ‘form’ allows Mathias to clamp the nose portion of the spine into a bend of his choice that is parallel to the skin side of the bamboo and also allows him to use the same form to clamp the laminated tail portion to be straight.
However, the straight tail portion of the spine Mathias split perpendicular to the skin of the bamboo and clamped it to the vertical edge of his ‘angled aluminum form’.
After I saw what Mathias did, I decided to blend his ideas, both the aluminum form and the splitting of the tail portion of the bamboo perpendicular to the skin side, together with an idea I got from Manny Alves.
Manny bonds bamboo and carbon fiber together in rather complicated combinations to make his ‘superspines’. So I thought why not incorporate carbon fiber into the tail portion of the spine. Here’s what I did.
I laminated the nose portion of my spine as described in my original ‘laminating’ article by splitting the bamboo parallel to the skin side; gluing it and clamping it to a curved form while the glue dried. Then I split the tail portion of the spine as Mathias did, perpendicular to the skin side of the bamboo, but before gluing and clamping the tail portion, I first inserted a piece of flat carbon fiber into the split and then glued and clamped the two outer bamboo parts with the flat carbon sandwiched in between them. The size of carbon fiber I used is 0.019″ thick x 0.118″ wide; 0.48mm x 3mm. This is a very thin piece of flat carbon.

The glue I use to bond the carbon fiber to the bamboo is carbon fiber impregnated superglue. I bought it at a model airplane shop. Other glues will probably work well also. However, before using a specific glue it would be wise to test the glue’s ability to bond carbon fiber to bamboo.


After the glue dries, I trim the carbon fiber so it’s flush with the bamboo spine on the skin side, the back side plus the very tail end.
There is no question that this is a much more time consuming process than quickly shaping a piece of bamboo to use as a spine. However, this is one place where I believe the time is more than rewarded with extra kite performance.
The result is the carbon fiber provides a substantial degree of additional front to back stiffness and straightness to the tail portion of the spine but adds very little weight. However the weight that is added is in the tail of the spine where weight is normally beneficial.
So far I really like the kite performance with this bamboo/carbon fiber combo-spine. There is one indirect aspect I also like about this spine arrangement. Even with a high wind kite; only one lower bridle connection is needed. Multiple bridle connection points along the spine are unnecessary. The carbon/bamboo laminated tail portion of the spine is so stiff that even with only one lower bridle connection point it has no tendency to flex backwards even in high winds.
So far my experience is this spine provides a slightly faster kite. And one that tracks very well even out beyond the wind window edges. Its stiffness prevents virtually any wind energy being used in bending the lower portion of the spine backwards; instead all the energy from the wind is converted to energy used to push the kite forward.
Hopefully, after reading these two articles and experimenting with spines yourself, you will think of a way to make an even better performing spine! If so, please share it with the rest of us!
If you have questions or if you discover other interesting techniques for working with bamboo spines, please email me by clicking my name below.
BigFighterKiteGrins,