
 Recently in the world of dual line stunt kites, to weight or not to weight, this seems to be the question. Or perhaps more accurately, where and how to weight is the question. It wasn’t very long ago that just being able to do an axel made you a radical stunt flyer, but have you seen what’s been going on lately?? Some of the moves being performed regularly now by the top flyers can seem almost impossibly out of reach, so complex and convoluted are the wraps, flips and tumbles. But never fear, Kitelife is here to show you the way. With the right inputs and some “help” from just a bit of strategically located additional mass, you too can be flipping your kite all over the place in no time.
The first item on the agenda is to explain what adding weight is going to accomplish for you. This is pretty straightforward, and it’s all about the Center of Gravity. Take your favorite kite, assemble it in your garage or living room and hold it parallel to the floor, on its back. Now put a finger on just the spine and find the spot where the kite is balanced and stable, remaining parallel to the floor. Congratulations! You’ve just discovered your kite’s Center of Gravity. This is the spot that marks the axis around which the kite will pitch when doing all those flippy-floppy moves. I’ll be referring to the Center of Gravity (CoG) a lot in this article, as this is what much of weighting a kite revolves (no pun intended) around. Simply put, basic weighting is used to shift the CoG either forward or aft to increase or decrease how “pitch-happy” your kite is. We’ll get back to this in more detail a bit later.
Before we get too far ahead of ourselves, it might be good to talk about the types of weights being used right now. This covers a good bit of ground, but I’m going to keep it simple and narrow our focus to the most popular methods used by many manufacturers and custom kite builders today.
You can attach weight to the kite using clips, tubes, zip-ties, fittings or inserts. Remember that you’re definitely going to want to be experimenting with mass and position, so choose a method that’s going to allow you to make easy changes. Because of this, if at all possible I recommend starting out with a weight kit made for the kite you’re flying. Most manufacturers now have weight-kits available for many of the upper end kites, so no point spending your time in reinventing the wheel. If you enjoy mod’ing your kite, then by all means play around, but your time might be better spent experimenting in the air rather than on the ground.
 If you are going to be building your own weight system, you can use just about any material you want, but most people are using copper, brass or lead. The rationale being that you want to use heavier materials so you can concentrate the effects of weighting exactly where you want it without having a huge chunk of aluminum hanging off your kite. Also, brass and copper are commercially available in solid rods and tubes of varying diameter, perfect for our application.
Now that we’ve got this extra mass, where do we put it? Well, the most common places are the nose, the keel and the leading edges. Each position adds a different characteristic to the kite, so let’s run through them briefly.
Since the nose and the keel are both positions along the spine, it’s easy to think of these as two opposite extremes along the same axis. Remember the Center of Gravity from earlier? Well, by weighting either the nose or keel you’ll be shifting your CoG around. You can try this by putting on a weight and then balancing the kite on your fingertip again. Depending on how much mass you added, and where you positioned the mass, that CoG position will have shifted, sometimes radically so.
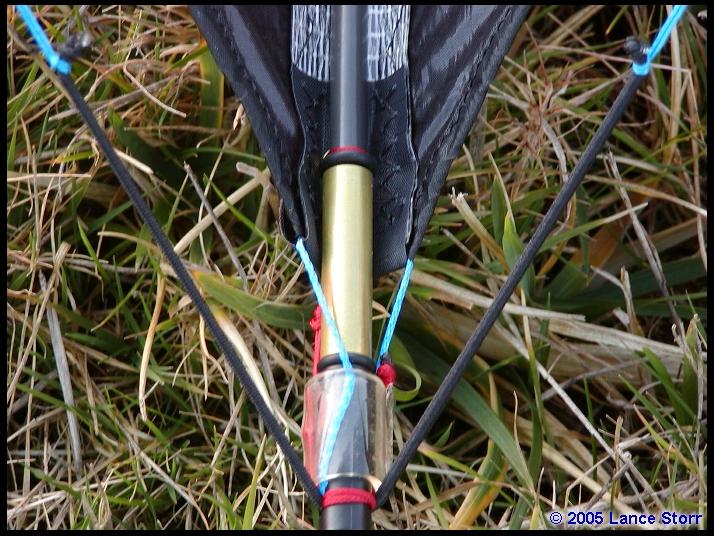
 The most common weighting configuration is to weight down the keel. This is often referred to as adding tail weight. If you’re having trouble getting your kite to complete a full wrap, then this is a good place to start. Put 15 grams below the center tee fitting and pop another turtle. If you give the kite a nice, sharp initiation move and plenty of slack, the kite will most likely rotate completely around. Viola, you’ve just wrapped your kite.
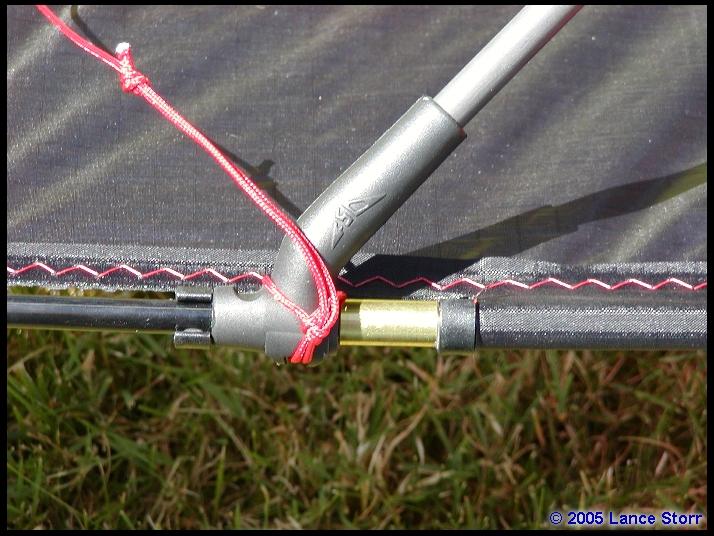
Now move that same weight towards, or even above, the center tee and see what happens. Opposite effect, right? So adding mass at or near the CoG can make a kite more stable. This can help to give you more solid stalls and a kite that tracks like it’s on rails. Since you’re adding to the overall mass of the kite without affecting the CoG, you can use your weight as a way of extending the wind range of the kite somewhat as well.
 If you continue moving your weight upwards towards the nose, you’ll find that moves like backspins become much easier. Be careful though! Most kites do not respond well to nose weight when used alone. The flyers who add mass to the nose will usually do it in conjunction with tail weight to maintain a flyable balance in the overall setup.
Moving additional mass out to the leading edges can create very interesting effects, especially in the rotation characteristic of your kite. Remember high school physics? Well, Mr. Newton theorized that the tendency of an object to resist changes in its state of motion is dependent upon mass. (In our case, the mass is the weight you’re adding) Inertia is that quantity which is solely dependent upon mass. The more mass which an object has, the more inertia it has – the more tendencies it has to resist changes in its state of motion. So when you add mass to the lower leading edges of your kite, you increase the likelihood that your kite, once you start a flat spin, will continue that rotation longer than it normally would. If you get the overall balance of the kite right, you could create quite the spinning machine. Double axels would be a usual occurrence, and multi-lazy’s would build in speed to a dizzying crescendo.

Now here’s the bad news… getting such a combination of nose, tail and wing weight correctly balanced so that you can have all three positions weighted AND have a kite that’s flyable under normal wind conditions is really hard. Not to mention that every time the wind changes you’ve got to adjust to compensate, it’s not hard to see why most flyers stick with just an adjustable weight on the tail. It’s a good place to start and simplifies your setup time so you can do more flying and less fiddling.
Well, that’s about it without getting super technical. Remember that this was intended as a brief overview of kite weighting, not as the definitive word on the subject. There are many opinions as to the advocacy of weights in general. Some people love them, some hate them. It’s my opinion that, like most things in life, less is more so be sparing in your experimentation. Remember that anytime you change the overall mass and balance of a kite’s design, you’re moving outside the tested realm of the kite in question. It’s not hard to get to a point where spreaders snap and leading edges collapse during flapjacks or tip stabs, so be cautious while having fun exploring this aspect of dual line coolness.
Matthew McGee