I’m not sure exactly how old this kite design is, but I imagine it’s at least as old as Sally Fields’ television sitcom from the sixties.
It’s a great kite for kids’ kite making projects, because it requires little real skill to make, and minimal materials and tools.
I’ve seen lots of these kites made and made lots of them, with 24 pound text weight paper, and they held up pretty well, even on a humid day at the beach.
Materials for this kite project are a standard size sheet of paper (8 1/2″ X 11″), a couple staples, a piece of tape and some flying line.
Tools required are just a stapler, with a hole punch being optional.
The graphic below shows the kite being made. Each step is described, below the graphic.

The paper is laid out sideways, and the two short sides are matched at the edge, folding the sheet of paper at the center..
This is the only fold that’s made!
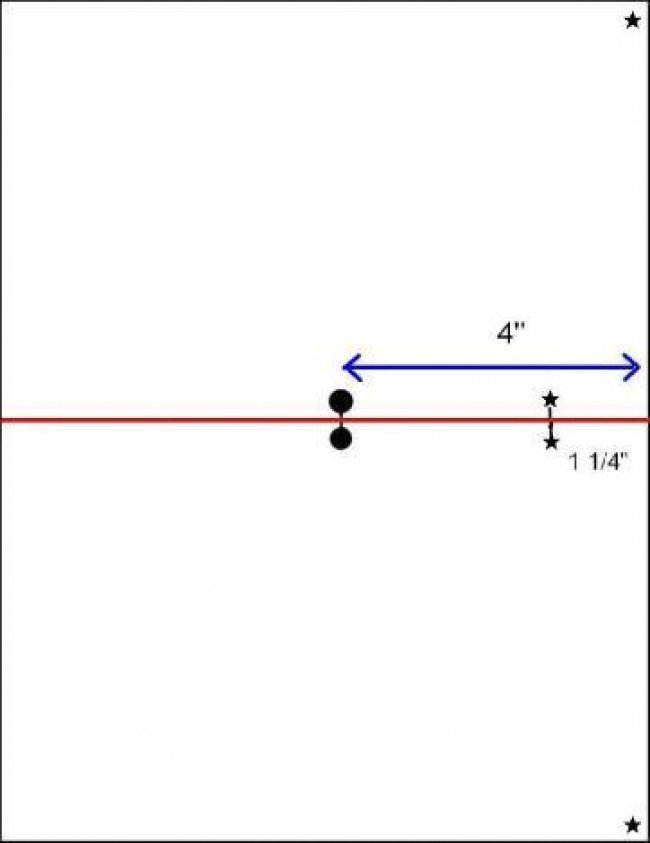
The corners of the kite are “bent”, or “curled” until the corner meets the edge of the fold at a spot 1 1/4″ from the top of the folded paper. This is easier for small hands if each corner is stapled as it’s bent. The staples should be close to the folded edge, but should also keep the corner from twisting.
A short piece of tape is put on one side and folded across so it covers the spot at 4″ from the top of the paper.. This reinforces the paper, so the flying line doesn’t pull out of the kite as easily.
A hole punch works great for making the hole for the flying line, but making a hole with a pencil or pen works just as well.

The last step is to tie a flying line through the hole.
This kite doesn’t need a tail. I’ve never made this kite with a tail, but hear a short one won’t make much difference how the kite flies.
For teachers, educators, moms, dads and kids, the kite’s dimensions can be viewed by clicking the image on the left.
The next graphic is able to be copied, and should easily be printed out to fit on a standard sheet of paper, providing the reference marks on the front of the kite.

When making this kite, making the fold with the marks face down, will leave them on the front of the kite, where they can be seen, while the kite is being made.
Have fun with this!
Tom Tinney