Leaderboard


Popular Content
Showing content with the highest reputation on 05/05/2014 in all areas
-
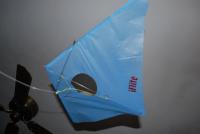
Definitely not right. Lol Sounds like someone put a wooden dowel in place of a broken carbon rod. Take it into any kite shop and they'll replace it for you on the cheap2 points
-
I modded my standard handles on Thursday night using the info here. Great warning about those burrs- they could have really sliced my hands up if I hadn't been looking for them. One tip I will add - if the vinyl caps are really tight, I just soaked them in hot water for a minute or so, and then they slipped off easily. I used the Dremel to deal with the burrs permanently and I have a great set of handles that look and feel a lot better. Since I had all the parts laying around, it cost me nothing but 30 minutes of time - no brainer in my books. Off course we have had rain and snow for the last 3 days, so I can't say that I have flight tested them! 8-(2 points
-

From the album: Avatars
2 points -
You guys are the BEST. Thank you all! I am going to keep flying until I start noticing any snags. Then I will switch to the no snag handles. I'll either make my own or buy some. Rain today and tomorrow. Yuck for flying but good for watching the tutorial videos.2 points
-
AWESOME!!! I really appreciate the information.2 points
-
I got my third Dual line kite, the Widow NG, about 2 1/2 weeks ago. Since then I have not touched my Revs, but have been flying the Widow, my Niknak, and my new Zephyr for hours and hours. This past weekend I flew the Widow and Zephyr almost 8 hours total. I went to the field this morning and and again flew the Zephyr since the winds were a bit low, but were forecasted to pick up this afternoon. This afternoon, after lunch, I almost grabbed the Window NG, but I decided instead that it was time to get back in the air with a Rev, so I grabbed my 1.5 Std with the Race Rods and Magic Sticks, and headed for the field. I didn't know quite what to expect, since I have read about "unlearning" dualie habits, and sticking to one kite or the other to avoid any pilot confusion. ( let's see do the brake lines go on the bottom or the top? ) I set up the Rev, and by this time the wind was picking up a bit. I thought for a minute about going back to the house and getting the B Mid vent instead, but, I figured this would be a good chance to see how the std sail , race rod, magic stick combination was going to work in higher winds than usual. The wind was around 6-8 at the surface, but up 50 feet or so the big trees were swaying, and it was gusty, and probably more like 14-16 in gusts. Up I went. I flew around for awhile, checked the wind window, and then did some inverted slow descents, to see if I remembered how to do them. Piece of cake ( probably helped by the magic sticks, no doubt). Then I did some figure 8's, with downturns at the edges, lateral flying across the window, and then some slow reverse flying back and forth. No problems, the reverse flying was smooth as silk, even with the gusts. It suddenly occurred to me that I was flying the Rev much better now, than I was when I stopped flying them 2 1/2 weeks ago. The dualie flying not only did not harm my Rev flying, it seemed to help it for some odd reason, which I can't quite figure out. I also owe alot to the Magic sticks, since they make reverse and inverted flying so easy, and seem to handle the gusty winds much better. So I flew my 1.5, for about 2 1/2 hours straight, and had a blast. Hope the wind is as good tomorrow, because it is going to be another Rev day.....1 point
-
I am not highly experienced but I am not surprised. There is a lot to be said for time on the lines. All kites that you fly teach you a bit more about the wind. I would say you flew better because you are more one with the wind. I don't have a great deal of natural ability & each improvement is hard won. But I have come a long way thus far & each flight of each kite has added to my experience. Just fly something any time you can.1 point
-
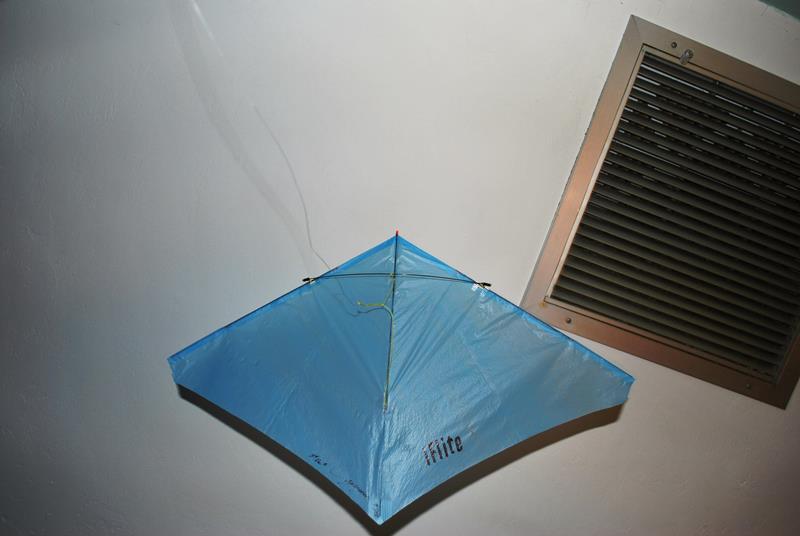
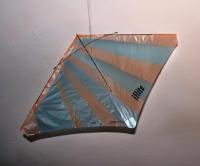
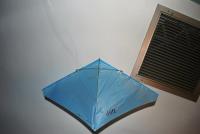
May Fly Day 2 - iFlite Fusion #1487 ------------------- My how quickly the days pass by. We've had storms and iffy winds but the gliders keep on flying! Such wonderful therapy while sitting on the couch. Day 2 brought out iFlite Fusion #1487, an attractive kite in the colors of the University of Florida. This one likes to spin and can keep you busy especially if you give it a quick pull. It's quite fun and easy to get some distance from the pilot with a quick spin at the end of a glide. That spin will allow it to climb and then head further away from the pilot as it glides using the energy from the height gathered in the spin. May Fly Day 3 - iFlite Classic #962 ------------------- I almost missed my perfect attendace record as it was a quarter til midnight before i started gliding. I flew for about 25 minutes so it could really count as Sunday's fly as well, but no need for that ;-) May Fly Day 4 - iFlite Vented #1217 ------------------- May The Fourth Be With You and all that ;-) Today was iFlite #1234, one of my favorite gliders. It flies very smooth and slow and pretty much goes right where you tell it to. Thank you Patrick Tan for your masterful craftsmanship and all these wonderful toys!
 1 point
 -
I sent you a message. Look in your inbox1 point
-
That is what I thought. Thank you!!!! Sent from my iPhone using Tapatalk1 point
-
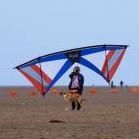
OK, next kite up for grabs. This one is more common, The Ray Merry Speedfoil RM10... RM10 is Gone ! http://ferob.com/kites/100_0131.mov Yes, this thing is FAST for a big kite. And it pulls like a Mack Truck... It would pull me 50' through deep sand, and it would pull me off the ground, much bigger jumps than are in the short video. The kite is in good shape, only flown a handful of times. I don't have lines for it, I used to share the lines that came with my 2.8m foil. $100 + $10 shipping...1 point
-
Only a few stakes left! I'm working on new ones to bring to the Wildwood Kite Festival with me. Feel free to message me with color requests. https://www.etsy.com/shop/LeshockArts1 point
-
...........May the Fourth be with you.....1 point
-
Harvey, Though there is some good info on how-to, make no-snag handles, being that you got your SLE a couple of weeks ago, you're probably not snagging your lines enough to pull apart perfectly good handles, once you really get into flying you'll probably start snagging the lines around your hands, elbows, buttons on your jacket, the wire to your headset and other things on or around you. So, to your original question, are they worth purchasing? or making? My answer is, snagging ain't a big deal. Just enjoy flying it.1 point
-
may I recommend ~ "hi-test bridle line\100# strength" as your leader material Dacron is too thick and can catch on the others easily, high test can be tied and untied without complications or excess effort. ~Run two strands by folding in half, larks-head that middle to the handle, only make your adjusting knots in one of those strands. In competition you might want to dump the sleeving entirely or use that same bridle line (with the spectra core removed) as your sleeving material. Setting-up is easier with the flying line ends being affixed to the kite NOT having sleeving at all. Length adjustments are made by shorting the attachment loops, (so make overly large ones compared to sleeved lines) All this stuff is necessary if you want to reliably throw and catch kite, at least in my experience. Snag-less handles, long leaders (the further out your can grab and pull the better,... but not all the way to the raw spectra). The method I first used for snag-less handles was a nail through the hole, cut to length to fit the diameter of the handles. You larks-head knotted-off on the nail and lined the edging of the steel tube with a cut-down moly, single wrap the handle (over that nail) with electrical tape, then slipped the cover back in place. (crediting Jeffery Burka and RECdotKITES)1 point
-
The top of the handles don,t snag, it is always the bottom so just do that end As for trimming the length, No point in doing that, they are your handles that you fly with so I doubt if any change in length would be noticeable ! I have never trimmed any of mine. If somebody else uses your set up they will notice a change in feel because every kite has slight differences and if they can,t live with that it,s not your problem ! By the way, I fly with " Stone in shoe Bob " Bill1 point
-
I did mine, with the help of a dremel tool to grind down the area around where the hog ring was, otherwise you will cut your hand to ribbens. If you don't have a dremel tool you can use a file. http://kitelife.com/forum/topic/5827-first-day-on-my-rev-sle-not-so-good/?p=428141 point
-
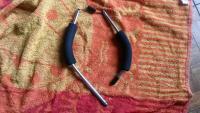
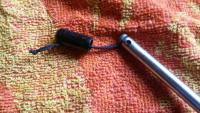
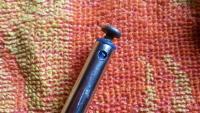
Here's a write-up, that I posted several years back, concerning this very topic & simple modification....... Same information, as others have already stated, just a bit more detail, and history, on how all this got started, should you be interested...... Good Luck.......and welcome to the forum "harveyt" -------------------------------------------------------------------------------------------------------------------------------------- Making Snag-Proof Handles OK, you've got the Pros in here now - listen up - these guys know what they are talking about. As for me, I'm just a tinkerer, with a bit of mechanical knowledge, and the tools to back it up. I really enjoy improving, improvising, and revising, already great ideas, and there are tons of them out there. If only I could fly a Rev, so well. As for the "Watty Way", my mistake (sorry Watty, but you did make the video), and I suppose that is what I remembered. I do remember that the original idea came from, "Stone in the Shoe Bob", so credit given, where credit is due (sorry Bob). No harm intended, only thanks - Bob, thanks for the idea - Watty, thanks for the video. As they say, a picture is worth, well, a lot. Ok, so now it's the "Stone in the Shoe Bob" method. Either way, thanks guys. Now, as JB has pointed out, the length issue is probably a personal preference. I'm sure that for the seasoned Pro, the slightest change in length, and/or diameter, is extremely annoying, however, for the novice / newbie, it may not be, quite so critical. I would suppose that whatever feels comfortable to you, would surely suffice. I hope JB will agree with this. So, as for the dilemma, "Do I cut the handles down to the original length, or do I let the length, fall where it may?", my advice on that would be to fix a set of handles, using the "Stone in the Shoe Bob" method (as illustrated in the "Watty Video"), then take them out for a flight, or three. If the length feels too long, awkward, or unwieldly, then it's simple enough, to go back to the work bench, take them apart, and cut them off at the inner edge, of the original holes, where the rings used to be attached (side of the hole, closest to the grips). After the cut, smooth off the rough edges, ream out the ends, and reassemble everything. This should put you back to within 1/16" to 1/8", of the original length - Voila! No snag handles, original length !! After all, it's a lot easier to shorten a set of handles, than it is, to lengthen them (now surely that makes sense, doesn't it?) Just for ease, of you that may be reading this, here is my original post to "Stone in the Shoe Bob", concerning his revision, which originally appeared, over in the Revolution Kites Forum: Hi Bob, I was reading about your handle modifications, using the drywall anchors and the screws, which would enable one to rid themselves of those annoying metal rings, on the ends of the handles. A while back, Watty Watson sent me a video that he obviously put together, to help me understand his explanation of this procedure. I thought it worked like a charm. Now, I see, where you have now, gone back and reversed that modification, on the upper ends of your handles, and reattached the metal clips. I believe you said this was due to the additional handle length, which is created, by this particular modification. Now, I've got a stupid question. If this additional length is a problem, why not just cut off the top end of the handle tubing, maybe .25" to .50", or whatever seems to be right, and put you modification back as it was. I mean, that is such a clean and trouble free modification, and those clips (hog rings) are really a pain. My thoughts would be to cut the tubing, immediately below the holes, where the metal clips were mounted, and then reinsert your anchor and screws, as you had previously done. This should put you back, very close to the original handle length (+/- 1/8"). Surely you've got several sets of handles, just lying around, that you could experiment with. I hope I haven't misunderstood your point, but I think I'm hearing what you were saying correctly. Just my thoughts on the issue. Also, as for me, I suppose that I'm not quite as tuned in on the Rev, as you may be, and obviously, I haven't been flying long enough, for that small amount of additional length, to be a bother. Maybe one day, I'll get to that point, but for now, I'm just very happy, with your idea. Thanks for sharing it ! Now for my additional two cents - For those of you, who don't want to go to this extreme, of cutting the tubing, and would just like to use the anchor and screw idea, I have modified several sets, with very little trouble, however, if you have access, a few tools, other than a screw driver, it will make this job much easier and neater. WARNING - Do be careful, when removing the rubber covers, from the ends of the handles, because most of the handles that I have seen, have a very sharp and nasty burr, around the holes, where the metal clips were attached. You can see where the holes were drilled in the tube, so beware. Once I carefully removed the metal clips, and the rubber end caps, I took the handles over to the grinding wheel, where I smoothed down the burrs around the clip holes, and then polished the ends of the tube with a rotating brass bristled, wire brush. You could probably accomplish the same effect, with a little elbow work, a flat file, and some emery cloth. Just be careful. In fact, the file is probably all that is really necessary, if you will be very careful, and try not to scar the exposed part of your handles, while filing the burr. A padded vice, would be quite helpful, for holding the handle steady, while you file it smooth. You just need to remove that sharp metal burr around the small holes. I also found it necessary to ream out the ends, of most of the tubing, as there was some kind of hard residue, just inside the end. I don't know what that was, but it definitely needed to be removed. Either way, it just makes for an easier job, once the grinding, polishing, and reaming is done. Then it was just a matter of forcing the plastic anchors (with shoulders), down into the ends of the tubing, and inserting a #10 stainless steel screw, leaving just a small gap under the head of the screws, for the pigtails to be looped around. This can be seen clearly, in Watty's video, which can be found here http://www.vimeo.com/7746634 Also, I'll try to post a couple of pics, of one of my latest modified handles.(see below)1 point
-
You can modify the stock handles with simple blue sheetrock anchors and the associated screw. Cheap and easy... The weight and feel of the no snags is nice but not necessary being a beginner. Simply remove the rubber cap. Remove the triangular hog ring. Some remove metal burrs...I find it helps hold the anchor in the handle, along with a drop of glue or epoxy.Pop in the screw anchor and screw..Tie up some leaders and attach.. instant no snag.
 1 point