Leaderboard
.thumb.jpg.53aabc63a639af8d375b2c92cf2e13f8.jpg)


Popular Content
Showing content with the highest reputation on 04/15/2018 in all areas
-
I purchased my first dual line sport kite today - a Premier Vision. I'm glad I decided to buy locally from the only kite shop I've ever seen - Kites & Fun Things. Jon Trennepohl even gave me a quick demo of how to set it up, wind up the line, etc. It was a great experience. When my skills improve, I'll be back there for another purchase. Now what we need here is some better weather.2 points
-
That is going to look super-sweet ! Make sure you post some pix, can't wait to see !1 point
-
LOL. I can't take credit for saying that. It's something Marrieanne Trennepohl told me yesterday. I just hope we get some better weather next week so I can try it out.1 point
-
I've had the kite for just under two weeks. I know how to fly outdoors reasonably well, and I've seen indoor performances both in person and on video, so I thought it wouldn't be overly difficult. After an abysmal first attempt, I rewatched the setting up and tuning videos. Walking slowly through each step, I realized a critical tuning step is moving the bridle knots. After tightening them all the way it no longer felt like I was tugging on a brick, it felt merely sluggish. (It felt quite a lot like when the wind suddenly dies...) There is something to be said with the Rev defaulting to a terribly short handle leader line and strong forward drive to make it easier for beginners, it might be good to ship these adjusted for the absolute novice. The novice won't know they need to change the lengths, but an experienced pilot will instantly recognize if they need to step it back a knot. I'm now at four flying attempts and I've learned it is a serious workout and a great way to get dizzy. I could record myself but I think it would be more of a comedy routine. I'm thinking something like this: * Up, nearly over, and not quite crashing: 1 point. * Launch, most of a 360 until either tripping over feet or running out of power: 1 point. * Style: At least he made an effort, 1 point. I know I can't improve if I don't put in time on the lines, and I can't win if I don't submit a video. I'll aim to do both, but my hunch is I'll keep the video set to "private".1 point
-
A stretched sail should still fly very well. Bill will get it on the right track. He probably has at least one that's even more stretched.1 point
-
It's more of a Falcon than a Pinto, but you'll still appreciate the Ferrari. Of course, you could start with a Corvette and move up to a McLaren.1 point
-
"If you learn to drive with a Pinto, you'll appreciate the Ferrari much more when you finally get a chance to try one."1 point
-
IMO, for 12' box delta you will need more then 250 lbs line. i will go with 500 just to be on the safe side1 point
-
Jon is a great flyer and the store is showing the knowledge he have. Stay close and for sure you will receive from Jon the best pointers of how to fly1 point
-
That is one nice looking Conyne. I do not own a Conyne of that size. For comparison, the 8' ITW Rocky Mountain Conyne lifted the new 6' ITW Flying Spider windsock better than a Powersled 14. The 14 wasn't a slouch, but there were times when the Spider was getting on the heavy side for it. I use a Powersled 10 interchangeably with a 5' Conyne for lifting light things or as a pilot kite. I would guess that a Powersled 24 would have more lifting power than a 12' Conyne. Conynes usually have 4 tail attachment points, to the Delta's usual 3 points. Conynes are easy to stack(never stacked deltas, but it seems like Conynes would be easier to stack.) I find that, without a tail, the Delta will more easily overfly and glide than a Conyne. Adding a tail usually cures this issue. I know my 11' and larger deltas will fly in less wind than my 8' Conynes. As for stability, I would say the Conyne with two tails is about as stable as a sled with a drogue.1 point
-
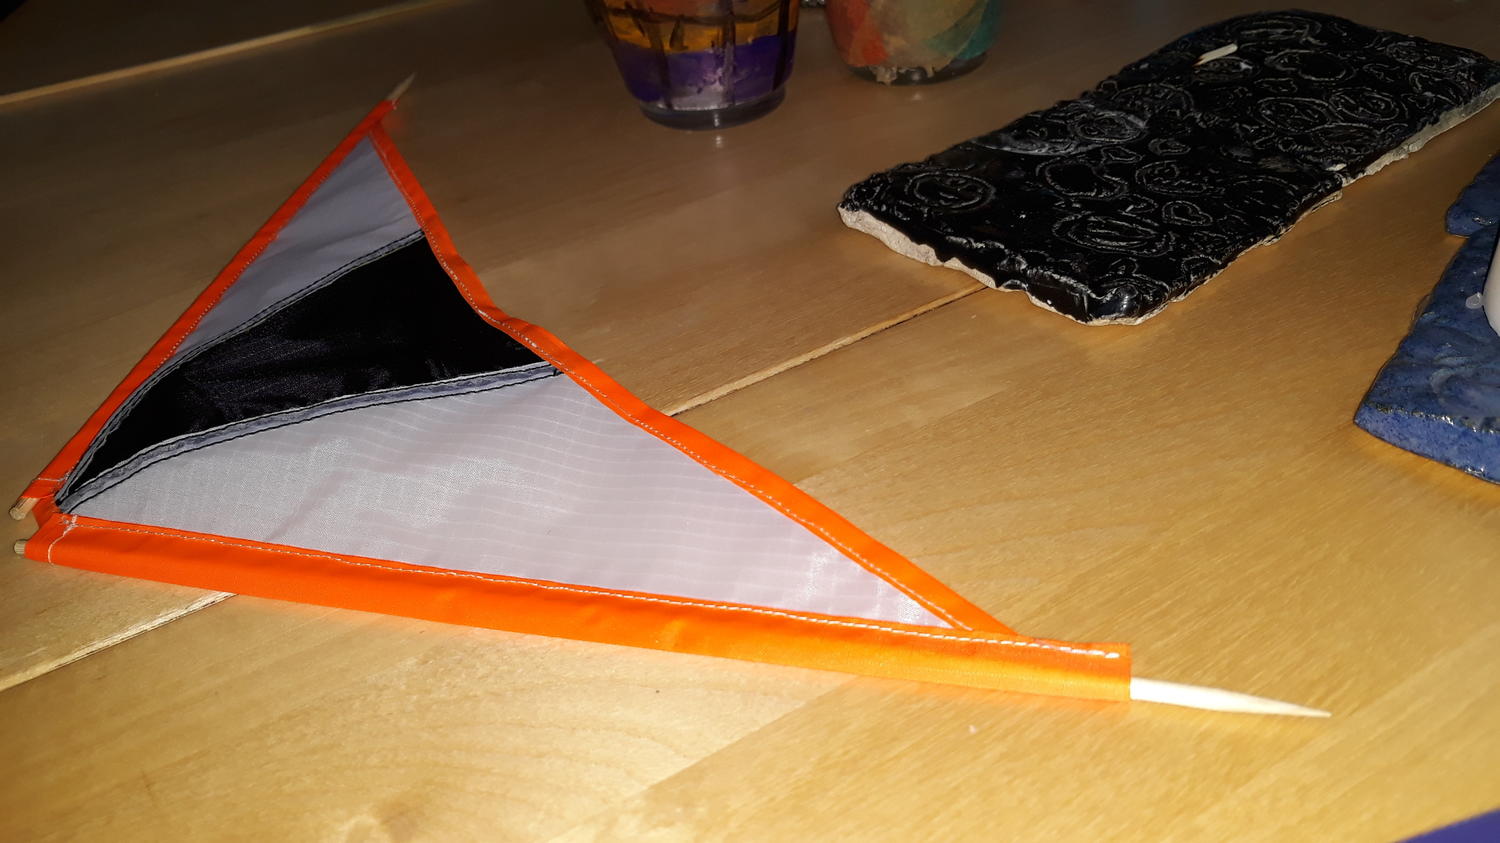
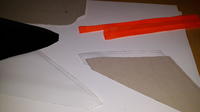
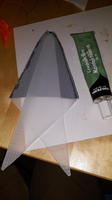
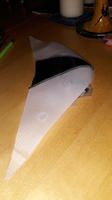
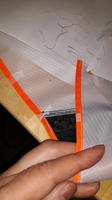
Gluing, taping and sewing Since I had no double sided tape I tried gluing the panels together. The first attempt was to glue the panels together with a glue stick for paper - worthless and close to no effect! Then I switched to the contact rubber glue - a solvent smelling turbid snot like glue that works well for flexible stuff like e.g. foam rubber. It was a little tricky to distribute evenly (old glue sample?), but held the panels well together. Did I have the patience to wait until the two glued surfaces were completely dry before joining then (as you should for this type of glue)? - No, but it worked out anyway. Here the panels were glued face to face. The stitches and seam used was a straight stitch plain seam. A first seam was made closest to the centre of the panels. On the rear side of the kite, the brighter panels were folded over the darker panel and sewed with a seam closer to the edge. Folding the black panels over the white panels would have caused the black panels to be partly visible through the front side of the sail (ugly). In the third image above you can see the resulting camber of the sail. The orange strip of the trailing edge was just folded double around the black and white panels and held in place with tape. As can be seen in the second image the resulting hem is not so good. Perhaps use some type of glue and let it dry while keeping the strip flat in the same plane as the trailing edge of the sail by putting a book on top? The pockets covering the wingtips are not yet in place.
 1 point
 -
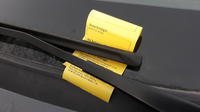
I used to carry my stake in my back pocket... Until the day I did an axel with my Rev (arm sweeps past the hip) and literally stabbed my forearm almost 1” deep on the return motion. Ever since, I exclusively carry my stake in a sheathe that hangs from my rear (center) belt loop.1 point
-
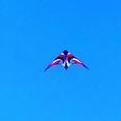
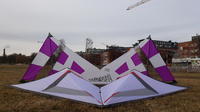
Pretty much raw footage.. Video doesn't do it justice.. The colors were vivid in person and the spinning kites had almost a strobe doppler effect.. Camera just doesn't show the colors.1 point
-
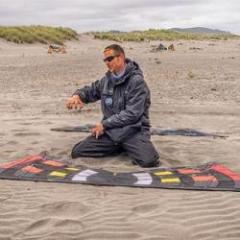
3/4 of a year ago my old time kite guru from the end of the nineties, @Anders Matson, suddenly surfaced on KiteLife and back "into existence" (a very subjective statement on my side) last summer after say 18 years. Anders lives on the west coast, while I live on the east coast (of Sweden i.e.). About a month ago he kindly sent me an animation and an illustrated document describing a QLK kite routine and when I asked he allowed me to share them (they are attached at the end of this post). The kite routine will be performed as a part of the 20th anniversary celebrating Nordic Kite Meeting ( http://kites.aerialis.no/its-getting-closer/ ). This meeting will coincide with the Blokhus - Lökken wind festival on the north west coast of Denmark ( https://www.facebook.com/BlokhusLoekkenWindFestival/?hc_location=group ). This is how I, an absolute quad team (sub-) rookie, approached the routine documents. As there are no serious (non power) kiters around me I had to practice this without a team. In fact, there a no other framed QLKs in this part of the country that I know of and the only framed QLKs I have ever seen are my own. I got the first one, a Rev. B-series 1.5 Std., in June 2017. My two months of intensive QLK started out a month later. This intensive training period was due to (should I really say thanks to?) the missed JB QLK-clinic that happened to take place reasonably geographically nearby (in Denmark), which to my knowledge never has happened before. Feeling frustrated, I set out a goal to at least compensate through intensive practice for this missed opportunity of learning - I raced against imaginary fellow QLK pilots and stopped doing DLKs for the duration of this period. Not until that point that the clinic was over did I return to do DLKing again or rather from that time I did both disciplines. Some remaining questions: What are the most common beginner difficulties? Are there any other things that I missed preparing for (see further down below)? Are there standard routines that are well known and spread so that people can be more prepared for spontaneous formation/team flying at festivals? Where can you today find advice on getting stated (other than the below). Is there a standard vocabulary that a "skipper/captain"(?) would use (talk/shout) when coordinating a group? Initial impression/digestion of the routine description After going through the Anders Matson routine material several times, I realized that I needed to to work with the material in some way to remember it more easily. I looked for sequences that were/could be grouped together and found that the landings formed natural start and endings of the sub sequences. There are several landings in the routine. I believe that this matches well with the designers intention of the routine to be inclusive and allow reasonably skilled QLK pilots to join in, since the landings should serve to collect and synchronize the group (I believe). Even if it has been designed to be available to everyone that can control a QLK, it is certainly not the case (IMO) that you can do this well without practicing. Below is a condensed terse form of the routine that Anders sent me. It contains much of the info, but not everything and is therefore not "stand alone" from the other attached documentation.: Abbreviations RHS Right hand side LL Landed line HL High line CCW Counter clockwise FYK Follow your kite. This will prevent that the kite lines (kite to kite i.e.) get twisted around each other. CW Clockwise ML Mid (height)line OL Offsetted line - the right half is at 60% of wind window and the left is at 40% height. GRID A kite double line - two rows and several columns RSRP Rotate step rotate pause: From horizontal pos. turn 90deg to side, wump sideways one step, rotate 90deg to horizontal. When reaching an end of the line, drop or rise vertically with the LE remaining in orig. direction. The pace of this part is: And rotate, and step, and rotate, and pause WGRID Widen grid The Routine LL - Repeat 4: WAVES(fr. RHS) - LL Repeat 2: LL - ARCHES - LL LL - Repeat 2: CIRCLES(fr. RHS, CCW, FYK, LE forward) - LL LL - ML - OL(FYK +/-2step, form CCW) - GRID - OL - GRID Repeat until orig pos. (CW, FYK): RSRP WGRID HL - LL or shorter LL - Repeat 4: WAVES - LL Repeat 2: LL - ARCHES - LL LL - Repeat 2: CIRCLES - LL LL - ML - OL - GRID - OL - GRID 1 lap: RSRP WGRID HL - LL or even shorter 4 WAVES 2 ARCHES 2 CIRCLES ML 2 (OL,GRID) 1 lap: RSRP HL Mental images for avoiding line tangles The largest worry of managing to do the routine well was flying with others and this thing about getting the lines tangled - the flight pattern of the kite was something that I could practice. Simply how did the line thing work when flying in a team? Anders had clearly drawn how the pilots should move on the ground, but it didn't feel like it was a good general way to just memorize it. I therefore sought a model that one can "always" apply. First I imagined that the pilots movements were an in the horizon mirrored image of the kites movements. That was a valid image but was to complicated for me to to function in real time when practicing the routine. The next picture I made to avoid line tangle was to follow the shadow of the kite on the ground (provided that it was a back lit kite). This was easier to remember. After the second routine training session I narrowed it down to just follow your kite (sideways). The down wind/up wind (ground) movements didn't need a mental image. It is intuitive - when you want the kite to go down you walk towards it when you want it to rise you walk backwards. Line set choice, handle adjustments and general wind challenge identification First action to get prepared for the event was to start using the (completely?) unused 40m line set, since Anders recommended 35m to 40m lines for the routine. Handling this new line gives me Climax (the line manufacturer i.e.) yellow left index finger tip when winding the line set up. The so far three 40m line practice sessions I have had here revealed some wind related possible problems. If the wind dips and/or there is ground turbulence, keeping the place of the kite in the (imagined) formation became difficult without much upstream movement/backing. To create more margin I moved the larks head in from the outermost position on the top leaders a couple of knots closer to the middle of the knot range. I imagine that one easily could cause disorder in the team if some of the members started to run backwards. I expect that the first ones to run backwards are those whose kites are lowest in the formation, because the wind is typically lower there. When they try to back the other pilots might not have the same need, because they got more wind as the kites are higher up. On the other hand, in the upper part of the wind range the challenge is another one. There maintaining position or a stable slow pace in the strongest gusts in a carefully planned way was the challenge. Nowadays I don't mind making a mixed DLK/QLK session as in this image from my latest session to prepare for the routine. I believe it increases the over all efficiency if one aims to progress in both types of kiting. I also think that the colours of my 1.5 B-series mid vent and my Level One Oneleven match very well. Drills related to the routine General The stand by position of a quad IMO is inverted. It is the easiest position to hover the kite in light wind. For me (and for many others I assume) it is also the stable position that minimizes any kite movement. Compared to any other hover, the inverted just looks best for me. It doesn't stop there, I see the inverted slides as the easy one and most often end up doing this rather than the non-inverted. This means it makes sense to practice the very basic regular hover since the routine is 100% free of any inverted hovers and other inverted moves. The waves and the arches Not much to say about flying forward and up. What requires some practice is to fly backwards and down as fast as possible in some possibly turbulent winds without having the kite wobbling. The circles Initially I assumed that you flow the circle much like a DLK. It was then quite straight forward, only the part around "07:30" in the CCW circles needed some finishing. Then during a mid vent session in a high wind period not really suited for the mid vent I dropped the assumption that the kite was choosing the speed and then more slowly positioned the kite along the circle. Now it became a challenge and a more thorough preparation for the event. The formation, execution and end of the grid This is the most challenging part, both in complexity (to remember) and skill of kite moves required. Apart from memorizing the paths/patterns, several things needed practice here: The snappiness of the 90deg clockwork like rotations. Maintaining the height in turbulent winds when being in the lower row of the grid. Doing the vertical slide upwards quickly (I originally thought this was very necessary and the single most demanding part). Keeping track of the four steps (backward/forward) required when doing the vertical slides. I have not been happy with my clockwork's snappiness. Now it is high time to start working on it. If one use flicking movements of the (lower side of the) handle. Then the kite movement will be snappy as well. If you inputted the right amount of start and stop movement of the handles you just made as successful snappy 90deg kite rotation. Still working on reliably avoiding wobble here. My first idea of the pace of the steps (the above RSRP) of the grid was a 1-2 or a 1-2-3, but Anders informed me that it was much slower: and rotate, and step, and rotate, and pause. When thinking the 1-2 or the 1-2-3 option was the case, I saw it as a problem to be able to do the vertical slide upwards quickly enough. Speed of the upwards vertical slide might still be required so this is something I practice. So a general rule of thumb to counteract the DLK steering effect when setting the left/right kite angle to drive the kite sideways (in the direction of the LE) is to add to LE angle by twisting the left/right handles in opposite directions. In other words, enhance the LE slide angle (that is set by extending one arm) by twisting the handles relative to each other. Pretend that you have the top of the handles connected with a rubber band that you want to stretch as much as possible by adding a twist to the handles. Being aware that this is what you do in a slide to maintain the orientation of the kite, enabled me to exaggerate hand movements/positions and run upwind and still keep the kite orientation in the upwards slide. To make my muscles remember this I did an exercise. I let the kite do an upside down "U" while sliding from left to right and keeping the LE pointing outwards. In the straight parts of the "U", both up and down, angle the top of the handle that you keep closest to you so that the handle top comes even closer to you, while on the extended arm angle the top of the handle from you. In the curved part of the upside down "U" reduce the relative twist of the handles. The second exercise I had that was related to the grid was also geared towards the vertical slides. I pretended the team consists of two or four persons so that the part of the time I did the vertical slides increased. The steps of the grid was then repeated over and over and over. After the latest training session I came to the realization that this art sometimes requires a sacrifice. Finally, before publishing this post I got the bright idea to read what other experienced pilots have written: https://web.archive.org/web/20060127225614/http://www.kitelife.com:80/archives/SEPT991/team.htm http://www.rehilliard.net/pdf/AKATeamFlyingManualbyTroyGunn.pdf (thanks again A. for the link) http://kitelife.com/1998/05/01/issue-2-beginning-ballet/ http://kitelife.com/1998/06/01/issue-3-team-basics/ Ouch, there were many issues with coordinating with others in the above links, this is a bit hard to do on your own. Perhaps I'll try to do the mini kite on a stick anyhow to rehearse the routine (for the event above) as also recommended in the links above. Perhaps it is more efficient for learning than the compressed terse text form is? But on the other hand, writing/reading text during a public transportation ride doesn't look funny, while waving a stick kite could. In an unrestricted wish list, there would be an online common stick practice simulator with verbal communication option, so that at least that aspect of team flying without distant travelling could be covered. Perhaps a (sub set of a) FPS like WASD/mouse control input for controlling your online kite? Rev rutin BLOKHUS.mp4 NKM2018Revrutin.pdf
 1 point
 -
Just to clarify; I doubt I could sustain more than 2 complete circles, my attention would need to move on... But it's got me thinking now! Sent from a Galaxy 8 Far Far Down Under.1 point
-
As I spent my first hour with the Kaiju outside in the evening calm I worked on mostly up & over. Pretty shaky at first getting used to the seven foot lines. Was surprised I could easily launch the kite suddenly enough to achieve shuddering as the kite got just past face level. That was a sign for me to slow a bit so I could develop the move until I was smoother. I also initially lost good form as the kite peaked because I did not have my arms extended properly ready to sweep the kite over my position. It is almost like you are slinging it past your position. The move required me to keep focusing on steady pressure while turning around & stepping back smoothly. Essentially I had to get myself in position to continue downward flight into a dive while keeping consistent sail pressure. At first my turns on the other side were failing because the kite lost sail pressure & would not turn, just stall & float. I was not stepping back. I must admit that things were happening so quickly that I was almost a bit panicky, over-driving & over-steering the light kite. Once I started to get it the magic began. Up, over, turn & land. I find it nearly as hard to describe as it is to execute. Kind of reminded me of my first attempts to fly those touchy quad sportwings.....But for a flailer like me it should be a bit easier. SHBKF1 point