The Tire Technique…
A few years back, I was flying at a festival in New Zealand. Another kiter had attached several large piece to the bumper-hitch of a small truck. When the wind came up, the back end lifted, the brakes disengaged, and the truck rolled over a child.
Fortunately, the kid was smaller than the space between the truck and the ground. He escaped slightly bruised. But the rest of us were pretty traumatized. Lesson learned.
 Vehicles make great portable anchors. But they have their limitations. And most don’t have convenient bumper hitches. But something they do all have are tires.
When I first showed the tire technique to friends, they were skeptical. How could a strap wrapped under a tire hold anything of substance?? But when I used tires to hold a four-Octopus-load during the record setting Ocean Shores flight, I think people took notice.
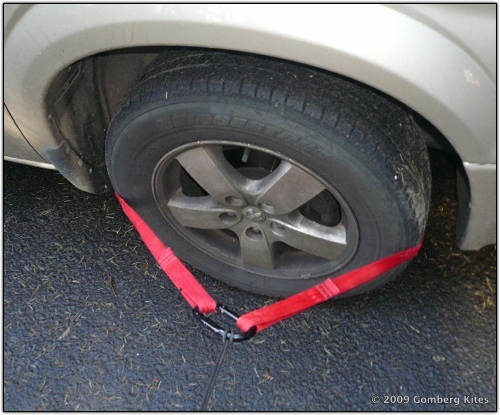
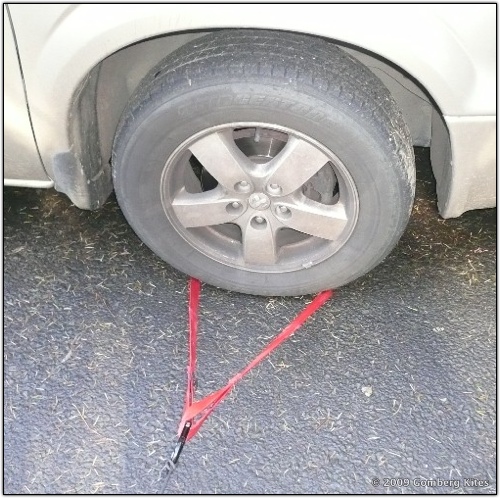
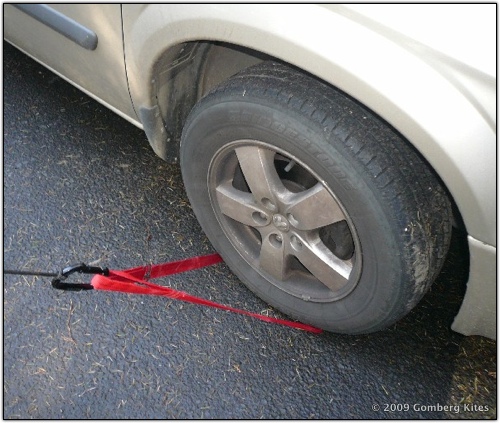
The key is to place the strap behind the tire where it meets the ground. The load is then being carried by the entire weight of the vehicle. In most cases, the strap doesn’t even begin to slide under the rubber and is easily removed when you finish flying.
The engine end of the car works best.
Don’t place the strap higher up and engage the axel or any metal hardware.
We’ve used the tire technique on soft sand, hard pack, grass, and pavement. And each time it has worked fine.
We share it with you here now as one more tool for flying well where and when you want.
Monday I’m off to the grand festival of Pasir Gudang in Malaysia. For members of the GKPI team will be on the field there. So watch for news! Meanwhile Susie is keeping the office open and keeping orders flowing.
The “Spanish” Anchor Knot…
Someone asked on the Show Kite Forum last week about the anchor knot I demonstrated at my Big Kite Workshop in Gettysburg. I call it the “Spanish Knot” because the Gonzalez Brothers showed it to me – and because I don’t think it has a better name.
 If you let all your line out, then it is easy to attach the end loop to the anchor. But usually, we don’t commit all our line and need a different knot system. Generally, I’ve been using Larksheads to connect a line to a carabiner. But they tighten down or may slip if you don’t add a second knot to hold everything. Undoing the knots can be tedious.
The good news with the Spanish technique is that it is easy to take a kite off the anchor, and the knot slips free to completely disappear. The bad news is that it’s a little bulky. So if you plan to attach two or three kites to one carabiner, this may not be the way to go.
Here’s how the knot works. Give it a try and decide for yourself.
If you know how to “Daisy Chain” a line, then you know the basics of the Spanish Knot. You make a loop and then pull a second loop through, and then pull another loop through that to shorten up bridles or loose line.
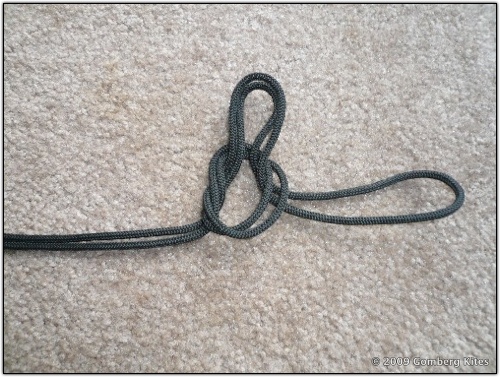
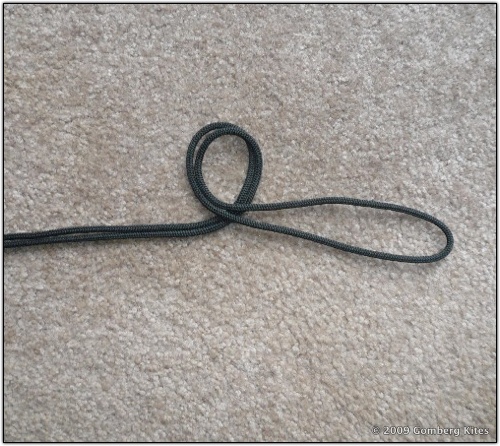

For anchoring, start with a line folded where you want the anchor to connect. Let’s call the connection location “Point A”.
Make a loop about a foot above Point A.. Then pull a second loop through that. The center of the second loop will be “Point B”.
Spanish Anchor

 Note that Point A is in one strand of line, and that Point B is in two of them.
Even up the three loops and slip all three strands that make up Point A and B into a biner. Notice that the line holds efficiently without sliding up snug on the metal.
When you have the kite down and are ready to disconnect your anchor, simply slip the three lines out of the carabiner. If you then pull the single line at Point A, it will undo the slip knot and disappear!


I’m still trying to get into the habit of using a Spanish Knot on my large kite anchoring. And I’ve found in some situations, that the knot can tighten under pressure and needs to be pulled hard to be undone. But it is good to have options and different ideas when working with larger kites and this Spanish Knot is a good alternative.