Charlie Sotich from Chicago is internationally famous for his small kites. Some of Charlie’s kites measure fractions of an inch. Postage stamps are usually bigger. His entire kite collection usually fits into a cigar box.
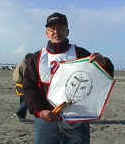
When I attended Charlie’s annual Black Swamp Air Force small kite class on November 28th in Perrysburg, Ohio I was in for a BIG shock. The kite Charlie taught was an 18″ tall Rokkaku kite, huge by Charlie’s standards. This Rokkaku had a different twist, or should I say Flip!
Charlie’s design for the Flip Flop Rokkaku is not a new one. Charlie has been making and flying this kite for several years. Charlie says that he did not invent the idea. He credits Kevin Shannon of Pennsylvania with the idea. For less than a dollar you can make one of these kites. Most of the materials are readily available in any kitefliers repair box. Charlie initially worked out this kite design for the Midwest Area Kite Retreat (MAKR) held in March of 1996
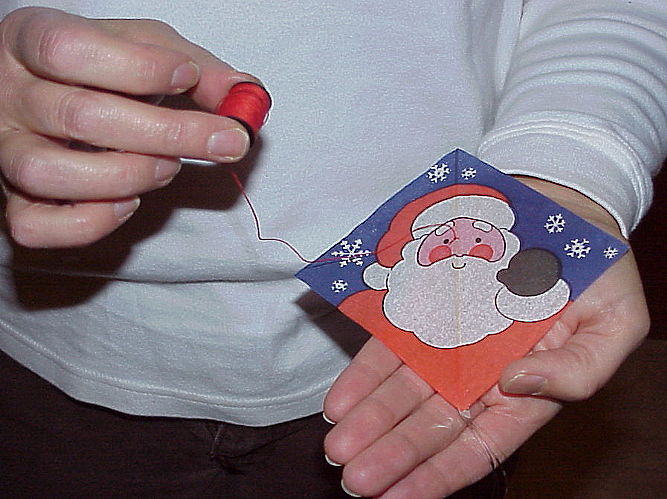
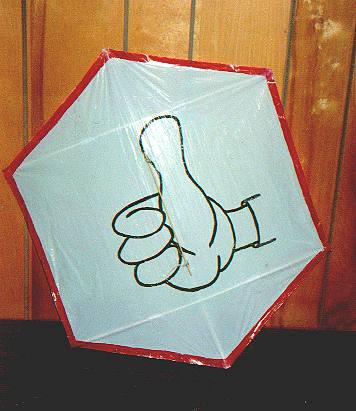
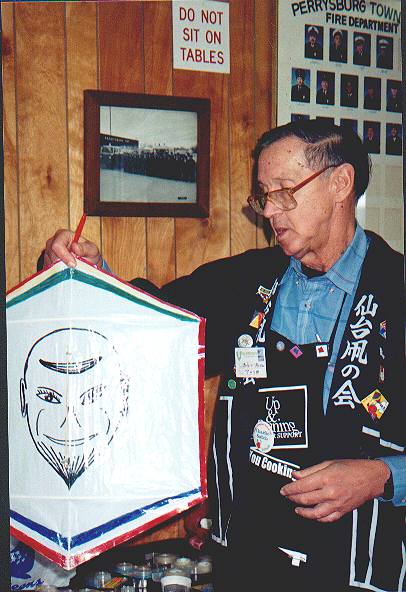
The Rokkaku design is pretty straightforward and follows the traditional dimensions and structure. The difference comes in the unique bridle arrangement that Charlie has perfected. This sliding bridle setup allows the kite to turn over or “flip-flop” in flight. This trick would not be much of a big deal if it were not for the truly amazing designs for the kite sails that Charlie supplies to the workshop attendees. The designs are optical illusions that look different when viewed right side up or upside down.
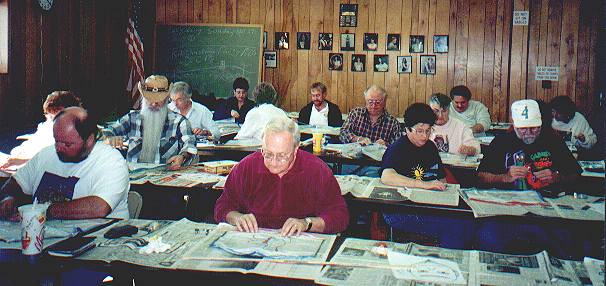 Twenty-five Black Swamp Air Force members attended Charlie’s workshop. This is an annual event hosted by the Black Swamp Air Force Kite Club in conjunction with their annual Christmas party. Although Charlie has taught tens of thousands of kids how to make kites in workshops back in Chicago, this class was only attended by adults. Charlie says that this design is much too difficult for the average little kid to make. Although this is not a difficult construction project some of the big kids had problems.
One of the most enjoyable things about Charlie’s kite workshops is the method he uses to instruct. Charlie has a knack for making the difficult parts seem easy. He can also become very technical when the situation requires it. Charlie says that the method he has perfected over the years works for anyone who makes a kite. The object is to convince the kitemaker that they can make the kite on their own. Charlie says that most problems with kitemaking classes come from poor instructions. If the kitemaker can understand what to do they can usually accomplish the most difficult techniques.
 The “Flip-Flop” Rokkaku is a very easy design and everyone in the workshop was outside flying their creation in about an hour. Charlie says that the actual construction should only take about one half hour, but for this kite the decoration is as important as the construction, and you do need to color the sail before you construct the sliding bridle arrangement. But just like kid’s kite classes you have to curtail the “coloring” part of the class or the workshop could take hours to complete.
 Another interesting part of attending one of Charlie’s workshops is the trivia about kite construction that Charlie passes along. – Did you know that you can remove the static electricity from tape by rubbing the non-sticky side of it in your hair before you use it? – Or wooden dowel rods bend best when soaked in water for two hours? – Just a few tidbits you will learn when you attend a workshop given by a “dyed in the wool” kitemaker who has helped kids.
Instructions for Charlie Sotich’s Flip-Flop Rokkaku
Materials List
– Three 18″ X 1/8″ wooden dowel rods (Two bent with 30 degree dihedral)
– One 9″ x 1/16″ wooden dowel rod or bamboo skewer (for sliding bridle)
– One plastic ring 1/2″ in diameter (for the sliding bridle connection)
– 3″ of 3/16″ – 1/8″ ID plastic tubing (for sliding bridle)
– 1-3 mil plastic (preferably white so it can be decorated) At least 18″ X 18″
– Plastic tape (1/2″ wide – Scotch Tape)
– Standard drinking or soda straws (Inside diameter to fit 1/8″ dowel rods)
– Permanent Markers (For sail decoration)
– Scissors
– Xacto Knife (for cutting sail material)
– Ruler (for accurate measurements)
Construction
– Trace the six sided Rokkaku shape on the plastic sheet (Charlie used a template for this step)
– Reinforce the edges of the sail with 1/2″ scotch tape. This will give the kite more strength and durability.
– Choose one of the “Flip-Flop designs included. Trace the design on the kite sail with permanent marker and color as you like. Remember that the best designs are the ones that show “Top and Bottom” (Try coloring the top edge with red and bottom with green.)
– Cut holes in the sail in the locations indicated for the sliding bridle spar 7/8″ plastic Tape the 8 – 1/8″ soda straws to the sail in the locations indicated in the diagram, four for the horizontal spars and four at the outside edges of the sail. (These will hold the spars in the proper location.)
– Insert the curved (horizontal) spars into the soda straws in the tips and centers of the sail.
– Punch holes in the 1/2″ plastic tubing to accommodate the center spar and the sliding bridle spar.
– Place the center straight spar into the soda straw and the 3/16″ plastic tubing. Place that tubing through the precut holes in the center of the sail.
– Tape the center (alignment) soda straw on the sail and tape down.
– Slide the 1/2″ plastic ring onto the bamboo skewer.
– Insert the 9″ Bamboo skewer (sliding bridle spar) into the 3/16″ plastic tubing in the center (front) of the kite.
– Attach your flying line to the 1/2″ plastic ring.
Flying Instructions
– The “Flip-Flop” Rokkaku flies very much like a fighter kite. Constant line attention is necessary.
– To “Flip” the kite simply release tension on the flying line and the plastic ring will slide to the bottom of the bamboo skewer.
– When the ring hits the bottom a slight pull on the line will flip the kite.
– This “Inversion” can happen very quickly and the technique takes a bit of practice.
– Some kitemakers at the workshop experimented with tails to stabilize the kite and emphasize the top and bottom of the Rokkaku.
In Conclusion
Charlie has been making kites since before recorded time. Most of his designs are very simple and fly perfectly. The cost of his kites is usually much less than a computer mouse pad. For more information about Charlie Sotich, and his many kite designs contact the author at tangents@kitelife.com.
Some ideas for “flip flop” graphics, stand on your head to see upside-down view.
