My aim in this article is to share my experience and a learning method about Multiple Sport Kite Flying with you.
I hope this will be a useful guide for beginners. Being a pioneer in Argentina for this practice, I consider myself one of those in the world following in the steps of Ray Bethell, Ron Reich, Carl Bragiel, Jim Poy, Roger Maddy, Joe Perron, Jose Mª Marcos Dominguez, Carlo Pitonzo and many others (past Kitelife article about kiting innovators).
The possibilities of Multiple Sport Kite Flying:
MKF is based upon flying two or more kites with independent controls on outdoor or indoor spaces technique, giving you these possibilities:
- Two or more stunt kites
- Two or more quad lines
- Two or more power kites
- Two or more fighter kites
- Some kites combination of stunt and quad lines
- Kite trains of stunt and quad lines
…and as much as you can imagine…
It is also like team flight, meaning that allows performing our aerial ballet, but with only one pilot flying all kites.
In order to become an expert in this discipline, you have to train your mind to make it works like a team by moving your arms and body like an octopus.
Team flying example:
You have to develop your sixth sense because sometimes your eyes can not see some of your kites. You will feel the adrenaline running trough your body when furious Eolo blows and the pleasure of it breezes.
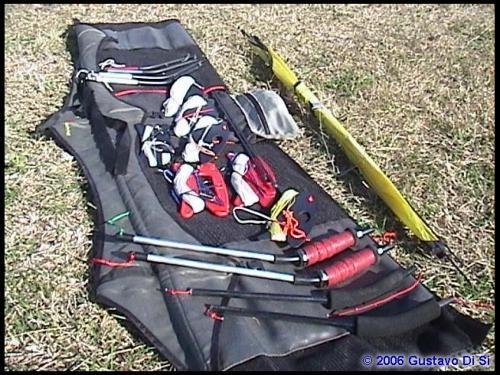
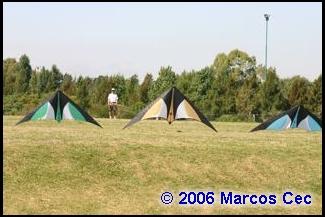
The equipment
At the beginning we can try with any stunt kite model. So, if we find this practice exciting, we can have full equipment. (3 stunt kites STD, Vented, UL, some handles, some lines and so on).

Learning my methodologies for stunt kites
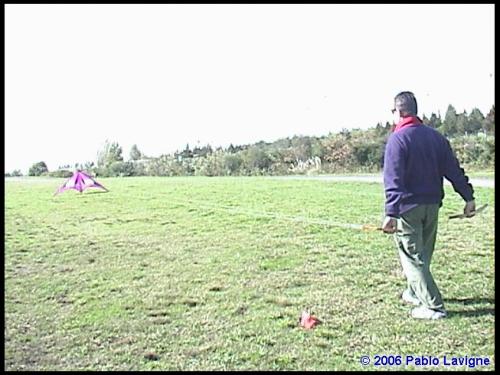
It is necessary to be skilled in acrobatic (sport/stunt) kites flying before starting MKF practice.
Let’s start saying that, in all stages of learning, you have to fly with moderate or slight wind, because you do not have enough experience on MKF and light to moderate winds make for a much easier time of learning.
Ensure you have sufficient space, and be conscious of others who you’re sharing your local field with.
Always apply clear safety rules of flying to avoid accidents at any windspeed. Remember that you have to be far more careful in these conditions than when you fly only one stunt kite.
In any aspect of kiting , safety is always paramount.
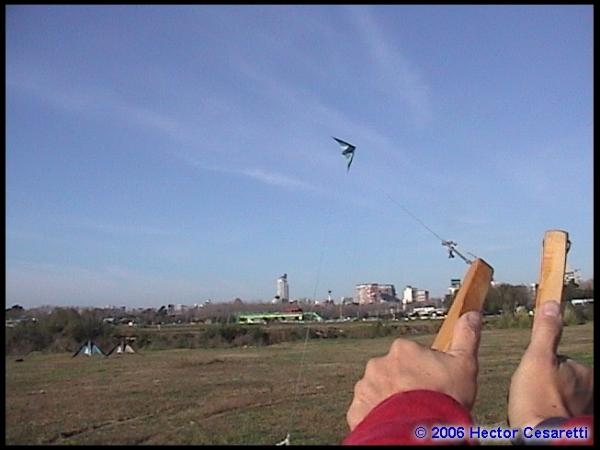
Step 1: “Takeoff and Landing”
Previously, you have to check that the flying lines are equal. Then, fix the lines of your kite to the handle control and begin your training process to acquire the muscle memory.
I recommend you to choose some maneuver in the ISK Compulsories Book. For example: DI02 – circle, DI03 – circle over diamond, DI11- split appears eight. I suggest series flying.
We begin with the hand that has greater ability. I started by my left hand.
So, you take the handle to takeoff the kite, at the same time that with the other hand take the handle without fixing the other kite on it.
Move both arms smoothly backwards to takeoff and leave the kite reach zenith.


I said both arms in order to get synchronization needed to fly two kites at the same time.

To land, initially do it in the edge of the wind window, right or left side, trying to land on both wing tips. When time goes by we will learn to land in the centre of wind window.
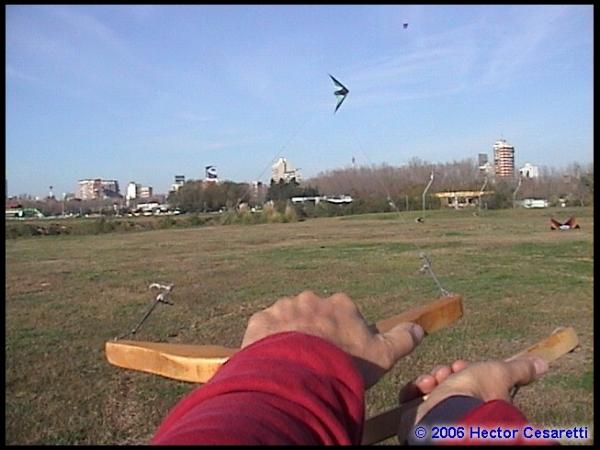
Step 2: “In flight”
When the kite is on the zenith, pull one control kite line moving the wrist laterally so the kite turns according to the applied force, changing flight position. After that, we return the original position wrist, so, the kite stop turn. Then, practice straight flying, moving your arms in the same straight trajectory of the kite.

 At the beginning it is necessary to keep watching kite nose to control the path.
I recommend easy movements. It is also possible to be more accurate by sticking arms to your body, but you can lose flexibility by lack of practicing.
Step 3: “Changing hands”
If you begun with left hand, you have to train with the other one following steps 1 and 2.
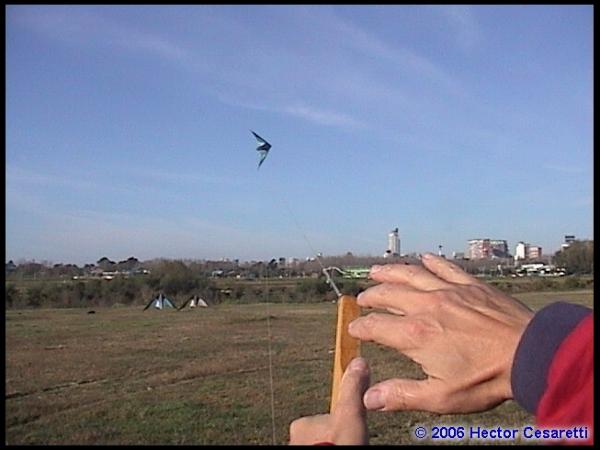
Step 4: “Mix both hands in flight”
Now repeat steps 1 and 2 using a single handle, using different hands, left and right, independently of the position and path of your kite. This training process, will improve natural movements.

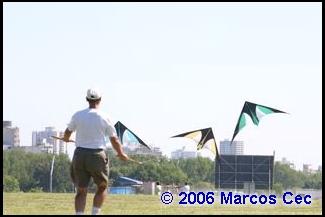
Step 5: “Flying two simultaneously”
Now the second kite is added, your must became more aware, because this flight looks like that of pairs flying.
Pairs flying example:
Repeat steps 1 and 2 fixing the second kite on handle, keeping your eyes in the noses of both kites. First of all practice synchronous maneuvers and then the asynchronous ones.
Be careful to do smooth arms movements. When flying two simultaneously you will feel an intense kites force and speed. With experience, it will realize that it is not necessary to watch kites constantly, feeling their positions thought your wrist and arms. In this kind of flying, “feelings” is more important than “seeing”.
Follow the same procedure described in step 1 for landing, first one kite at time watching that wing tips touch the ground at same time.
With practice you will be able to land both at the same time in any point of wind window.
Other alternatives are to fix one kite to the waist and the others in your hands (such as Ray Bethell), attaching the third kite to your chest (like Carl Bragiel).
Ron Reich favored another technique entirely! One kite is flown from the waist (controlled by hip motion), and in the center of your belt is another connection point…
- The left line of the left kite is in your left hand, and the right line from this kite is attached to the center point on your belt, and the kite controlled with one hand… Push with the left hand to go right, pull to go left.
. - The right line of the right kite is in your right hand, and the left line from this kite is attached to the center point on your belt, and the kite controlled with one hand… Push with the right hand to go left, pull to go right.

The idea is that the center of your belt stays more or less in the same place while your hips rotate to control the center kite… While this method can be equally effective, it might very well be the hardest to learn.
Not to be outdone, some have even flown the third kite with their feet, although this greatly limits your mobility and control – particularly in light wind.
Both of the first two procedures work perfectly, but I prefer flying the kites by hand at the beginning, because it makes learning freestyle maneuvers easier.


Step 6: “Flying the third kite”
Where will you place the third kite?
Get the experience of flying with different parts of the body (Chest? Waist? Feet? Legs?…) and choose the most suitable for you.
 If your decision is the waist or any other option, you have to first practice the maneuvers without your hands.
I said, without your hands! At the beginning, you will attempt to take the lines control with them. Doing it this way delays learning.
If you cannot overcome the temptation, I recommend placing hands behind the neck or at your back. Thus, you will have no choice but to fly the described way.
In case that the kite crashes or lands in a position where you are not able to takeoff, we have to walk or run towards it and place it in launch position to try again. I assure you that, at the beginning, you will lose weight and have a good shape…
Before take off your tummy has to be squarely facing the kite. Walk backwards smoothly until the kite reaches the zenith. After that, turn the waist slowly left or right to make the kite turn. Fix your eyes on the nose to control its flight path. Move your legs and hip easily, let’s go try training with the kite on this part of your body, including landings (repeating steps 1 and 2).
Step 7: “Flying three kites simultaneously”
After many hours of training, the next challenge is to fly three kites at a time.
One kite in each hand and the third one on the waist with independent controls. Wow…Wow!
The first time I flew three at a time I thought: Saint God! And now what?
Now repeat steps 1 and 2 with three kites. We can takeoff three kites at the same time or one by one, leaving them rise to zenith and keeping them in its position.
At the beginning, you can feel to be stick in the floor or perhaps to be about of taking off with your kites. Calmly, maneuvering one by one at time, go back to the starting point.
For instance: flight the left kite, the other two remain in the zenith, and return to the starting point; afterwards, go on with the right kite and then, do the same with the central one, same exercise on and on.
Pay attention at the body movements, because the kites will be more reactive at them.


It is necessary to do easy movements and coordinate them in order to keep flight under control. You have to feel the kites and your mind have to work like a system.
With time you will gain on experience being able to combine complex maneuvers like three under synchronous and asynchronous form. These and others subjects will be treated in oncoming articles.
Some Tips:
I take notes during all training sessions to improve my techniques and routines, you might find another method which works equally well for you.
Example:
| Wind Speed(knots) | Left Kite | Centre Kite | Right Kite | Detail |
| 0 – 15: X | X | X | X | Gust: |
| 16 – 25: | Constant: X | |||
| 26 – more: | ||||
| Bridle Setting (cm)
|
A: | A: | A: | 3 Legs – Turbo – |
| B: | B: | B: | ||
| TP: | TP: | TP: | Turbo Inverted: X | |
| Launching | OK | OK | OK | Same time |
| Landing | OK | OK | OK | One at time |
| Turns | Good | Not so | Good | Wider |
| Cross | Good | Not so | Good | Not so straight |
| Refuel | Good | Good | Good | – |
| Turtle | Not so |
X |
Good | Unstable |
| Fade | Good |
X |
Not so | Unstable |
| Flic Flac | Good |
X |
Good | On time |
| Yo -Yo | Not so |
X |
Not so | More practice |
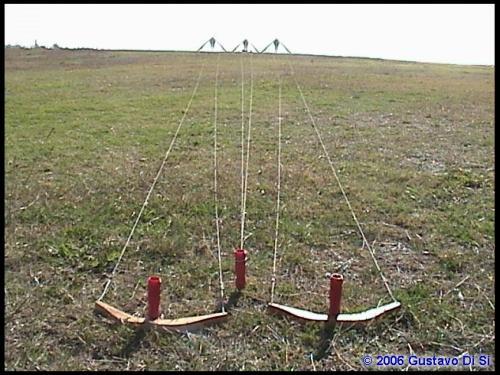
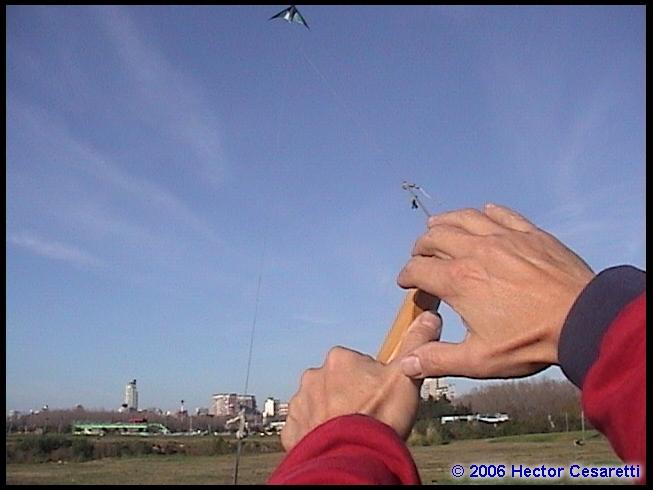
I design my own handles, according to my own hand size and kite model. The materials can be diverse but I prefer wood. At the beginning I flew with handles that has different angles, nowadays by symmetrical angles.


The handles can be taken in two different ways, so each pilot has to find the best for him/her.
 To fix your third kite on waist, an economic procedure is taking a belt doing two eyelets on flank of your waist, passing a thread of cover dynema through it. I also suggest reinforcing the fasteners of the trousers, because they work as an anchorage for the belt.
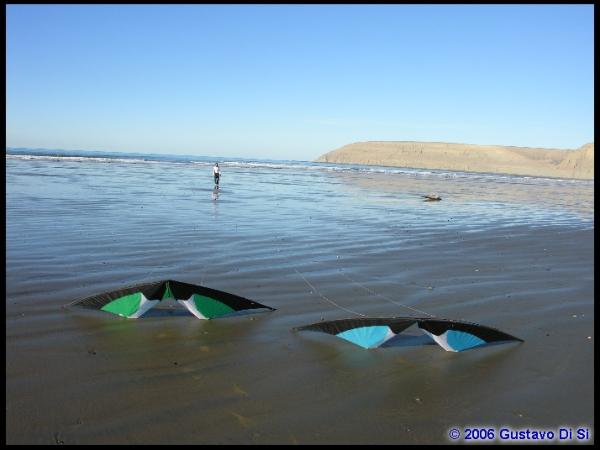
The length of the lines depends on the pilot style. Carl Bragiel flies with lines of the same length, while Ray Bethell (www.raybethell.com) use different lengths.
I would like to remind you that the kites generate turbulence during their flight, as each kite flies through the draft left by the kite before it. You cannot change your relative position to avoid this effect; therefore, if you decide to fly with equal length lines, the kites have to be flown further away from one from another to allow the turbulence to clear.


If you choose to fly with different length lines, you have to compensate the effect of turbulence, depending on the trajectory of the kites.
Example: Imagine, athletes performing in a 400 metre dash… The relative position of the runners is different at the starting line in order to compensate distances during the first curve of 100 metres.
The kites fly similarly, the path is a curve commanded by the pilot from a relatively fixed point in the wind window. The kite with the shortest line also has smallest turning radius, receiving in addition the wind at first, because it is at windward of the others, therefore flight faster and you need to compensate these effects.
 At my beginnings I flew with equal length lines, nowadays with different from 45, 43 and 41 metres respectively.
Bridle types… Which kind of bridle you can choose? Three legs, turbo, turbo inverted, actives? (Andy Wardley http://wardley.org/kites/index.html)
In my opinion it depends on the pilot. I used turbo bridle but nowadays turbo inverted; everything it is a matter of fashion. The main thing is to fit the precision and speed in order to set the kites properly. I think that it will vary based upon the style of flight of each pilot and the kites design .


Training as much time as you can is this only way to progress. If you are methodical and disciplined you can take advantage of synergy effect. Therefore, if your flight is not so good in the short time, does not worry, do it again, again and again until you reach your goal.
If you believe you do not have the skills to fly MKF, my opinion is:
There are two ways that make possible;
- Be born with a gift
- Become skilled through training and perseverance.
So, if you have both a gift and skill, you are lucky… Otherwise apply option 2.
Also, if you don’t feel confident… Come on! Try yourself, and surpass your mind limits… All is possible.
I would like to thank Kitelife for the opportunity to publish this article and I hope to share with you new experiences and knowledge very soon. I would also like to invite you to express your opinions and comments on the Kitelife Forum or click here to email me directly.
![]() Acknowledgment:
Acknowledgment:
To all my friends from USA, Spain and Argentina, who helped me to learn and improve my kites flying techniques.
Best wishes,
Gustavo Di Si
Author Note: The author does not assume any type of responsibility in the application of this training method, by damages in the materials of flight equipment or those can be caused by pilots during trainees, competitions or recreations flying… Please practice safe kiting at all times, and teach by example.
Pictures by:
Polo Madueño
Pablo Lavigne
Héctor Cesaretti
Gustavo Sonzogni
Marcos Cec
Gustavo Di Si
Bibliography and Articles consulted:
- Al Hargus III:
° https://www.kitelife.com/magazine/issue40/tirades40/content.php
° https://www.kitelife.com/magazine/issue41/tirades41/content.php
° https://www.kitelife.com/magazine/issue42/tirades42/content.php
° “The no secrets handbook of team sport kite flying” (1998) - Servaas Van der Horst and Nop Velthuizen:
° Stunt Kites to make and Fly – UITGEVERIJ – THOTH – 1993
° Stunt Kite II; New designs, buggies and boats – THOTH Publishers -1994 - Bert Tanaka:
° https://www.kitelife.com/old-issues/issue-1-a-look-at-ballet/
° https://www.kitelife.com/old-issues/issue-2-beginning-ballet/
° https://www.kitelife.com/old-issues/issue-3-team-basics/
° https://www.kitelife.com/archives/002/fly.htm
° https://www.kitelife.com/archives/0901/together.htm - David Hathaway:
° https://www.kitelife.com/magazine/issue43/revisions43/content.php
° https://www.kitelife.com/magazine/issue45/revisions45/content.php - Eric Allen:
° https://www.kitelife.com/archives/jan01/revclass.htm - Hans Jansen op de Harr:
° https://www.kitelife.com/archives/NOVE99/dikehoppers.htm - John Barresi:
° https://www.kitelife.com/magazine/issue39/lightwind39/content.php
° https://www.kitelife.com/magazine/issue40/lightwind40/content.php - Matthew McGee:
° https://www.kitelife.com/magazine/issue44/weights44/content.php - Mike Reagan:
° https://www.kitelife.com/archives/MAY98/indoors.htm
° https://www.kitelife.com/archives/JUNE1998/doin’it.htm - ° https://www.kitelife.com/archives/0798/doin’it.htm
° https://www.kitelife.com/archives/SEPT98/doin’it.htm
° https://www.kitelife.com/archives/1198/doin’it.htm
° https://www.kitelife.com/archives/099/indoors.htm
° https://www.kitelife.com/archives/APRIL99/doin_it_indoors.htm
° https://www.kitelife.com/archives/0599/doin_it_indoors.htm - Olan Turner:
° https://www.kitelife.com/archives/00july/musical.htm - Phil Napier:
° https://www.kitelife.com/archives/JUNE1998/novice.htm
° https://www.kitelife.com/archives/APRIL99/novice_class.htm
° https://www.kitelife.com/archives/0798/novice.htm
° https://www.kitelife.com/archives/0599/novice_class.htm
° https://www.kitelife.com/archives/JUL99/novice.htm
° https://www.kitelife.com/archives/002/novice.htm - Ron Despojado:
° https://www.kitelife.com/archives/SEPT991/4play.htm
° https://www.kitelife.com/archives/00march/4play.htm
° https://www.kitelife.com/archives/00november/4play.htm - Ron Kramer:
° https://www.kitelife.com/archives/00march/indoors.htm - Sandy Wagner:
° https://www.kitelife.com/columns/issue-1-4play/ - Special Section:
° https://www.kitelife.com/archives/SEPT991/teamfly.htm - NASA – National Aeronautics and Space Administration
° http://www.grc.nasa.gov/WWW/K-12/airplane/kite1.html
. - Juan Miguel Suay Belenguer
° http://www.monografias.com/trabajos6/vuco/vuco.shtml
° http://www.parador.es/castellano/revista/09/PA09EnForma.pdf
. - Wardley Andy
° http://wardley.org/kites/bridle/index.html
Sometimes our readers take time to comment on the projects and issues here at Kitelife, and we’re always happy to share them with you.