Leaderboard


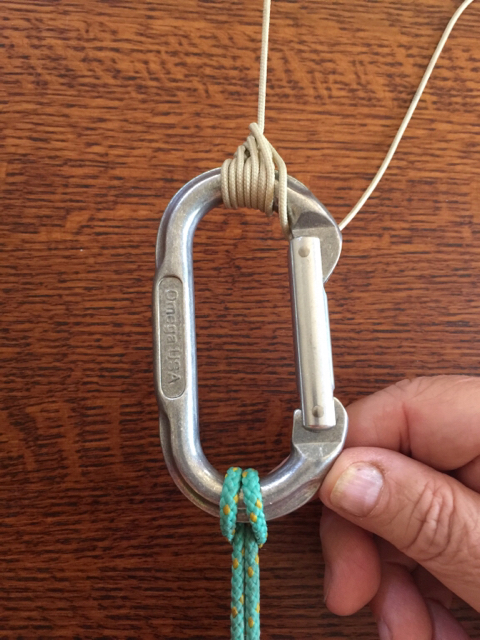
Popular Content
Showing content with the highest reputation on 12/04/2020 in all areas
-
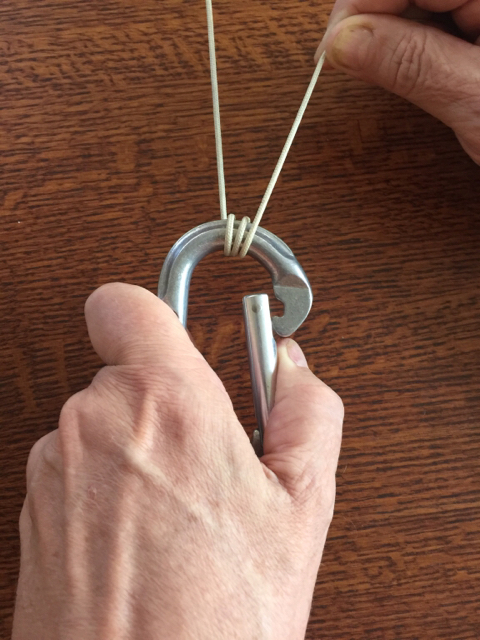
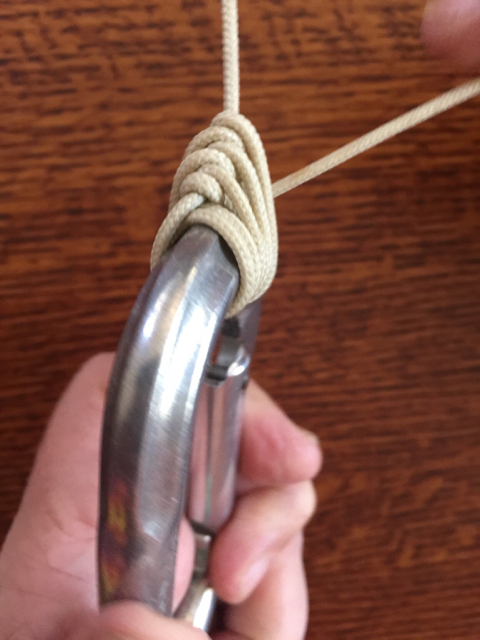
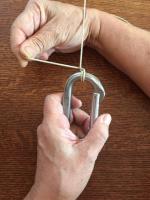
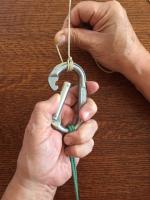
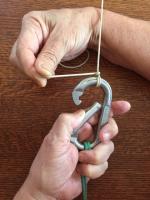
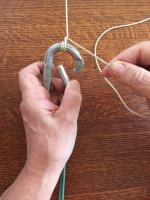
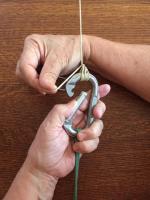
Captain Rick (a real tugboat captain!) showed me this knotless hitch for tying down kites, especially big kites that pull hard. This is my technique for tying the hitch onto a carabiner, but the hitch is perfect for tying to a fence post, driftwood, trailer hitch, etc., without degrading the flying line. The hitch is also known as the Lighterman's hitch, and even has a "secondary" use of safely mooring your boat! 1. The kite is in the air, the standing line (flying line) is under tension, the carabiner is tethered to an anchor, and the bight (the line we are working with) is in the middle of the line between the kite and spool. For safety, the carabiner is climbing-rated at 22 kilonewtons and will hold about 5000 lbs of pull. 2. The opening side of the carabiner is the bollard, where, of course, we will make all of our bollard wraps. 3. Start with two wraps of the bight around the bollard. 4. If your kite is pulling so hard that is is difficult to hold, make three wraps. (All of the following photos show two wraps only.) Position your holding hand with your thumb on the carabiner gate, and work the bight with your other hand. (I'm right handed, so I hold the carabiner with my left and work the bight with my right.) 5. Always pass the bight around the standing line on the "dockside" (closed side) of the carabiner. 6. Twist your holding hand palm up, open the gate, and pass the bight over the bollard… 7. …and pull the bight through the gate of the carabiner. 8. Twist the carabiner back to the starting position (palm down), passing the bight dockside of the standing line. 9. Pass the bight over the bollard and pull it through the gate. Notice that the standing line has been wrapped twice, once from each side of the carabiner, thus equalizing the tension on the standing line. 10. Twist the carabiner palm up again, pass the bight dockside, wrap it around to and over the bollard, and then pull the bight through the gate. 11. Again, pass the bight dockside… 12. …twist the carabiner back to palm down (except I moved my thumb for photo)… 13. …and pass the bight over the bollard and through the gate. For most kites, you can quit here. 14. However, for heavy loads, wrap the standing line again. Twist the carabiner palm up and pass the bight dockside, over the bollard, and through the gate. 15. Twist the carabiner palm down… 16. …and pass the bight over the bollard and pull it through the gate. This will hold 99% of kites, but for exceptional loads or very slick lines, you can repeat the wraps as often as needed. 17. Note the alternating wraps on the dockside, keeping the tension equal on both sides of the standing line. 18. The finished hitch uses no knots that weaken your flying line. It can be easily adjusted even under load by undoing a few wraps until the line begins to slip, and then controlling the line slip with a little tension on the bight. With a bit of practice, you will be able to tie this hitch in 10 to 15 seconds! Sent from my iPhone using KiteLife mobile app


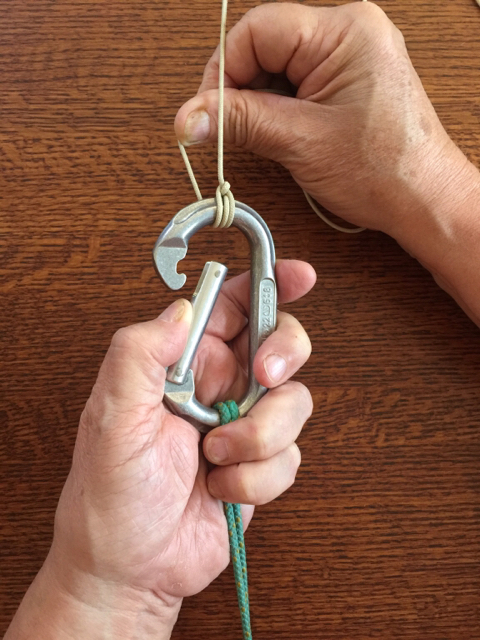
 1 point
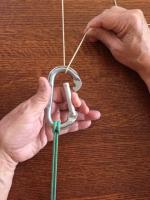
 -
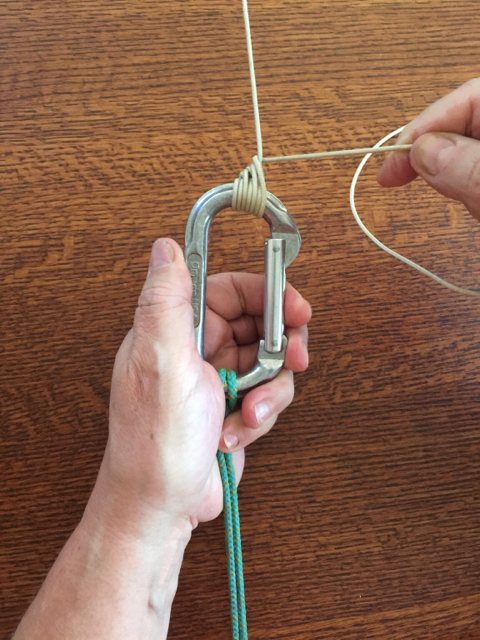
OR you can try the brute force approach like I have and try every option.. (WARNING, IT GETS EXPENSIVE VERY QUICKLY)


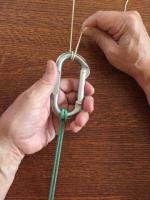
 1 point
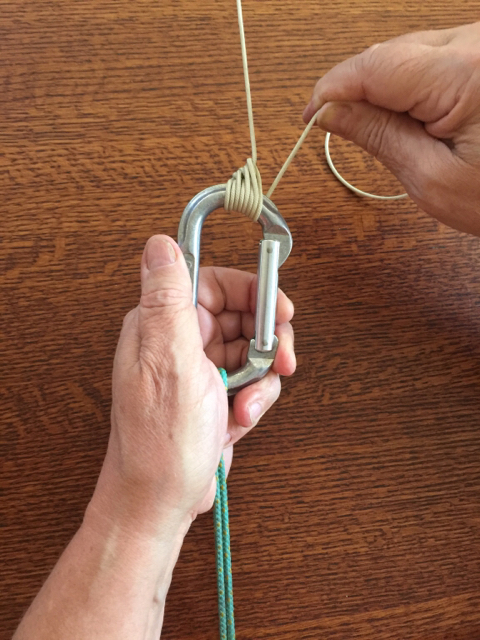
 -
Just to the ‘burbs, but a bit closer to the beach! [emoji41] Sent from my iPhone using KiteLife mobile app1 point
-
Thanks for the responses. Yes, it's mostly just for fun. And maybe for slowing down the kite in the higher winds. I come from a Rev background and haven't quite gotten used to no brakes yet.1 point