REVflyer
-
Posts
59 -
Joined
-
Last visited
Content Type
Profiles
Forums
Gallery
Events
Downloads
KL Shop
Blogs
Articles
Classifieds
Community Map
Everything posted by REVflyer
-
I regret selling my Great wind deca, I'd be interested in a replacement, can you give me a ring sometimes soon? 301- 402- 2624 is the office number
-
I use long throw handles most of the time, but I live inland and learned under the coaching influences of Jeff Burka. Longer throws means less work for the pilot, . . . you can get the kite totally flat and parallel with the ground. So edge floats and field recoveries are less effort and look smoother. My go-to handles are 17 inches across the gap. I have several sets in this length, a hand-made set of titanium grade five tubes, a set of wrapped carbon customs from Lolly and a set of no-snag solid aluminum customs from Ben. Each has advantages, the set from Ben are a lesser bend, but they are quite heavy compared to the others. The titanium set still has the hog-rings which catch a flying line occasionally and the wrapped set has a foam grip that's too thick for my liking. I have 15 inch handles, (best on the speed series kites) probably 1/2 a dozen sets of 12 and 13-1/2 inch handle lengths, one has aluminum tubes (used on my 50# lines for maximum sensitivity), some wrapped carbon and some steel tubes. I have TC Ultra handles for my baby Rev stacks, since the winder is built in and the holes allow you to pin it down at a specific angle during set-up. You don't need a dozen sets of line and handles, but it surely is convenient when each time you grab one of 'em everything is tuned perfectly, just unwrap the lines away from a stake, hook-on and fly. I guess like anything else, it's what you are most comfortable with, for me long throws serve a purpose. I'm a flailer by choice, so big actions on the kite is how I generally fly most of the time when done as an individual. Team-flying in formation? a shorter handle length is easier to hold my position. In quad competitions or really big-wind conditions I will go to the shorter lengths of handles and longer line lengths. That smoothes everything out nicely and it's what the judging panels expect from a Rev pilot besides. so what do you want to do?
-
you can use Skyshark tubes, but as previously noted they need to be cut down and ferruled. Use 2 part, 5 minute epoxy and clean-out the inside of the tubes first (with a Q-tip and some alcohol to remove the mandrel release agent). Cut 'em with a dremel and high speed cutting wheel, but first wrap your cutting area with vinyl electrical tape so the spar doesn't splinter. USE eye protection and avoid inhaling the graphite/epoxy dust!!! Flexibility is one of the advantages to mixing frames, but you may need to experiment. I recommend you buy the blemished tubes, direct from the manufacturer if they're available. This way they are a couple dollars each and almost disposable. The ferrule is point 240 (?) and we use a four inch length of solid carbon. Cut down the center spar to make the proper overall length, epoxy one end to completely dry, then do the other side and tape it into position until it also dries, since there's no way to release the compressed air pressure created when you slide in the second ferule. (do the 2nd half several HOURS later to make sure the first end is totally done curing) We like to slightly round the end of the carbon ferule so it doesn't pinch the leading edge sleeve during assembly and make abrasion holes. Skyshark makes a great variety of tubes, multiple wraps and lengths, tapers and straights. go direct and discuss your project needs, Jon Trennepol is a greatly under-used asset and a veteran kite builder. He'd be pleased to assist you. SS is too flexible JB?,.... come on, how can that be? Ah sponsorship, I forgot. (wink, wink) Anyway, just add another tube inside the leading edge sleeve to double up the thickness if necessary. The down-spars can be tapered or straight. Personally I prefer a tapered tube, since the triangular surface area of the sail is so small, why carry extra unnecessary weight there. The ones I like best are "Response 12" (long ago discontinued) but their new "Black Diamond" brother is a smashing success story as well. These are sanded, painted tubes that taper and they are so strong. 2 wraps, 3's and 5's I believe. Sometimes they have super-strong 7 wraps, or was that just a nasty rumor? The primary reason to use REV tubes is convenience, not some vastly superior performance factors and certainly not at a cost savings either! "Convenience" costs money,.... you will learn more by doing it yourself and experimenting though. Chasing a lower weight in your kites is the first of many projects to come, enjoy the journey and keep us informed of your progress.
-
the triple stitched zig-zag stitch is generally used in conjunction with double faced adhesive tape. This technique is nice and easy with straight lines, (Revs are like this) but Ken McNeil does this stuff on his shaped sail dualies (centenary cut ~?~) by adhering a curved edge to a straight edge. The shaped sail grabs more air so a "standard" can fly in lower wind conditions. You don't even have to sew if you use the correct double faced product. The best on is 9460 adhesive from 3M company. You heat the material after application and it fuses the pieces with a 1/4 seem that will outlast the fabric. Our 1point6 design is made of a single skin of Icarex material with all the assembly done as a "no-sew" using 9460 tape. This method is very light weight and strong, perfect for a huge wind range with the bottom edge resting at indoor capable and the top easily 10 or 12 mph. Some materials can't be sewn at all, mylar scrim and orcon must be taped or the perforations will tear thru the material in moments. You can sew thru the tape, just as Revolution and many other quality manufacturers do, then you get the best of both worlds!

-
My problems with the indoor are a personal concern I guess. I have so many hours on the outdoor models that I find the differences between the two models difficult to overcome. (I know, practice some more and all that could change!) Here's the first thing, easily noticed about the differences between the two models. I see that the down spars are much closer together (towards the center of the sail) on the indoor. For me that means my hands can't be as far apart when flying it. How to overcome this "concern"? I'd say to make a 1.5 with lighter weight materials, like a single skin of Icarex or a mostly-skin of Orcon, with Ixy to reinforce the higher stress areas only. Orcon fabric isn't in any way durable, it has to be assembled with adhesive rather than sewing also. The indoor model is taller on the down-spars, so the flight dynamics are "centered" deeper into the sail. That helps to grab a big section of air-pressure, but makes changes in direction more difficult, side-slides included. Going to a smaller sail shape will make a kite faster, but I don't see that as an advantage to indoor flight either (hence my aversion to the Rev2, even a highly modified one). The best performances (my personal opinion again, to be sure!) are S-L-O-W and graceful. Throwing the kite around or ignoring the reverse characteristics is a distinct disadvantage, particularly in competition. There are advantages and disadvantages to using a bridle too. "Catches" are more difficult, but the kite's action on the end of the strings is smoother, due to the de-tuning which a bridle's slight slack in specific areas allows. Twitchy movements are lessened, but is the compromise worth it for your particular flying style? The indoor could be assembled with standard styled end-caps and bungie. The insertion style of cap assembly leaves the connecting lines exposed to abrasion and abuse. Eventually they will fail, then many owners adopt a new connection method to make the kite more durable. Speaking of durable. How much weight are you willing to carry to insure the kite can fly indoors but not implode with a strong input command? The attached photo shows a local guy, Dave Ashworth who makes a killer indoor or low-wind kite. He's created an indoor Blast, a modified 1point5 and a Tirips (Spirit spelled backwards)

-
the SUL 1.5 B-series is Revolution's BEST product A set of race rods is only half of the equation, make sure you get the lighter weight leading edge sleeve as well.
-
I had that kite first (for it's KITELIFE review, before Monkey), but in my local conditions it was virtually unfit for flight. It has 8 wrap center frame members and the sail is drum-tight, offering beautiful construction and design. No flight in less than a stiff breeze would be pleasurable. If you live near some pant-leg-whippin' routine ocean breezes though, you may enjoy it a lot! It will certainly be both a new experience and a challenge to "master".
-
you can advise them that indoor festivals are held within the National Air & Space museum year March. I've been going down there for at least half a dozen years now. We have flown in between the priceless displays and all around the spectators too. If pressed hard enough, I might be able to come-up with a video you can share with the authority figures. If the event is sanctioned by the AKA you get a liability insurance policy. A decent location is the toughest part of learning to fly kites indoors!!!
-
it's all straight-lined 1/4 inch seams and a single skin of Icarex, what could be easier to make?! My first kite was a knock-off, I was 38 at the time and wanted a custom sail, after 7 years of flying factory products. Man was it ever crap too,... but I won a building medallion @ Smithsonian 'cause it flew just fine, they judge on four categories, thank goodness. It had duct tape on it and I'm not kidding! The 3M bonding stuff?, you iron the adhesive, to set it permanently. I've used three or four of these no-sew kites down to completely destroyed rags, probably a couple thousand hours on each, all hard abuse and lessons. Stuck into trees, balancing on signs and fence posts, slammed hard by my club-mates, particularly Harold! Andrew Albosta has a saying, in our kite club. Anybody can fly any kite for 3 or 4 minutes (in competition, as an example). We want a kite you can fly all day long, standing on only one foot. A kite that floats on the gentlest of motions,... hence the long throw handles in case there's no air motion. I can add energy thru my feet also, but I don't want a run-around, that's for sure!!! Heck, if there's even a whisper of a breeze, several of us are sporting these huge grins yet again! Do you need a no-wind kite? I personally don't like how the stocker Indoor REV flies "outside". I have even fabricated a bridle for it, after much testing I still don't like it outside, bridle or not! I much prefer a bridled REV 1.5's traditional style of flight dynamics, with the down spars MORE separated, away from the center of the sail as compared to the Indoor model. I can keep my hands further apart, yank & spank with abandon and generally be a flailing hazard to those people who are standing too close, in my personal space. A "no-sew" is fine in a dead-calm, but if you can get 2-3 MPH (steady!) you want a SUL 1.5. The venting helps with backing up and smoothing out bumps in the wind. Listen to me, you can't make a kite as good as the factory's "B-series" FOR THE MONEY they charge. you get a taped and sewn polyester sail, a great panel layout and a proven design with hundreds of loyal followers around the globe. Ben Dantonio calls us his family, I think this philosophy is universally true for us all! So if you want to make a no-sew, that's fine,... understanding it will cost you more (and probably not be as versatile either!) is a good place to start. Is it worth the hassle? I make one or, at most two kites per year. At that rate it costs me five or six hundred bucks for whatever I'm working on. It better look cool and fly super for all that aggravation, cost & hassle involved. If you can, assemble a group and do a cooperative project together. That will really teach you a bunch and make the journey more enjoyable. YOU AIN'T GONNA SAVE MONEY! I just recently received a new B-Series, with an SUL leading edge sleeve tube on a standard Mango colored Barresi sail pattern with a complete set of Race frame members. After tuning/modifying for my personal style, I gotta' tell you how great this puppy flies. It's not no-sew effortless flight, but it certainly has the lowest wind range of any REV factory kite I've ever flown (besides their indoor). I highly recommend you acquire one for yourself, particularly if you live inland like me!
-
almost forgot the critical point. If you held a 4 by 8 sheet of plywood directly against the wind, how hard would it push on you? Now angle that board either forward or backward 30 degrees, pushes much less, correct? Well you need to add DOWN to your tuning of the handles so your kite gets "square to the wind". It would seem that you'd add "UP" to get the kite moving better in forward flight. What's actually happening is the reverse, as you add more and more "up" is your tuning, the wind bleeds off the pressure at the bottom of the kite (trailing edge). How to test for proper "DOWN" Place the leading edge of the kite on the ground, inverted. Now shorten your bottom leaders a little bit at a time, until the kite will back-up inverted. That is how much "down" you need in your tuning. Lines even? An easy check to improve flight is to drop each flying line loop over a single stake after removing from the kite. Now, go back to the handles and pull 'em up tight,.... do they align perfectly in your hands? If not, adjust either the lines or the leaders.
-
Hi Dean, I'm a light wind specialist, it's the local conditions around the DC Metro Area more often then not. I'd say there are several things you can do. First, make your handles longer or buy longer throw handles, just for low wind. If the stock ones are 8 or 10 inches long, then go to 15 or 19 inches (measured across the gap, not along the parameter) Next, shorten your line set. if you have 120's go to 60,... if you have 80 footers go to 40 feet. Next examine your sail and frame. Change the frame to the lightest stuff you can get. consider 2-P tapered down spars from Skyshark together with a Race frame from Rev in the leading edge. See if your elastics have gotten longer. Tighten the tops, or remove the elastics on the down spars (at the top) entirely. Tie your end-caps directly into the frame with some heavy dacron or high-test bridle line. The caps should be perfectly flush with the leading edge sleeve, so they don't catch there, so don't start by tightening the bottom elastics!!! Dump the sleeving (from both ends of your flying lines), that's another darn tangle point! Make a set of new leaders, the top ones should be as long as the distance between your two flying line attachment points. Add tuning knots, to the bottom leaders only (avoids another tangle point for flying one handed, doing 3D moves, or just spanking the darn thing!) Leaving the top leaders full length, at all times. this path allows you to gain muscle memory for throws and catches. Consider a more responsive bridle, or practice without one at all. Examine the stock bridle, see the hinge where the two pieces connect? That hinge should be no bigger than the diameter of a Sharpie Pen. Look at the middle attachment point on the across birdle. See how there's a lot of lateral movement available? That all needs to be locked down tightly, so every inch of commands actually reach the frame and sail, "Sloppy bridle" is fine in a big wind, but counter-productive in low or no-wind. I would recommend you stay on the 90# LPG, it will not pick-up foreign substances or tangle nearly as easily as other brands or lighter weight lines. After all this crap is done you'll still need to practice too, particularly the float and ground recovery techniques. Here's another option. Order a John Barresi SUL 1.5 kite direct from the factory. You want a race frame and their ounce & half nylon leading edge sleeve (instead of that 3.9 dacron "pig" that comes on a stocker) Anything more is going to require your making your very own specialty purpose kite. (Eliminating the venting on the entire kite, make the center vee 12 inches, instead of nine. Make the sail bigger, but make certain it weighs less too! Consider making the kite as a no-sew sail using 3M's 9460 Adhesive tape) Email me if you're interested in a custom bridle or training wheels directions. I'm not the national champ, but I betcha' I could fly most of the day in a phone booth on fire. I pray for no-wind, actually prefer it this way, even in competitions. I think I own fifty Revs, most of 'em are for low or no wind flying. When conditions are the toughest, I've probably got ten thousand hours experience in a dead calm. We call this indoor flying with an unlimited ceiling <LOL>
-
welcome back professor and my best to your partner\bro too! revflyer
-
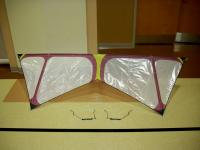
I just made a new "no-sew" Rev styled kite out of Icarex. My old one was a completely tattered mess, having literally thousands of hours on it. It's a little bigger than the stock 1.5 in height (32-1/2 inches instead of 30) and the center vee is cut-out to a twelve inch depth instead of the stocker's 9". There's no venting or sewing, so it's really light and with a larger surface area. Imagine the indoor Rev, but with none of the squirrelly flight dynamics. Oh my gosh, I'd forgotten what a crisp new sail feels like!!! The kite flies itself in our local conditions. The design parameters were worked out by the KiteSquid back in '99 and I'm sure glad I've got folks like him in my area. I'm a concept guy, he's an implementer,... what great team we make. I'll draw a cocktail napkin sketch and then a week later he'll hand me a prototype to test. I feel like I've won the mega-lottery every time we pair-up to do a cooperative effort. The picture is our efforts for the Smithsonian Kite festival back in '99. The two kites were printed thru an ink-jet printer, then rare earth magnets were added, so they'd lock together in flight at the leading edge.

-
the height is about a half to a third of the down spar length. I use 16 inches (point 125 tube) 'cause the sticks come in a 48 inch length. The fitting mentioned above mounts about a foot south of the top of the leading edge. The end cap is point 098 (yeah I know it's too small to fit on the tube, it works, force it on but don't glue it!) The truss lines should be 90 LPG, tight to each endcap and one long line running between the two halves/wings BUT not so tight as to 'cause frame distortion!! See Antman's pictures, see how the frame is curved? That should be loosen or it's sacrficing the lower end of the wind range. The truss lines should pass thru the caps and wrap twice around the thing, like the bridle does on the rev caps. You don't want the lines to move, no knots either! I hold 'em in place with a tiny bead of 2 part epoxy. If you use Crazy glue to stuff takes all night to dry, don't say I didn't warn you either!!! I flew the first 7 years without "training wheels", actually laughed at folks that used 'em. Now even my indoor kites have them. The picture is an ocron Tirips owned/made by Dave Ashworth being flown inside the Air & Space Museum

-
I was approached by members of the Smithsonian kite festival advisory board back in November about doing a festival in Tobago. Apparently the event is 8 or 10 years old and one of the sponsors has seen some guy in wacky clothing chasing folks at the washington monuments in '99 flying a four stringed kite that looked like a crushed bow-tie. The board members said the sponsors didn't know the guy's name, but the description certainly fit me perfectly, . . . so if I was interested, they'd pay my airfare and hotel for a few days to fly on the island (it's only 7 x 26 miles) for a one day event the 30th of December. I work for the federal government of the USA so I couldn't accept the offer directly (Ethics Approval denied), neither could the misses, Barbara. The coordinator said she'd handle the government scenes and give me cash, so I booked the flights. We're going from the 27th of Dec until the 4th of January for a one day gig. SWEET! I'll try to take some pixs and do an article for AKA Magazine afterwards. I also went to the Dieppe festival in Canada this year with my bride. We paid our own way and worked so hard the sponsors are covering me to come back in 2009. We gave Jake kind of a warranty, if you're unhappy with us it won't cost you a thing! The treated us like rock stars. We hung-out with some of the best kiters in the world, half of 'em "no speaka-united states" either. They furnished excellent meals, adult beverages and ground transportation, all I had to do was chase people with my kites! Heck I've got years of practical experience doing that from our 1st Sunday Flys downtown DC on the mall grounds. I must have tapped a hundred heads/hats during the 6-7 days we were up there. I've flown in South America too, but that was a trip my wife specifically stated as "NOT a kiting vacation" HA, sure dear!

-
the biggest difference is because of the third "down spar in the middle" (a spine if you will) The Rev is two triangles tied together at a central point on the leading edge. You can affect each wing independently. On the Spirit there's a dilution of your inputs because of the spine. You simply can't affect one wing independent of the other. Adding more curve to the spirit's spine and the kite comes alive, it's much more floaty than a REV already. You can't do a catch (like 3D flying w/a REV) on the spirit unless it's done sideways or downwind. The leading edge is NOT at the edge, it's partways down, so that has a more equalizing flight effect between forward or reverse. The spirit kite VERY EASY to fly, it will accept dual line push-pulls or quad-line like wrist rotational movements equally well. My kite club has played with this design for half a dozen years, it's very versatile for a builder. We've made it slightly larger on 42 inch Avia spines and also significantlt smaller with framed components made of solid micro-carbon. We fly a modified model made of Orcon indoors too. You can teach somebody off of the street in a few minutes to fly the spirit,.. it's almost impossible to snag a flying line and the visual platform is better for your graphics when compared to a Rev. It will dead-launch with a simple tug on the lines. The kite really prefers long throw handles too!

-
a free custom kite from Ben? I hand delivered my birthday card, it was a 12 by 4 foot poster, mounted on outdoor foam-core, signed by every single person in the state of confusion. The rest of you folks can relax now, 'cause this baby is going to good home out east, where it can play with lots of other kites just the same shape. I kind of laughed at all the other cards thrown into the trash after my buddy got a glimpse of my b'day wishes effort. Save the postage gang, this contest is all over except for my opening of the pony package.
-
Quad handle selection is like choosing a putter in golf, you don't need the latest technology, whatever knocks it into the hole is perfectly sufficient. Handle length is pretty closely related to local conditions. I can't remember the last time I use handles less than 15 inches across the gap. But if we get 5 mph breeze (that's steady!) the schools will be closed for a week due to the storm! If you fly in no wind, you certainly need specialized equipment and techniques, but the cheapest, easiest fix is to add length to the bottoms on your handles. 17 inch gaps in no wind is about as effortless as is possible without additional kites or parts. Almost anyone can fly a routine for a few minutes in demanding conditions, but try to put on a show for a few hours and you'll quickly see the advantages of longer throw handles, particularly if you perform in tough locations. We do a gig at a winery in the fall, it might as well be a telephone booth on fire! It's side-hill lie, up against huge trees, with the folks walking thru our area constantly. They don't cut the grass either, it's not even smoothly angled downhill! Tricks come easier on long throws, but technique is the key and it's vastly more difficult to grasp that proper technique if the handles are short. I give lessons and folks are flickin' the kite around during the first hour. Without big handle movements no wind flying is just a throw and a glide, not smooth and controllable at all! My grip is a very light touch with index finger and thumb almost exclusively. Held very high on the handles,... try this: "how fast can you flick your fingers, as opposed to a wrist rotation of equal motion?" You'll find those little finger-flicks are all that's necessary for effective flight, if you have the proper kite and line lengths. Everybody looks good in steady 8 mph off of the ocean. Show me what you've got in that blazin' phone booth! most folks that fly one of my kites comment on how much easier it is than their own,... that's because I've tuned it for no stinkin' wind. I prefer the dead calm of early mornings, actually cheering at competitions when folks ask for a wind reading. Welcome to my world! At least six months out of the year it's SULs & Indoor kites in the DC Metro area or you are watching from the sidelines. Do you need long throws? I guess not. Will you appreciate them?, I'm bettin' lunch you do!!!
-
Here's a new thing to work on Jason. When you do the throw both handles are in one hand already, so leave 'em there! Now the kite will go steady/straight in the direction of the throw, so push your handle/thumb forward (add REVERSE) and have the kite paste itself inverted at the end of the lines. It's rock steady down there and it looks great. Practice your throws "not directly down wind" but instead thrown across the window so it winds up on the opposite edge, inverted and pasted all from your one hand. (learn your weaker hand first!) Eventually you and a partner can "cross the streams" w/one kite's lines over the top of the other. You guys are throwing an x-shape, this looks magnificient in no wind, so slow and graceful. Since there's no wind you guys separate and do a 360, each going in the opposite direction. You fly all the way around each other and finish back where you started. Felling extra cocky today?, .... try to throw your kite in between the lines of your partner (intentionally nesting them?!??). Then you have to fly them apart. You will not make this look good for many sessions, but the laughter and entertainment value is worth the effort. Competition isn't about winning (at least to me!) It's about putting on a good show for the gang who attends. After the first couple of comps, those other gals & guys will be your friends or acquiantances. Let them know "the unexpected" is your speciality! You can't win without some risks, executed well, ... so a throw & catch or some other risky manuever should become a routine part of the effort.
-
I determine the top leader length by insuring it will not reach all the way across the gap (potential tangle point!), then shortening the bottoms until the kite willl back-up from an inverted position on the ground. Add another knot an inch longer (on the bottom leaders) than my preference for teaching and that's it, all done. I also like longish top leaders, 'cause that extra reach makes "catches" much easier and better looking. I've been burned twice in competitions though, by the "too long top leaders" tangling-up with the bottom flying lines during slack line tricks. Since shortening to less than the gap I've had no more crash & burns due to equipment.
-
Hi Jesse, If you live in Baltimore you should come fly with us sometime. We have conquered these fickle local conditions on quads. Check out our website for further information. wowkiteclubDOTcom We'd be pleased to share our knowledge and modifications with you! We have at least a dozen skilled pilots to assist you along the no-wind learning curve. I own about 40 REV products and never travel w/o at least a handful of 'em.
-
-
Hi Ben, you know I want in for an all-white sail also. Naturally, I'd want 'em in SUL formats, preferably with a white leading edge sleeve??? You can keep the center logo there, but maybe consider doing a single skinned "paintable" version?, (so it can be tie-dyed & steam-set easier in a big pressure cooker). light weight Polyester sails please!!!!! paul wowKITEclubDOTcom
-
Those titanium handles back-up even better in Scottie Weider's hands though (HA!) Light weight and very strong they've been run-over by the park service vehicles on the DC/national mall. There's so much REVERSE possible, you can flick the kite inverted anywhere in the window, facing in any direction. I'm working on "quarter-turns flicks" right now. I generally fly early in the mornings when there's no wind on 60 ft lines, many times in a parking lot to insure solid footing. A big stride, with a yank & spank style, . . . don't stand too close to me! Imagine how much easier flying one-handed would be, if your had lots of throw length, just a little flick on the top of either handle adds your inputs (I balance the two handles on an index finger). Long handles are pretty useless in a steady 10-15 mph breeze off of the ocean, just too sensitive. Where I live, they are required at least six months of the year. PS: I have an even longer set for dead-still air, they almost drag on the ground (19 inches across the gap)! Combined with the right kite & tuning though you can fly standing pretty much stationary. Since you have so very much action available in your handles you can do slow, graceful axels, throws & catches, killer floats and inverted slides. All without moving your feet. People frequently ask us how we can fly without any wind.
-
I measure across the gap between the two attachment points, but you must be very SPECIFIC when ordering or you will not get what you desire! My favorite handles are almost 17 inches across the gap, (but I live in the land of no wind, so making a custom set was quite necessary). They are long, light in weight and exceptionally strong. You can see a picture of them down at the bottom of this link. One of my young apprentices is demonstrating. < http://www.wowkiteclub.com/tarara.htm > I'm very pleased to see the factory and sponsored fliers recognize the advantages of going even a little bit longer then the old stockers.