Jump to content
KiteLife Forum

photomom

Members
  • Posts

    700
  • Joined

  • Last visited

  • Days Won

    24

Everything posted by photomom

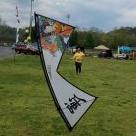
  1. IT FLEW!!!!! The wind was very light, almost too light. But it went up and I was able to do turns and hovers with no problem. YEAH!!! (Pics to follow.)
  2. Well, there's no chocolate sauce but the bunjis, end caps and bridle are now on the banana quad line. Tomorrow, if the weather cooperates, it will have its inaugural flight. If it flies, there will be photos. If it doesn't, it's back to the drawing board. Wish me luck.
  3. photomom

    Zen with NYM

    That touch of color on the Zen is perfect.
  4. photomom

    B-pros

    Love your B-Pros. My favorite colors.
  5. I think it is possible if you can remove the sticks and not distort the sail with the sewing. And you would have to be careful where the bridle points are.
  6. Here it is. The first image of my homemade quad line. It needs just bunjis, end caps and bridle and I'm good to go.
  7. Hi alf, Welcome. I'm afraid I can't help you find a place to fly. I'm on the Crystal Coast in Morehead City. WE fly every Sunday morning at Fort Macon State Park. We also have a local kite shop, Kites Unlimited & Bird Stuff, Etc. We're not too close to you but if you happen to get down to the coast, look us up.
  8. Well, I'm very impressed!!!!!!!!!!!! Wow!!!!!!!!!!
  9. Wonderful to both milestones!!!!!!!!!!
  10. I'm making a closed sleeve for the LE rods. Tabs are connecting the sail to the LE sleeve. Where the mesh usually goes, I'm leaving open. I hadn't thought about no sleeve at all. Interesting. Thanks for the information.
  11. Definitely more complicated than a Della Porta, a shield or a rokkaku. It's the leading edge and tab placement that makes this a harder build in my opinion. The 48" ruler is my best friend.
  12. I used my Elliot Shook Mesh quad as a pattern. The last time we were in Corolla and visited Cath and Elliot, he gave me a lot of tips on the construction of his quad line kite. The appliqué is a simple design and the sail is in three pieces; two wings and a center section. It went together in one evening. The hardest part was getting the appliqué centered and even on both wing sections. After the initial measurements and cutting ( and a lot of thinking and planning), it has gone so quick I hadn't even thought about documenting it. I will post a photo when I get the leading edge on it and, hopefully, when it flies.
  13. I've built several single line kites over the past few years. All different shapes and sizes. This will be my first stunt kite build. Finished the sail yesterday and will make the leading edge today. Not only is it my first quad build, I am experimenting at the same time. I'm going to omit the mesh and just attach the leading edge with tabs only. Will either frame it with diamond rods, three wrap rods or green race rods. A lot depends on the wind the day I'm flying. Wish me luck.
  14. Take your time. That will give me a chance to finish the sail I'm sewing just for this frame. [emoji6]
  15. It was good to meet everyone this weekend. And it was good to see you again, John. Thank you for letting me just come and hong out for a while. I hope you all have (had) a safe trip home and I hope to see you again on a flying field somewhere, anywhere. Fair Winds All Karen
  16. Yes, Kites Unlimited and Bird Stuff has lines in a several lengths. I know they have the 120' for team flying and either 80' or 100' for sure. Don can also make a custom set if you need something special.
  17. I am amazed at the distance some of these people are traveling.
  18. Many a time Don and Jeri have kept the shop open for a while or have opened early if they know someone is coming to get an item. All it takes is a phone call. And for that matter, if there are people in the shop, they stay open until they are done shopping. That'a the beauty of a family-owned and run kite shop.
  19. So glad you got them and you like them. I feel sure you will like the way they fly. Can't wait to see the stack. Woohoo!!!!!
×
×
  • Create New...