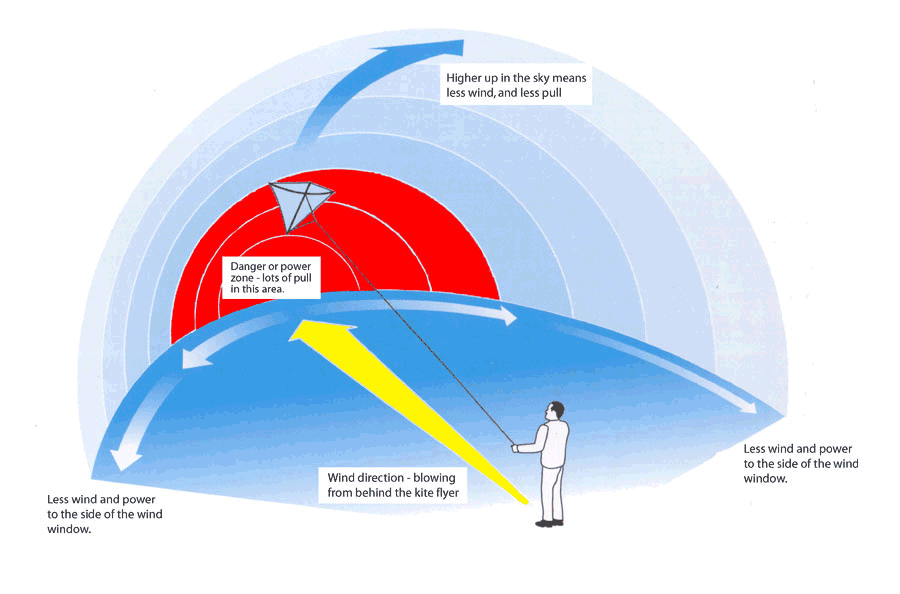
Most of us have seen some of the basic diagrams and introductions to the wind window as it relates to a sport kite flier… Oversimplified, it’s the more or less half-circle space downwind in which your kite is able to fly with the strongest in the middle and power reducing as you fly out toward the edge.
(image from balticseabackpackertips.com)
In this sense, the concept of a wind window may seem like a simple “at a glance” reference… This is partially true as it will certainly help new fliers get a handle on their flying experience, but I’m here to talk about the incredible depth of the wind window in terms of flight space, effect on the kite and general presentation for both exhibition and competition.
The wind window is quite literally your canvas – understanding that space and some of the dynamics involved in maneuvering through it will surely expand your overall control and flying enjoyment.
Line length and window size
Typically recognized as a semi-circle directly downwind of the pilot, the actual shape and size of your wind window varies greatly depending on:
- Wind speed (light or strong pressure)
- Turbulence (trees, weather, etc)
- Bridle settings (angle of attack)
- Kite weight (vs wind speed)
- Sail design (deep vs flat, vented vs non-vented, etc)
- And more…
For the purpose of this article, let’s assume we’re working with “laboratory grade” wind in the 6-12mph range… Quite often, a sport kite’s real sweet spot exists somewhere in that range.
Now, you may have have the idea that kites on shorter lines fly faster – this is generally not true although it may seem to be the case… Short lines equal a short flight path, which makes the kite seem like it’s flying faster when in fact, you just have less time to respond before the kite crosses such a small wind window.
Flying on longer lines gives you a proportionately larger wind window in which to fly, thereby increasing the amount of space in which you have to think, act and respond before you hit the “wall” on any given side of the window.
If you’re practicing for skills, I suggest 100′ or longer as this will start to give you flight paths that are long enough (distance and duration) to actually evaluate your control and make adjustments mid-stream… If you’re working in a small window, your maneuver may already be done before you’ve really started to evaluate what’s happening, if the window is huge you’ll be able to make several adjustments across the entire maneuver.
Another consideration is the overall aesthetics of flight…
If you’re conscious of what other people might be seeing (such as in exhibition or competition), shorter flight paths equate to faster and riskier flying, whereas a larger wind window allows the pilot to really draw out their flight paths and illustrate shapes, particularly key for building and executing a solid ballet performance.
Here’s a quick video of me flying in Seaside a couple years ago… There are a lot of trick sequences, but you’ll also notice that I tend to favor a lot of long flight paths and shapes punctuated by those tricks, in various parts of the window:
Also remember, the longer (and heavier) your lines, the more potential wind drag and additional weight you’ll need to be pulling through the sky… Drooping lines equate to delayed response, slower flight and a generally sluggish version of your kite compared to when the lines are taut (more or less straight).
Dual Line:
Because traditional sport kites are “nose forward” (no built-in brakes), the shortest effective outdoor length while still having at least a little wind window to move around in is somewhere around 50′ but that’s super short and gives you little to no response time… Seems to me the usual dual line lengths start around 75′, and the wind window only gets bigger as you move toward the typical longer lengths of 100′-130′.
The dual line lengths I generally try to keep in my own bag include 75′, 100′ and 120′.
Quad Line:
With the ability to hover, it’s quite possible to fly a Rev (for example) on as short as 15′, although this doesn’t give much space in which to move around…
For outdoor, I typically use 30′ (urban/street flying) as my shortest and work up through 75′, 90′ and 120′.
To thine own self fly true
End of the day, if you’re flying purely for yourself it’s really about what makes you feel good on the lines… In all things kiting, I always strongly encourage folks to try all extremes or variants at least enough to have a taste because even if it’s “not your thing”, every point of experience is also a point of reference that provides a greater understanding of your own base line.
There is nothing in this world like trying it out for yourself – a compendium of experience, observation and experimentation is the single most powerful tool for finding your natural style and preference… There is no right or wrong way to fly, as long as it’s safe (for all involved) and personally fulfilling.
Pressure vs sail loading
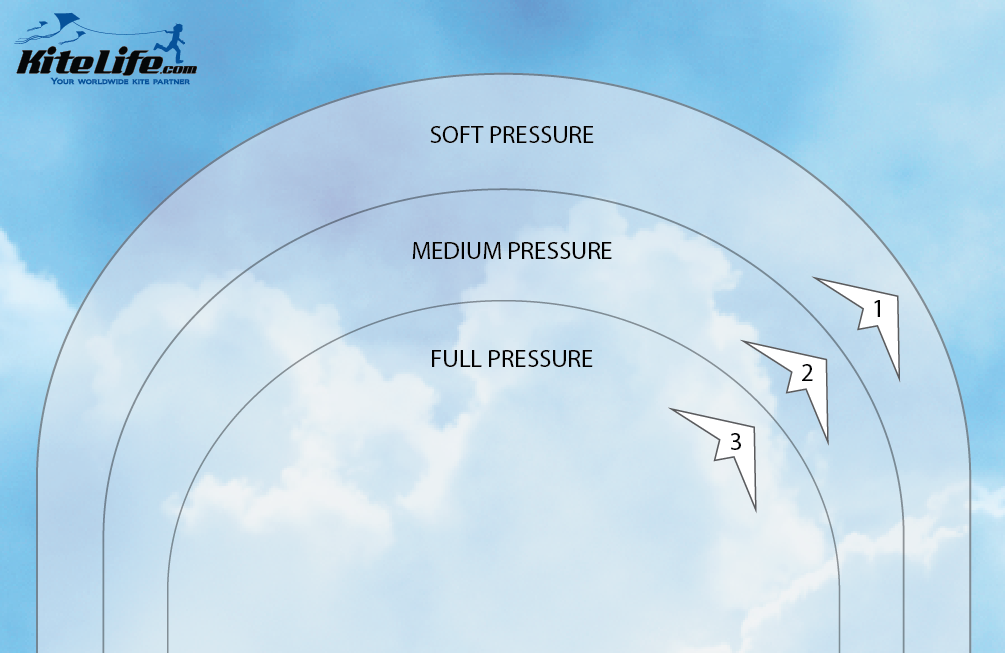
For this next concept I’ll explain how a kite sees the wind window, oversimplified into three basic pressure zones…
As a sport kite flies from zone 3 into zone 2, there is a partial decrease in pressure, and exponentially less pressure going from zone 2 to zone 1… What you can do flat-footed and well loaded in zone 3 requires a little body movement to accomplish in zone 1, such as drawing back on your lines to add the tension and sail pressure needed to compensate for being out “on the edge” of the wind window.
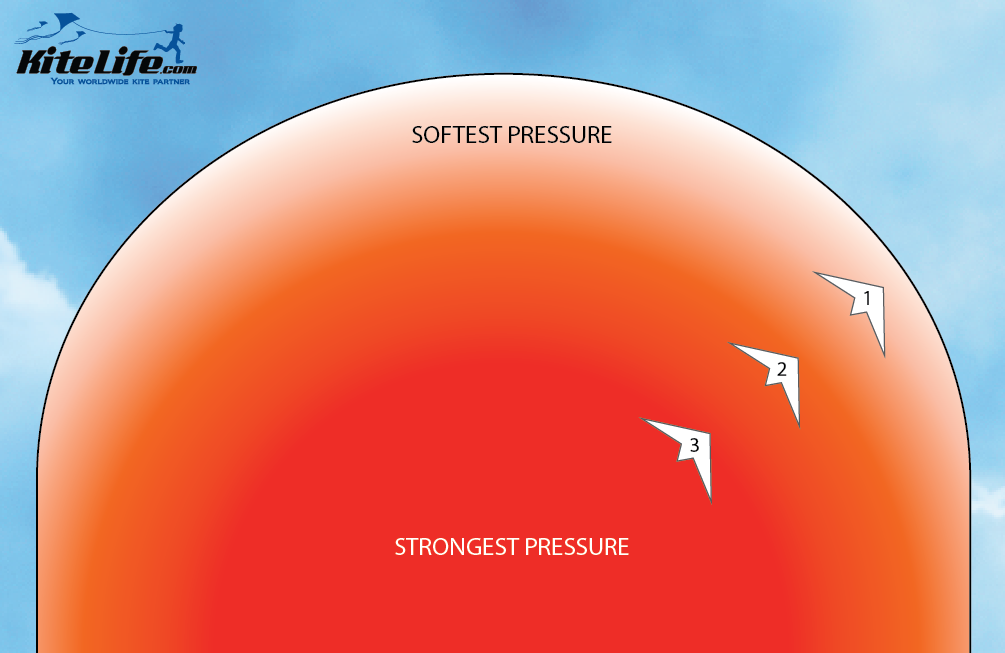
Now we’ve got the very basic concept… More pressure in the middle, gets softer and requires more applied tension from the pilot to power through the edges and back into the middle.
Let’s take that understanding up a notch by realizing that the power isn’t neatly divided into three areas, it’s actually a gradient all the way from the middle to the edge, like this:
Again, it’s all about understanding how the natural wind pressure increases or decreases at various angles in the wind window… Get familiar with the whole range, it’s amazing what you can learn about your kite and flying as it encounters different angles.
Why is there a wind window
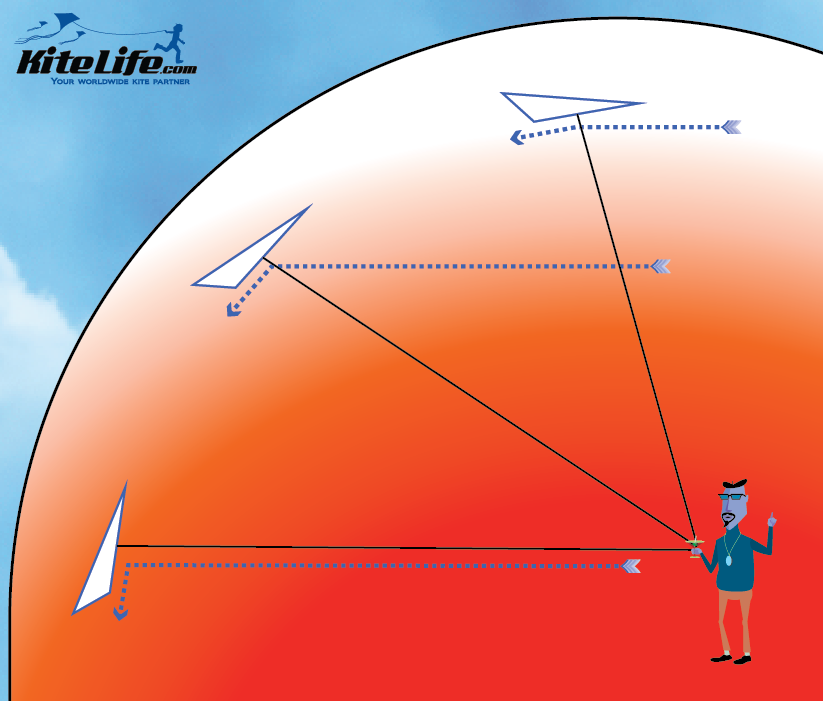
The dynamic at work here in simple terms, is angle and pressure so when the kite is in the center of the window, it’s providing the flattest, fullest profile against the wind… When the kite is on the edge, it’s at an angle to the wind and more of the potential pressure is spilling (sheeting) off the sail:
In the illustration above, you can see the angle of wind is ALWAYS horizontal but the angle of the kite changes because of the bridle and line(s) connected to the pilot… Accordingly, the kite spills more wind near the edges, and grabs (loads) more of the same wind when closer to the center of the wind window.
Dividing and moving through the aerial canvas
Now that we understand a little more about the wind window and keeping our kite loaded throughout it, what do we do with that space?
I strongly encourage you to check out my “Flying With Intent” and “When it Becomes Routine” articles for more in depth theory and ideas, but for the purpose of this article I’ll provide a simple frame of reference and a couple of things you might practice to get a more practical application of knowledge…
Sharp turns
Because you don’t have as much pressure on the edge of the window, the same input that gives a nice sharp corner in the center (power zone) might very well cause your kite to unexpectedly stall… The easiest way to compensate for this is to make a more delicate input and/or draw tension into the lines through your turn and into the exit path.
Banking through the edge
Curved or banking turns greatly lessen the chance of an unexpected stall and allow you to grade your input on/off gradually… Accordingly, the smoothest way to move from the center, through the edge and back to the center again is to fly an arc, adding just a little power (tension) at the deepest part of the arc.
Banking up the edge of the window will often require you to walk backward in order to maintain drive and tension, banking down the edge of the window will sometimes benefit from you walking forward through the first part of the arc and stopping to apply some power as you turn away from the ground.
Stalls and landings
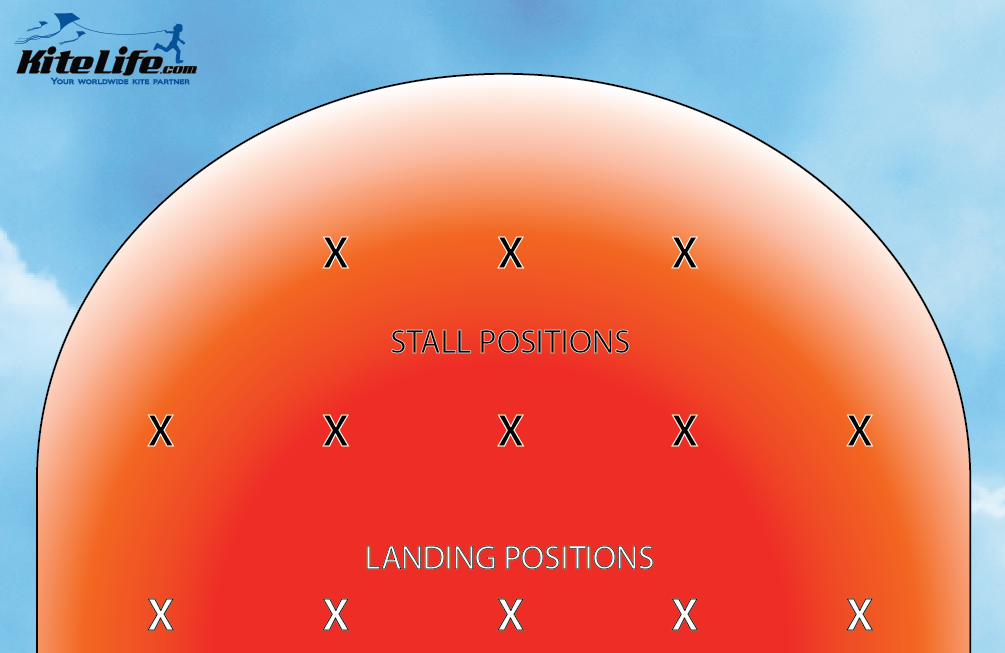
One of the best ways to feel how the kite responds differently in different parts of the window is when you’ve got it in a stall – so for example, if you stall or try to land on the right side of the window, you’ll feel the wind naturally trying to push the kite left… Try it in the various areas and see what happens each time, play with compensating for the push of the wind and use it to facilitate certain tricks or maneuvers.
Above is a basic practice grid for stalls and landings, see if you can hit all these points individually, really get to know each one for it’s own unique effect on the kite… Then try stringing some together, move from stall point to another and see how your necessary inputs change from point to point.
I hope you’re motivated to begin your own exploration of the wind window – there is a big sky out there, and it all deserves to be flown in… With any luck, we’ll cross lines in some part of it and have some awesome kite stories to swap.
Until next time – one sky, one world, indeed.
John Barresi


