Materials needed:
- Soldering iron with pointed tip (30 watt, no more, no less)
- Metal Ruler
- Silver or White Sharpie
- Glass table (used for cutting fabric with soldering iron)
- Mylar
- Kevlar (or some other tough and durable fabric that can be melted together)
- Ripstop Nylon
- Sewing Machine
- Stitch Puller
- Lighter
*Fabrication Notes
- Make all cuts with a soldering iron.
- Always use the glass table for cutting.
- Always use a ruler to guide your cuts.
- Be careful not to burn yourself!
Step One:
Removing the Old Nose
1.) Ok. The first step is to remove your old nose using the stitch puller.
Be careful what stitches you are pulling out, you don’t want to (A) pull out a stitch that’s not suppose to be pulled (ie. the L.E. stitching), and/or (B) punch right through the sail with the stitch puller.
Remove the leading edge pocket stitching first (in RED), then remove the vertical stitching (in BLUE) used for the spine pocket.
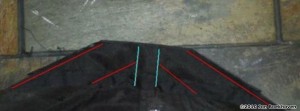 With that stitching removed, you should be able to remove your nose from the kite.
*Notes*
Depending on your nose, you may have a bigger mylar re-enforcement underneath the Kevlar material. I think its best to replicate the original nose, so if yours does not have that mylar piece, don’t worry about it. For the sake of this tutorial, we will be using mylar.
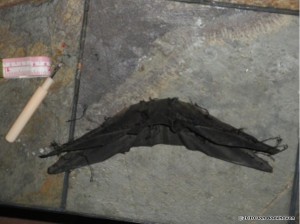
The Mylar backing should still be attached to the Kevlar material, so the rest of the stitching should be pulled, and the 2 pieces separated, like so:
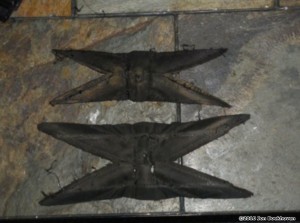 Try and flatten these pieces the best you can – they will serve as templates for your new nose.
Step Two:
Surveying and fixing the Real Damage.
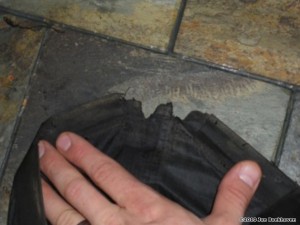
Your sail is most likely going to have some sail damage underneath the nose – most likely fraying or some tearing. These need to be patched before we continue.
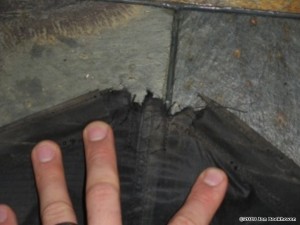 For this damage, you can use a piece of ripstop nylon to sew over the damaged areas. This will also provide you something to stitch the new nose to. But first you need to CAREFULLY melt ALL the frayed edges of your sail (using your soldering iron. I found that the barrel of the iron serves well in most areas).
(I would suggest you adhere some kind of re-enforcement tape to the damaged area for added protection)
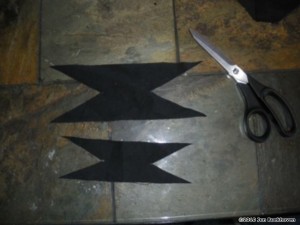
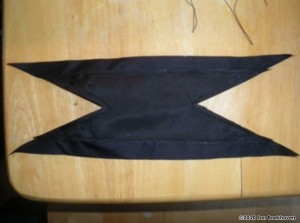
 Next is to cut your patch from Ripstop Nylon for the nose, like so:
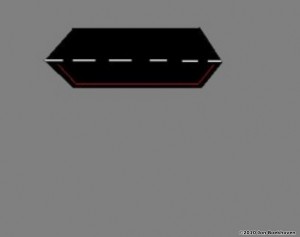 (sorry for the low grade illustration. lol)
Cut the patch in a reverse hourglass pattern, making sure that it is wide enough to cover any damage, but not so wide as to cover the leading edge. This patch will protect the damage, and add more surface area to stitch your nose to.
Fold the patch in half (shown in white) and single stitch it to your nose (shown in red).
*Things to Note:
- When you stitch this patch on, be careful to not stitch your leading edge holes shut!!
- When applying the patch, try and cover up any stitch holes you may have exposed on the sail.
Step Three:
Fabricating your New Nose Parts
Next is to take your old nose pieces, and use them as templates to make your new nose.
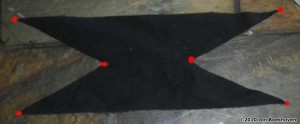
Do this by first placing your old nose parts on the BACKSIDE of the new material you are using. Then make 4 small dots on all 4 corners of the “hourglass”, then 2 more on the inside corners (shown below in red) of the new materials.
- Make sure to fully stretch your nose across the new material – you want to make your new nose the EXACT size of your old one. TAKE YOUR TIME!!!
Cut the Material by lining up the dots with your ruler and heat cutting them with a soldering iron (NOT scissors!!).
Step Four:
Stitching your Nose Parts Together.
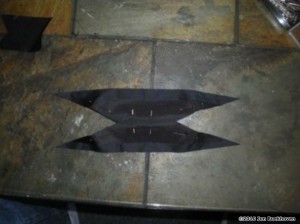
Pin your nose parts together like so:
Make sure that you have the front side of the material facing up for stitching.
Then Stitch around the perimeter of the Kevlar piece, securing it to the Mylar piece.
**NOTE: Be carful stitching, and go slow on the sewing machine pedal. You may want to manually use the sewing machine when you’re maneuvering the corners.
Step Five:
Sewing on your New Nose!
So you’ve got your nose and you are now ready to sew it on.
Take your nose piece and fold it in half. Place it on the nose of your kite, and pin it into place (use as many pins as you need. The more the better I say, as long as it doesn’t get in the way of the sewing needle).
This is the crucial part, and GREAT CARE should be taken to make sure the nose is correctly pinned in place.
Things to note BEFORE stitching:
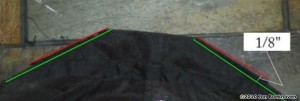
- Make sure your nose is pinned to the kite in such a way that it can be sewn to the very edge of the leading edge, while leaving 1/8” of Kevlar (0.5cm) hanging over the Leading Edge.
*green = Leading Edge
*red = Edge of the Kevlar
Next step is to sew the nose. Use a single line stitch, going over each line twice (if you have a reverse setting on your sewing machine that could be used as well).
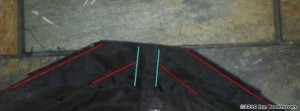
Work from the outside in, stitching your leading edge pockets first (displayed below in RED) making sure to secure the OUTER leading edge stitch to the EDGE of the L.E. material (try and follow the old stitch line if possible), then your spine pocket (displayed below in BLUE), making sure to leave a 1/8” (0.5cm) gap from the tip of the nose to the spine pocket stitch (to reduce snagging issues when kite is assembled).
Step Six:
Snag reduction on your Nose
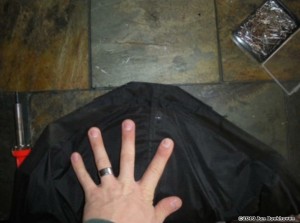
Once your nose is sewn on, it should look something like this:
Next step is to melt the Kevlar edge together (remember that 1/8” you let hang over from Step 5?). I find the best way to do this is with a lighter, CAREFULLY heating small section by small section, then pressing the front and backside of the kevlar together.
After the piece is “pressed” together, I reheat small section by small section, and gently smooth the newly joined edges with my finger.
**note: This is hot work, and you may burn yourself, so BE CAREFUL!! Use a glove, or some inanimate object to smooth if it is too hot for your fingers. Just TAKE YOUR TIME!!
Smooth these edges as flush as you possibly can. The smoother the nose-to-L.E. transition the less chance of a snag point. It doesn’t have to look pretty, it just has to work well!!
All that’s left now, is to re-assemble your kite, and give it a test fly!!
Enjoy!
Jon Boekhoven

