Let’s Stack it up!
There will be, of course, many pre-tried, pre-tested theories and projects, all of which we shall be pleased to hear about and publish for you either in this magazine or on a special page on the Close Encounters Kites website.
 There is a video on the site already to prove that we didn’t do a bad job – or maybe it was just some good, excellently choreographed flying by Marilyn in some good (makes a change) wind.
All I am going to do is write about how we did it and extracted a bit of enjoyment along the way.
This won’t get too complicated because, as you probably know, I don’t do fiddly.
It started when I saw on the HQ site an article written in German about “Emotions in Rhythm”.
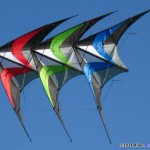
I thought that this was going to be a new release from HQ of a stack of kites already made up and ready to fly. Wrong! It was an article done by one of their associates about three “Limbo” kites made up in to a stack of three.
This won’t be a repeat of that article because one of my many talents is that I don’t speak German and therefore, have no idea what was said!
The Limbo is a strong kite with a fibre-glass frame, just about large enough to work with and relatively inexpensive at under thirty pounds. We ordered up three, keeping in mind that if this were successful, we could add two more stacks, some tails and have a fine show with three of us flying in the arena to music.
The Project
Firstly we had to have a plan to get the engineering principles exactly right down the last detail. So, what is the optimal distance between the kites to give the best control and ensure that they all follow in harmony, easy lift off and no wobble in flight particularly in the tightest of the turns?
 I remember someone once telling me that the spacing should be two thirds of the length of the leading edge – Oh well – that’ll do then!
Another piece of advice was to join from one kite to the next in five places – both ends of the top and bottom spreaders and from the T-piece. Now that’s a fair bit of string! OK, we’ll try that idea as well then!
We already fly a stack of two Eolo, Neox kites – we flew them at a few festivals when there was enough wind in 2009 and will be using them again next year, so we are aware of the problem of transporting the kites and storing them when you get back home.
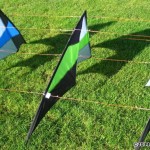
If you take the standoffs out, the limbos will lay flat one on top of each other but if you need to separate them it’s best to give a little thought on how you are going to tie the links.
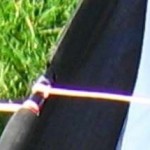
We reckon that our way of making a permanent tag on each kite was a pretty good way to do this and you can then put each kite back in its bag if you want.
 It takes a while to cut and tie twenty tags and ten lengths of line keeping good uniformity but you soon start to invent little shortcuts to speed things along.
If you are planning to make bigger stacks with bigger kites it has to be remembered that the front kite in particular has to suffer a lot of pull from the pack that it is leading and may have to be strengthened with stronger rods.
I have seen people use what they call a Ghost Frame – no sail just a frame – in the shape of the joining lines, attachment points, sometimes with the frame made from a light but strong metal. The flying lines are then attached to the frame. Marilyn doesn’t like green and is not particularly fond of red kites – the blue one at the front then?
The Launch
We used 100ft lines for the test flight – perhaps a little too long for a solo stack but that is what we would use for kites this size flying pairs or team.
Immediately we had difficulty in powering up at low level and it took some considerable effort to get the kites high and moving. We found it easiest to get someone to hold the back kite, keep the lines tight and throw the stack up.
This wouldn’t be necessary in a strong wind though. Once they were going however, all that messing around in the garage at home was soon forgotten.
The pull was good without being strong and the stack was easy to control.
However if you did not pay attention to keeping the kites powered up near the ground where the angle of attack is different, the kites quickly lost it and there is no forgiveness once they start to go. This also happens if the wind suddenly drops – once you are in trouble, recovery is almost impossible.
Don’t get me wrong, if you want to have some great fun flying a nice stack that will impress any onlookers at minimal expense then go for it! We just need something a little more reliable with a lower wind range if we were to do anything in public. Maybe that the kites are a little too small for this sort of thing or maybe if it weren’t so cold out there and maybe if I had the time to mess around with the bridle….?
Side Item – Whacky Worm
We had seen a more sophisticated version by the Swiss guys at Portsmouth and Basingstoke a while back and we particularly liked the one in our team colours of yellow and black. But now there was one commercially made by HQ and we waited all season before we could get our hands on it – The Whacky Worm!
 I did a video straight off to show how big it is (2.3mtrs) stood up next to the wife and then continued along with a launch and had it dancing gleefully to music.
It nearly didn’t work because this kite needs a good and steady 8mph minimum to get it away and see it at its best.
The WW really is a joy to watch on its own – if you had the pockets or enough friends with one each, several all at once would be fantastic!
Even I found this kite very quick and simple to erect. Similar to the Amulet, from the same stable, most of the rods pleasingly stay in place when you put it away and assembly is by joining three rods down the top half of the spine ensuring that they slip through all of the sleeves and lay against the back of the sail.
The kite costs less than seventy pounds but disappointingly doesn’t come with line.
