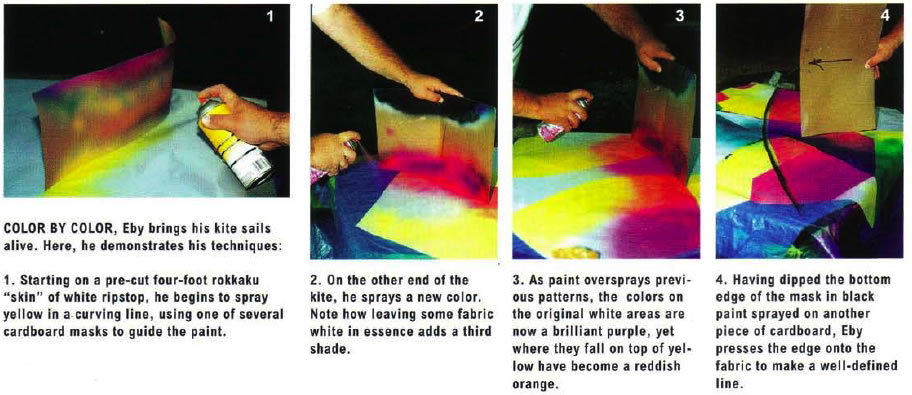
I admire the beautiful appliqué work of today’s kite artists. But one long-time kitemaker told me that the only way to develop those effects is by “putting lots of cloth through your sewing machine.” I’m too impatient, and began looking for a quicker avenue to multicolor kites.
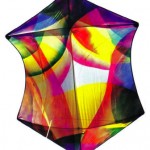 I found it in the article about spray painting ripstop by Chris Dunlop (Kite Lines, Winter, 1992-93). He used a product called Design Master Professional Color Tool, a spray paint offered in many translucent colors that dry quickly, don’t crack or peel and produce great airbrush-like effects
At first, I tried to imitate Dunlop’s work, but without much success. So I developed my own style. Here is some of what I have learned.
CONSIDER YOUR HEALTH!
The very first time I painted a kite was in my garage. I covered my car with a large plastic tarp and spray painted against my truck beside the open garage door. I wore a dual-element air-purifying respirator. But when I removed my mask to walk into the house, enough fumes remained to make me light-headed. And the smell lingered inside and out for days!
Buy and wear a dual-element air respirator while painting, even if outside. Read and follow the safe handling procedures on the label of your paints.
I now paint outside, on the cover of my hot tub on the rear patio, usually at night when there is no wind. (A picnic table would work as well) And make sure to cover not only your work surface-I use a blue plastic tarpaulin-but any other objects nearby to protect them from spray.
YOUR KITE “CANVAS”
I have not experimented with fabric other than nylon sailcloth, although I believe cotton and silk would probably work. I have found great results from Bainbridge’s Dragon fabric and Carrington’s K22. Also I’ve achieved acceptable results with ripstops rated as second, third or even fourth grade, because the paint usually covers the minor blemishes in the fabric.
Uncoated fabric yields better results than coated fabric, because on coated fabrics the paint does not bond to the fabric but to the coating. As the kite skin flexes, either from the wind in flight or from rolling for transport in a sleeve, the color may flake. To minimize this problem, I make larger than normal kite sleeves, and have also found that wrapping a large kite around a cardboard tube will store it without creases.
PAINT FIRST, BUILD LATER
When I began, I first built the kite of white ripstop, including white leading edges or edge binding and white reinforcements. Then I painted it. However, I soon discovered that if I didn’t like what I was painting, it was difficult to correct any errors.
I now paint three to five yards of continuous fabric first, then build the kite. You have many options. You may cut the kite shape from the fabric and then paint the skin, or position a kite pattern onto a pre-painted panel and cut out the desired area. Practicing in advance on paper is a good idea; you can then move up to the more expensive material.
To date, I have painted approximately 60 panels of various sizes, which can be used as an entire kite skin. I have not used more than one skin per kite, but using two or more is easily possible.
I have no clear design in mind for each piece, and do not plan my artwork ahead of time by spraying paper or using crayons. In fact, it is difficult to describe how my ideas originate. Dunlop described it best when he said the technique is “playful inquisitiveness.”
About one in every 10 tries, I look at a kite and say “yecch.” But the beauty of this technique is that you can overspray with flat white or black and start all over, or do something else to fix the look you don’t like. The weight of new layers of paint is negligible on any but the smallest kites.
THE SPRAY-CAN PALETTE
Color Tool spray paint is offered in 46 standard colors. In addition, you can buy flat black and flat white, six glossy colors, six tints, eight metallic colors, three wood tones, three glitters (metal flake), shimmering gold and pearl and white and black washes (which lighten or darken colors). A 12-ounce can costs about $6.50 at florist supply stores. I began by buying five cans in basic colors, plus black. But my first few experiences were less than ideal, for I tried to paint using all the colors. This resulted in color shifts into brown and eventually toward black. So I formulated two key rules:
- Limit yourself to no more than four of your favorite colors, plus flat black and flat white. Some of the most striking and vibrant images I have painted were done with just a few colors.
. - Remember your basic art classes’, which taught that when you lay one color over another, a third color results. Yellow and blue make green, yellow and red make orange and red and blue make purple. Think ahead and use this to your advantage.
. - I began by painting on white fabric, believing a white background to be most receptive to color layers. Anyone who has done house painting knows it is easier to paint darker colors over light ones. Further, over-spraying dark on light seems to intensity the effect of color blending. (It is possible to paint on almost all colors of fabric, however, so you might test different effects on smaller remnants or scraps.)
.
.Sometimes I use flat black first, then spray a portion of the fabric with flat white so I can introduce another warmer color on top of the white. Occasionally I will spray orange or yellow on top of darker colors that I wish to lighten.
PAINTING TECHNIQUES
Lay the fabric flat on the surface and begin painting by holding the spray can about six inches from the surface. Use short bursts and move the can briskly. By painting quickly, the colors remain wet and the second color more easily yields a third.
Sometimes I paint freehand, but have found that cardboard masks help direct the paint where I want it-and also yield interesting design effects. I have several different pieces of cardboard bent into varying degrees of curve, a technique I learned accidentally when I left the masks out in the rain and they bent from the moisture! (High quality two or four-ply poster board sheets about 24 x 36 inches cost less than $1, and I cut them into 8-x-36-inch strips.)
To make designs, hold the cardboard and spray directly onto the fabric adjacent to the mask. The cardboard blocks any errant spray and creates a positive line of demarcation.
To create a softer line, hold the cardboard about one inch above the fabric and spray directly along the edge of the mask, not the fabric. The paint bounces off the cardboard and creates a lighter effect on the fabric than spraying directly.
The speed at which you move your can also helps determine the density of the line. Quick spraying yields a thinner line.
To create a narrow hard line, spray color onto a large piece of cardboard and allow it to puddle. Then take a second piece of cardboard and draw an edge through the paint. Press this edge directly onto the fabric and you will imprint a straight line. Sometimes, I slide the cardboard edge along the fabric, creating streaks that give the impression of motion.
Another interesting effect is paint spattering. Spray paint directly onto the cardboard and tilt it toward one corner. Make the effect you want on the fabric by dripping the paint as it runs off.
Sometimes I cut shapes out of oak tag board, and use them as stencils or to mask an area I do not wish to paint. A local sheet metal shop made for me a number of squares of different sizes of galvanized sheet metal, approximately 118-inch thick. I lay these on the fabric to provide uncolored areas when over-spraying another color.
I have also experimented with using coins, dried flowers, leaves, ornamental grasses, string and other items to create different effects.
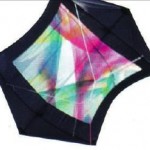 And though I began spray painting to avoid appliquéing, I have learned to combine techniques. For example, I’ve painted fabric rectangles that are then sewn as insets on a black-skinned rokkaku. The wide black edge provides a border framing the artwork, helping the kite stand out in my Pennsylvania gray skies.
This rokkaku by Tony Corbe of Mechanicsburg, Pennsylvania, was the first kite he made under Eby’s tutelage. It won second place in Corbe’s age class at the Smithsonian Kite festival.
EXPERIMENTS ALL OVER
I am not the only kite artist working in this medium, and of course everyone who experiments with it is discovering different effects and techniques.
Scott Hampton of Sandy, Utah, for example, has been working with Color Tool for four or five years. He was introduced to the technique by kitemakers Don Mock, Spencer Chun and Carl Crowell. His technique differs from mine. He applies three or four light layers, building up color slowly to both front and backsides of the fabric. And he uses just two colors of paint, red and blue, on three colors of 1.S-ounce fabric in mango, fuchsia and light blue.
 Scott shared his techniques at kite retreats in Washington State and Oregon, where kitemaker Jamie Alford experimented with spraying Color Tool onto crinkled ripstop. Hampton reports the result was an unusual three-dimensional look.
From Sandy, Utah, Scott shows his kites and banners at Dieppe, France in September (photo left). He uses spray color to achieve ripple and gradation effects in combination with solid colors of fabric in pieced sections.
Randy Shannon of Flagstaff, Arizona recently corresponded with me about the spray techniques he uses for his kites, including ones with Southwest Indian motifs.
He writes, “I usually spray onto white [fabric], although I do use gray and yellow also. I then use either hand-cut stencils or rock art designs and overspray with various colors and get a nice sandstone effect in the sky.”
He also says he gets good results painting on paper, which “is much cheaper than nylon when experimenting with new stuff.”
 My last word is a warning: Kite painting, like kite building, becomes addictive. You may even find yourself moving beyond kites. I’m often seen wearing a T-shirt painted in the same bright colors and techniques as the kite I’m flying in the sky!
Kurt Eby lives in Harrisburg, Pennsylvania. He’s a real estate appraiser by profession and a one-tme potter turned kitemaker by avocation.
(Republished with permission from Kite Lines, Spring 1999, Vol. 13 No. 1)

