Kites
If you dig back into Kitelife’s online archive of Stunt Kite Quarterly magazines and start hunting around 1992 or so, you’ll find an article on Dave Brittan who is arguably one of the very first people to fly a kite indoors. And, what was he using for this? A Rev II. Not what you’d typically expect to use as an indoor kite but, given when this happened, the only other choice would have been a Rev 1 (which, experience has shown me, can be a little unwieldly indoors.). Now fast forward a few years. Indoor kite flying has started to catch on a little bit more, enough that a demo event is put on at the 1997 World Cup. One where Dave Brittan flys a stack of Rev IIs indoors, and Penny Lingenfelter is spotted using a bridleless Rev 1.5.
Finally, fast forward a few more years and voila, there is now a specific Indoor Revolution kite, complete with a specific set of indoor handles to go with it. So, given the wide array of choices available to an indoor flyer, figuring out which kite will work best for your flying is mostly a case of trial and error, however, having tried most of the possibilities over the years, I can provide you a little insight to what I found.
While any of the Rev kites (up to and including the Power Blast 2.4, thank you Egan Davis!) can be flown inside, most people will find the Indoor Rev itself an easier one to get a start with and once the basics of flying are under control, wrestling a 1.5 indoors will be significantly easier for you to grasp. Lam Hoac, Egan Davis and Penny may make a 1.5 look graceful indoors but, for me, its never been the case, I’ve always found them heavy no matter how much weight I have managed to slice off.
Lines
To some degree, what you choose for line lengths will be entirely dependent on your indoor flying, but there is a few things to be aware of. One of the more important things to keep in mind is that the kites performance changes pretty drastically from 10 feet to 20 feet, a much more marked difference than from 80 to 90 feet as an example at the other end of the scale. The long you go, the longer reaction time from hand back to the kite. Start with a 10 foot set as your first set. This is short enough to be used in any  space that actually has enough room to fly in. In what may be a surprise to what some people would expect, I’d advise against using anything lighter than 90 pound line indoors.
I’ve played with 50 pound and even a couple of sets of 30 pound line over the years and I’ve found that they simply tangle too easily for the “worth” of the weight on whats a 10 length of line. 90 pound line works well for a few reasons but, mainly that its simply tougher to tangle and it will resist coming apart if you catch it on something in the gym. One last tip regarding indoor lines, if you are making your own, skip using any kind of sleeving at all on the lines, you will find its simply not needed and it’ll simply be something to get tangled up on. Trust me, this won’t be a problem, your average gym offers lots of opportunities for things to get tangled on.
Handles
Again, we get the simple choice, the old tried and true outdoor Rev handles or the specific Indoor ones. The Indoor ones have a few advantages, the biggest being that they are simply much lighter with just the graphite tube and foam, there is no metal tube inside of that rod. Also, being canted back a little bit and a little bit longer than the “typical” outdoor Rev handle. This give you an extra degree of control on the kite’s reverse, something that will come in handy as your indoor skills progress.
Indoor Spaces
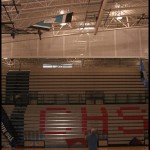
 Ah, and here’s the single biggest challenge that indoor kiters consistently face, “where to fly”. Unfortunately, I can off no magical ideas for this. We’ve been very lucky in the Northwest where we have a year round slate of indoor comp events, and there’s usually large amounts of practice time available any of those weekends as well, plus, various groups have managed to corral space at various facilities for practicing nearly year round. For a size, you are really looking for a place thats at least the size of a smaller basketball court, with a 14-16 foot ceiling. This gives you the bare minimum space you will need in order to become a smooth indoor flyer.
Some sample places to begin looking for available space include elementary schools (high schools tend to be booked solid) and community centres. Also, some churches possess small gyms or activity centers. Also, warehouses can be another valuable place to check out, if you can find one you can get access to on the weekends or evenings. The key thing that any large indoor space needs is the ability to be able to control the movement of air within the space, so be sure to ask this question very clearly early on when trying to make arrangements with a new space. Nothing is more frustrating indoors than dealing with stray gusts of air.
Outdoor Spaces
While it seems like an odd approach, I’ve sometimes found better luck with “indoor spaces” that are actually outside. Again, the idea is to find as windless of a space as possible. And if possible, try to avoid spaces with a lot of concrete as its really hard on the connectors as they drag across rough surfaces and its also hard on the rods as they go crashing down onto cement. Grassy spaces between buildings can be a great place to fly, but, also be on the lookout for parking garages that may have a flyable area tucked away within their walls. I do however have a technical note with respect to using the Indoor Rev as an outdoor kite. I strongly recommend that you replace all of the rod inserts with the traditional outdoor rev end caps and bungie cords. Otherwise, you will wear thru the usual indoor connectors in no time at all.
That Very First Flight
Ok! Assuming we have now solved all of the above problems, from which kite, lines and handles we’re going to use to where we’re going to try this out, whether thats indoors or outside in some quiet windless corner, we’re now left with just one thing to do, and thats to actually try to fly the kite. While there is a wide variety of ways to start a rev flying indoors, I’m going to suggest using the simplest one for the first while, and thats to simply lean it against any flat surface. I know, that sounds like the cowards approach to things, it certainly looks cooler to throw it out from one hand and giving it a jaunty little snap as it reaches the end of the line, however, I’m saving that for next issue, ok?
For now, we’ll start with the kite leaning up against some surface, and we’ll walk back to the end of the lines. The first time we launch the kite, we’re simply going to walk backwards and let the kite drift up on its own. Walk backwards as far as you can, and once you’ve run out of space, simply plunk the kite back down along a surface and go back the other way, you are just getting a feel for what the kite feels like when its hovering in the air. Indoor flying really comes down to a couple of basic ideas.
First, you are going to move backwards a lot in order to gain momentum for the kite. Secondly, you’ll then exploit the momentum that the kite has developed from walking backwards to get it to another place within the area that you are flying. While we’re on the topic of walking backwards, I have one warning for you. Take it easy and go slowly at first. Your calves are designed for walking forwards and if you spend a couple of hours doing nothing but walking backwards with no stretching exercises or breaks, you’ll find in a day or so that your legs will be so tight, you’ll barely be able to walk. Just make sure to take plenty of breaks and keep your legs stretched out well.
 One other thing with indoor flying, be careful to develop your flight in both directions equally. If you spend a few minutes wandering around in a circle in one direction, make sure to reverse and go in the opposite direction as well. I’ll leave you with all of the above as a homework assigment for the next two months, and next Kitelife issue, I’ll dig a little deeper and we’ll look at some specific launches, landings and throws, plus, some further ideas for places to fly.
Thanks again and have fun!
David Hathaway


