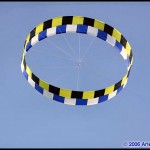
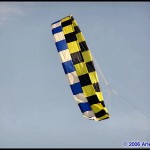
Yup, as the title suggests I built a flying zero, nothing, nada, zip, zilch! Well sort of, almost, kind of. The kite itself has the official name of “Circoflex”. Seeing it flying congers up so many different descriptions.
For several years now I have looked at plans of this kite and had put it on the “to do” list a few times but like all potential projects it got relegated to the back burner, year after year. Other kites kept getting the “priority” treatment and this one just sat there waiting patiently. Finally in a short lull and with the potential of being a workshop kite the Circoflex sprang to the front of the line.
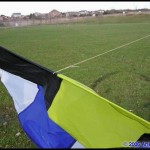 First off I had to decide which one to make. Like a lot of kites there are a number of variations on the theme and the circoflex is no exception. Long and skinny, short and fat, narrow sail, long sail, 20 feet, 40 feet, 12 meter, the list of options was endless. After a bit of research I settled on a 20 foot circumference by 16” wide sail as my first attempt. No sense going overboard first time out! The plan I used was on a web site called “Circoflex Kite Plans” which has a plan put out by Gary Engvall. It is well put together with everything you need to make the kite.
Back in 1996 Helmut Schieffer and Ton Oostveen, both from the Netherlands introduced the world to this nifty kite at the Dieppe, France Kite Festival. It all came about because three years earlier the fellows wanted to fly a windsock across a river. A bit of an odd beginning but hey you have to start somewhere!
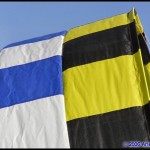 A lot of these kites are made from sections sewn together. In my case I needed a finished size of 20’-0 ½” by 18” (611×45 cm.) as the circumference including two ¼” (6mm) seam allowances at each end. I wanted a checkerboard appearance and needed something that would be mostly square and divide into the finished dimensions. 8” (20 cm) square fit perfectly. Just needed 60 rectangles of material. Then to sew them all together. This task of sewing was handed to my wife, Arlene who looked at me and said “you got to be kidding”. “Nope” I said and so away we went. She now reminds me NOT to do checkerboards again! 😉 (won’t tell you about the 10 foot checker crown we made shortly after) LOL
A problem with flying a circle is like any windsock or tubular shape it has a tendency to spin around the tow point. The two gentlemen solved this by adding some weight at the bottom of the kite. Curtain weights were engaged to make the kite fly more stable. In the recent versions it was determined that 30 pennies in 6 pouches of 5 each was a cheaper and effective alternative. Boy it works too… in steady winds it sits there rock solid. With no shifting or spin. In gustier winds it tends to “right” itself like a ship in the water. A little ballast goes a long way.
 After all that sewing she made the leading and trailing edge sleeves by turning over 1” of material along the front and back edge. At each end of the 20 feet we folded the sleeve at a 45 degree angle and sewed it down. This created the opening after the circle was sewn together to allow the leading edge rod and trailing edge string to be inserted in the sleeves.
This put the sail together nicely. Now according to the plans there had to be a spar in the leading edge. OK, It says 1/8” fiberglass or carbon rod. Just so happens I have a part coil of 1/8” fiberglass left over from another workshop. Rather than make it in the number of pieces (5 at 48”) I used one continuous 20 foot piece. One brass ferrule and voila… I had a leading edge. The trailing edge said that it wanted a string a few inches shorter than the circumference. So a piece of 50 lb Dacron got pressed into service. A loop on one end, and a measurement from that loop to a knot at the other end. I inserted the string and larksheaded the loop over the knot. Worked wonderfully.
 Now for the bridles. The fellows decided a 12 point bridle system would be the key to success. At every “hour” point along the leading edge a bridle is tied to the kite. The lengths varied according to the position. But in general the 11/1, 10/2, 9/3, 8/4 and 7/5 points are the same length with the 12 and 6 being different lengths. I had pre-melted the 12 holes at a point just behind the leading edge spar (before I inserted the spar) so it was a matter of following the chart and (for me) tying a loop at the LE and then measuring to be able to tie another loop to get the length. When you work in a confined space with a kite that is both big and very floppy it gets pretty wild tying on the bridles.
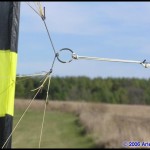
In the instructions they asked for a 6” long line between the 9,10,11,12,1,2,3 and the 4, 5, 6,7,8 o’clock bridle points. I used a heavier piece of line for that. On that center line I added an aluminum ring with a tow loop. The suggestion was to have the tow point towards the bottom of the center line. The kite would fly better.
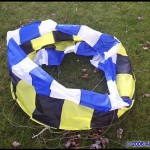
 At this point the kite was finished. BUT, there was a wee problem. A 20 foot circumference kite is approx 6’-4” in diameter. It is also floppy with a myriad of string floating around. Not an easy thing to transport to even the local kite field. Lucky for me I had bought an old wire LE el cheapo kite a few years back. This kite had to be twisted to make it smaller to fit in a bag. So again I looked at this kite and with my wife on one side and me on the other we gave the LE an opposite twist and folded it in half. Fit the back of the car just fine. I can now transport this thing around.
Our test flight was on a day where a thunderstorm was coming and the winds preceding it were gusty and strong but hey… gotta test this thing sometime. IT actually took to the wind rather well. Even though it was a bit swirlly the kite flew with a ton of potential of better flights ahead. Such a better flight came at a kite festival.
Although the winds were light most of the day after supper a very nice steady breeze came up and allowed us to fly for a couple hours. Once up in the steady breeze it hung there like it was glued to the sky. What happened next I still grin about?
 With several of my friends also flying kites I was totally surprised by people coming over to see my “Cheery “O” in the sky. The first was a family out to see what we were doing. “We just had to come over and see” said the mother. With the very next question “how does that thing fly?” by the father. Their two kids thought it was really cool. As I let one of the kids hold the kite line I explained about how a balance was established with the drag caused by the short string in the trailing edge and the lift created by the upper and lower sections of the sail. Just like the kites that were flying beside me. A little tension on the line and a breeze flowing over the sail and a good angle of attack and the kite flies first time every time.
Shortly after that another couple came strolling by. The husband says “I had to come over and see how that thing flys”. By this time I have a “permagrin” happening and again explain to them how it works. It was a bit funny, seeing as there were Cody’s, other single line kites and stunt kites flying along with some ground bouncers. Yet all the people were strolling past me to see my “nothing” kite. A big zero in the sky. Or as some described it “a cookie cutter”.
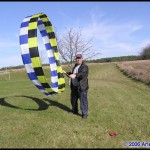 The circoflex is certainly an interesting kite to fly. It attracts tons of attention, and yes I HAVE to make another one, or two. Maybe a 40 footer . I don’t know why this kite ever got stuck on the back burner but now I know. If you have it sitting there waiting, get it built. It is one cool kite. The reaction to your nothing kite will give you that same permagrin I got!
For some more information on Circoflex kites go to the “Circoflex Information” web site to read more about this fascinating kite.
Dennis Ische
