Repairing a Dynamic DT-15 Carbon Tube Using Epoxy and Glass Fibre
Added 21st of June 2018:
So in a way @RobB was right, the repair didn’t last. Well there was no catastrophic failure, but a new fissure emerged (still using the tube though). Today I'd increase the glass fibre content. For images and the second iteration of the tube repair including heat shrink tubing (and more) see:
https://kitelife.com/forum/topic/8458-widow-ng/?do=findComment&comment=68307
https://kitelife.com/forum/topic/8458-widow-ng/?do=findComment&comment=68335
# Original blog entry from 2016 below ####
After a too hard ground contact with my HQ Infinity there was a set of small about 1.5cm (~1/2 inch) long fissures parallel to the axis on the inner end of one of the lower spreaders. This is a description of how I repaired it - not necessarily the best way. If you consider to use other fibres I've written down what I learn't in a comment to the previous blog entry "An Infinity...". Feel free to comment in (close to) any way.
Material:
- Nitrile gloves (epoxy is not healthy)
- Sand paper
- Glass fibre - here is long fibre strand used (but I suppose a thin mesh/fabric would do)
- Tape
- Epoxy
- Spatula/flat pin
- CA-glue
- Wire
- Scissors and a hobby knife
Nice to have/possibly needed:
- Hot air gun
- Heat shrink tube
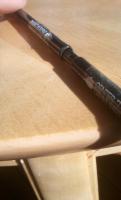
No snug fit - The fissures caused a play when connected to the other LS via the (normal) DT-15 connector rod. Also click on the image to see the small fissures that should be visible in the image then).
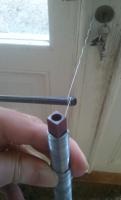
Using a wire to compress the expanded/stretched opening while pre-gluing it with a small amount of CA-glue. Verify that this part goes well enough before proceeding. When I tried it the result at this stage wasn't perfect, but it tuned out quite OK in the end.
Sanding the surface to remove varnish (if any?) - is this a necessary step? Tape the parts of the spar that you don't want to apply any epoxy to.
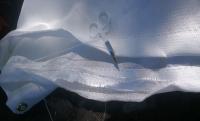
The simplest way to extract the glass fibre strands was by cutting parallel to the strands to be extracted. Limiting to one cut minimised the number of itch inducing short glass fibres on the loose. Before cutting the strand loose from the fabric, put a droplet of CA-glue on either side of it to keep it together, before cutting through the strand/CA-glue. A 3dm long strand was extracted. The damage to the welding sheet was reduced by making the cut in the double layer fabric close to the end and then sealing the hole with a strip of gaffer tape. The sealing of the hole also reduces the number of exposed fibre ends. The way I tried initially to cut one strand end and then pull the strand out step by step using a needle, only resulted in a several places broken strand - not recommended.
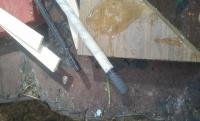
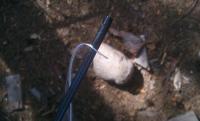
No the image does not show a broken fiddle stick - it is another old broken (pultruded) carbon tube (used for a practice repair) - here with a CA-glued strand attached. You could of course use tape to attach the strand as well.
Wear rather thin nitrile gloves (really not worn or with holes in them though) when handling the epoxy so that you don't lose precision. Be in a well ventilated area or outdoors. Now mix a blob of epoxy with the spatula.
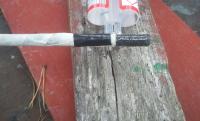
Coat the area on the spar with epoxy by smearing it out. Soak the strand in epoxy by dragging it a couple of times through the epoxy puddle. Now roll the soaked strand around the tube to be repaired. Connect also the free side of the strand, so that it doesn't attempt to unroll itself. Add some more epoxy and/or smear/make it uniform. Let the epoxy harden.
Cut and/or sand points of the repair that you suspect will point out from the second layer of epoxy. Mix some new epoxy (not much required) and apply the second layer. When the epoxy is almost hardened, remove the tape.
The tape closest to the repair might need to be cut using a hobby knife. If the epoxy remains (already solidified but) slightly sticky longer than your liking, have a go with the hot air gun gently for a couple of minutes. At this stage the repair was finished.
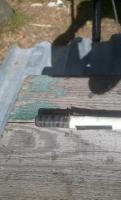
I was a bit concerned that the diameter of the tube after the repair would be a bit to large. When connecting the two lower spreaders together, the spreaders could be wiggled so that the outer tip could be moved (like a flapping bird) about 1cm relative to the other spreader. However when comparing this to my (still intact) Maestro 3 the amount of play was very similar. If it would have been necessary to handle I would have tried to put some heat shrink tube around the connector part of the other LS to act as a cylindrical shim making the spreader to spreader connection play free.
So far I've tried the Inifinity only one time after the repair in quite light wind due to the winds lately and I might have gone slightly less risk taking after the incident. Will it last? - only time will tell. However if it would break I would comment on this blog post and try with a higher content of glass fibre if feasible to repair. The next time I think I would have two strands in parallel to increase the amount of glass fibre in the repair.
Perhaps a next project could be to see if it is possible to repair some old broken lower leading edges of my Prism Illusion (Avia Sport G-Force UL)? Yes, this repair could have some unfortunate effect on flight behavior, especially since it is far from the centre of the kite and also might affect the curvature of the leading edge. However, the Illusion spars just snapped in two pieces when they broke, so some other approach is required to repair them than the above - a thin walled carbon tube that fits nicely into the Avia spar and a very fine fibre mesh would very nice to have here.
(A spin-off from this project - now I got a nice long glass fibre source for sealing the spigot of the wooden stove. No definitely not the epoxy for that - got a special heat resistant type of goo for this.)




3 Comments
Recommended Comments