Blackstar
-
Posts
47 -
Joined
-
Last visited
-
Days Won
1
Content Type
Profiles
Forums
Gallery
Downloads
KL Shop
Blogs
Articles
Everything posted by Blackstar
-
I started a Freedom 2000 using a sail plan from the kitebuilder forum. I have half of it sewn and I'll probably finish the other half this weekend as I am waiting on spars for my Virus to go fly again. I ordered .315" rods for the top piece, and .240" for the vertical pieces, curious to see if they get torn up with this design, though I've read they are really sturdy and the frame is hard to damage. I bought the 5PT rods for my sons kite as well while I was at it.
-
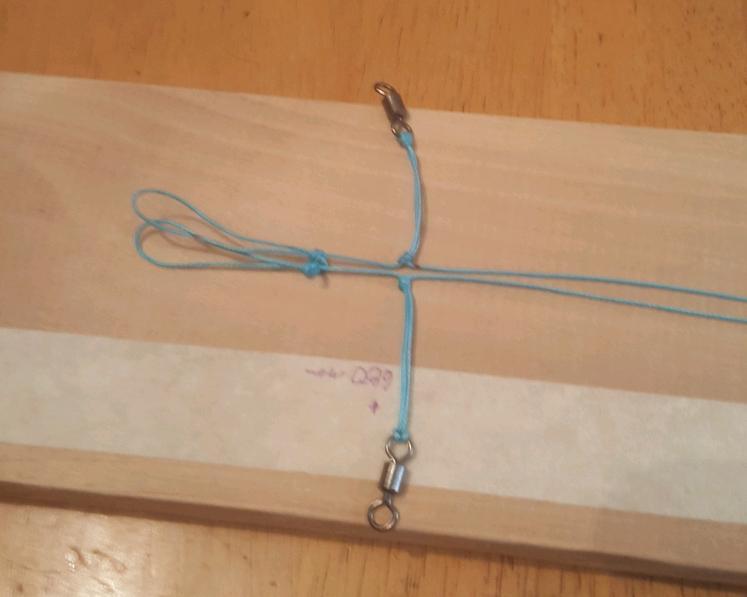
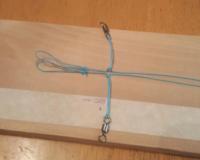
So back to Bridling. Questions: 1.) Making the Uphaul and Outhaul out of a single piece and then the Inhaul attaches with a prussik knot - is this a functional design? If so, is the Prussik knot adequate to keep the connection point locked? I have certainly seen this on some kites before, but I wasn't sure if it was still used. I have seen "Stopper" knots tied at the ends of the adjustability. 2.) Do the Uphaul and Outhaul need to be separate lengths, adjusting the nose pitch for wind/controls only using the Uphaul? The way I have tied mine is the Uphaul and Outhaul are one strand, the turbo leg is part of the inhaul (see pic above) and the Inhaul has a Prussik around the Up/Outhaul strand as described in question 1.
-
I took it out yesterday, in 15-20 knot wind.. and as you foretold immediately broke a lower spreader. I know that's a ton of wind but I flew my Prism in it a bunch and my kid did too, including 2 full speed nose dives into the grass.. bless him 🤣 I'm ordering a .240" internal ferrule and 2 skyshark 5PT rods. I talked to the folks at Kites and Fun Things and that was their recommendation as well. So I can keep my leading edge fittings and spine, and I have a 6x6 R-sky T already so it should work out fine. The kite flew pretty good though to be honest, I'll need to tune it a bit once the lower spreader scenario is resolved. I've started my quad though I've seen mention of the plans and name for the design frowned upon here as it's a copy of a production kite. But I'll probably post some pics of that soon.
-
Well I'm getting hosed by the wind. Saturday was supposed to be 15 knots, ended up being 4.. And then the same thing today. So I'm just waiting for some wind to try the Virus out
-
could you post a pic of this? I think I did my "double larks head" incorrectly, but all the links to it I can find are tying around a ring or something, and they pass the loop over the ring, which I obviously cannot do wrapping the knot around a continuous piece of line. perhaps I will have to remove that line, tie the double larks to it while it's loose, and then install it on the LE
-
Sadly my son is with his mother this weekend, so it will just be me and the wife. I am fully expecting something to break during the trial run. I am not sure what yet, but I'm guessing some stitching on something I didn't do adequately. I'll let you know. My dad is 74 and bought me my first kite because he was into windsurfing and would drag us all around the oregon coast and hood river etc. to do that.. and here we are 30 years later.
-
Well it's all bridled up. I guess we'll see how it goes tomorrow. 15 knots wind expected in my local fly spot.
-
I'm going to change the title of this thread and start documenting my son's build as it gets going here. Does anyone have opinions on that? Start a new thread for the same kite design or just tack it in here?
-
Sewed the nose better and then put 2 eyelets in on either side just below the leading edge pockets. It's quite robust now. Trimmed the spreaders to appropriate size and now all I have to do is put in my eyelets for the cord and knocks and tie the bridle. The little end of the project bits always take the longest.
-
Yeah I have built templates for a quad from another forum that are widely available. That will happen when my tubing arrives. For now it's going to be a 2nd Le Virus, and then a Karel Oh design I got some Light weight tubing for. I haven't tied the bridle yet for my first kite here, so I'm sure there'll be some more things to go wrong as I navigate that process as well. More updates to follow! 🤣
-
It is my first build yes. I definitely learned a lot from the build and I'm planning on compiling a "do this better and don't do this" list. I definitely should have paid better attention to my nose stitching, but I was having problems with the "stack" of cloth. It ended up being 4 layers of Dacron and 2 layers of 1000D Cordura. The needle just didn't have the mustard. Not sure how to combat that, but I'll address it. I've started a Virus with my 10 year old son so I'll learna little more.
-
Well it's getting pretty close now. I left my rods like an inch longer than desired till I got it together .. I'm gonna have to sew the nose a little more but it feels sturdy.
-
My ferrules should come today hopefully, so I can begin the final assembly of the kite. I plan on building a bridle board to assist with the tying and measuring of all those parts. After looking at things a little more, I will probably just use the 150lb line for this bridle, I had originally planned on using the 300lb. Question: What is a good line length to use for the control lines? Preferences seem kind of all over, I will probably end up with a few different sets of lengths but I was looking for a good low to medium low wind length for this time of year.
-
I see OK. I have a Prism kite I'll look at as well as my old Cheetah, but that Double Larks Head bit helps, Thanks! So now I'm just waiting on my stainless ferrules for the wing spars before I can start assembly. I made templates for the leading edge connectors and the yoyo stoppers. Question about the yoyo stoppers: do people usually mount them in a leading edge cutout like the LE connectors, or melt a hole for a zip tie and just "Clamp" them around the rod with the leading edge dacron inside? I suppose it depends on what you got for stoppers?
-

Djinn UL Custom (Nederlân Series) x BundukiVlieger
Blackstar commented on Bunduki Vlieger's gallery image in Member's Galleries
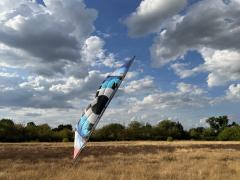 Love the sky, and your Kite is a beauty as well! 🥰
 -
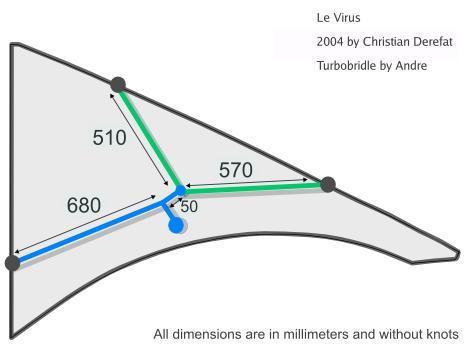
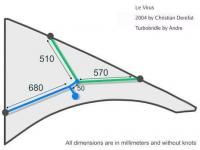
Could someone help describe the bridle in this pic a little better to me? It indicates that all measurements are shown without knots (I'm assuming its mean to be as if there was a line right from where it attaches to the rod and where the other piece of bridle comes off of it) Ive been reading on this website here: Andy Wardley: Knots for Bridle Makers That page is the knot part, but he has tons of overall info there. so would I make the green part out of one piece of line, perhaps with a simple knot on either side of where the blue line attaches, and then the blue parts would be one main line to the green line, and then the spot where you hook up the control line is an overhand knot with one of the "tails" being that 50mm section that goes to the green line? I don't really know what I'm doing on this at all, any advice would be cool
-
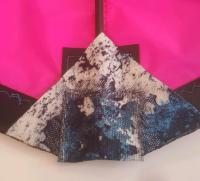
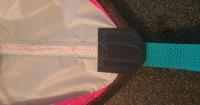
Finished the nose, the Cordura was a little thinner than I anticipated so I doubleda layer and melted it together. I can fix it later with something else if it rips. I have a rubber cap on the rod so it's fairly soft and the load is spread out But really the wood burning tool is MVP for all this plastic based fabric. You can tack it, melt it, cut it, join it.. I had a spare soldering stand holder so it's an official tool setup. I'm thinking about making the power cord 5 feet longer.

-
All my rods are non-wrapped pulltruded carbon, which I have read will break much easier at an internal ferrule. I read thst using a wrapped rod is the way to go with internal ferrule. I have no experience in this matter first hand other than my old old kite that has lasted for 30 years has external ferrule for the non wrapped rods.
-
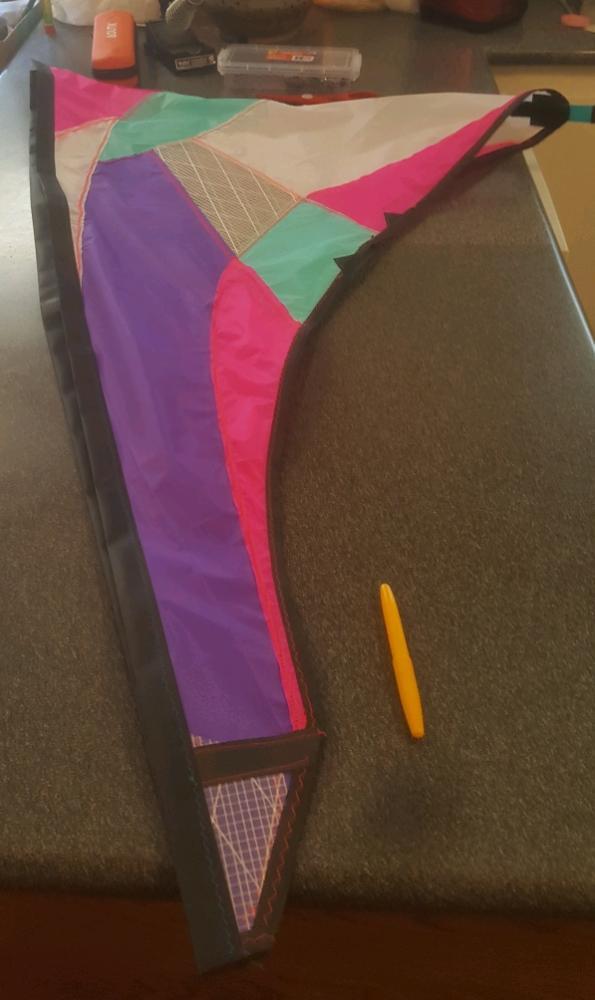
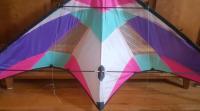
Finished sewing the other leading edge! Everything is pretty symmetrical somehow! So now I have to make a "melt out" template for the spreader cutouts, and for the center T, and sew the nose. I'm concerned about the bridle but I'm sure I'll figure it out when we get there!

-
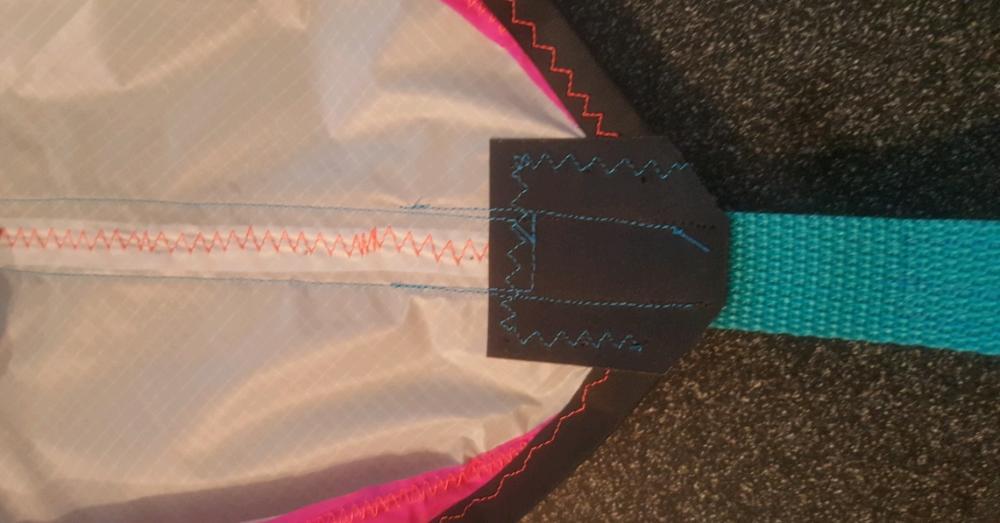
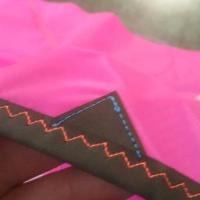
Eh It looks ok to me. You can see how not great I am at stitching but it's pretty decent. Should be fine
-
Sewed one LE tunnel and the tail pocket here. I was waiting for my sew on velcro to show up but it actually showed up today so I figured why not. Test fit my 6mm spars in everything and so far so good!
-
Yeah I am definitely not great at sewing and there's lots of evidence in this so far.. But some of it is alright. Thanks for the kind words! The wood burner as a hot cutter works flawlessly. Glad I spent the $20 on it. I put a fold of Dacron on the nose and hot cut it the flush with the angles.
-
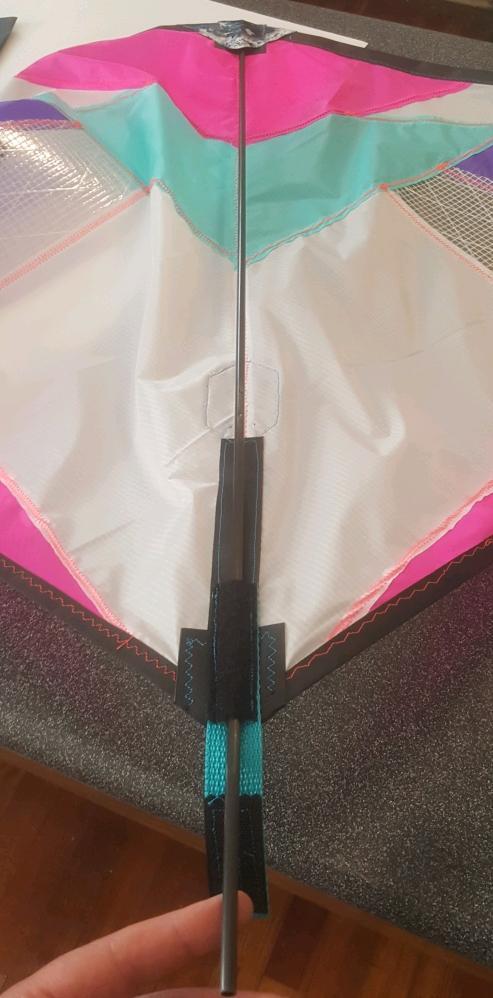
Hey thanks it's coming together slowly! Sewed on some spine reinforcement and the T reinforcement

-
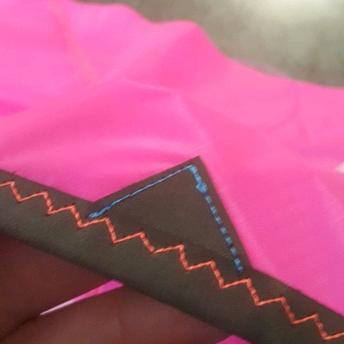
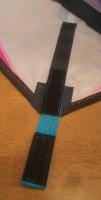
Got my standoff reinforcements sewn and I'm going to do the T and leading edges today hopefully Using blue thread for all the reinforcements because I like it haha
-
I sewed the other leech line/Trailing edge tunnel .. and I think I made every mistake possible.. I ended up having to cut some stitches, and cut part of the Dacron.. 😑 But I ripped the stiches back a bit and fixed it all and used a drop of super glue to fix the rip and it should be OK. If it starts getting a little threadbare I can fix it with some ripstop tape but I do think it'll be OK. I got the two halves sewn together and now I'm going to start on the reinforcements. Once again, it's not the prettiest thing ever, but for the first attempt at a kite, I'm fairly pleased. I should be able to get the rest of the kite sewn up this weekend, and possibly assembled. I got some stainless steel ferrules coming for the leading edges, but they probably wont come for a couple weeks so I think I'll most likely assemble it with full length spars.