-
Posts
544 -
Joined
-
Last visited
Content Type
Profiles
Forums
Gallery
Downloads
KL Shop
Blogs
Articles
Everything posted by JoneZ
-
In a way, yeah I guess. lol I was one of kids that was always takin apart things. From radios, to toasters, to dads skill saws. I think I was just born to take things apart and try to make them better. lol
-
LoL talk about training wheels. Love the stock kiddie video they made for that one. lol The dead launch is the way to go really, from the belly down, nose towards position. Pretty hard on the spine section of the sail. I've already thrashed mine. I would recommend a lightweight tape to re-enforce the sail down the spine before perfecting the dead launch. If you're on sand, the "digger" method that rx posted is the way to go. Looks killer too.
-
Definitely helps. Thanks for the description. The thing I need to really work on is the uneven fade position. I go to get it in that position, and all of a sudden my anxiety level goes from 1 to 11, and I forget how to use my hands -- forget that my left is my right, and right is left -- forget to tug the low wing -- forget which hand is in control of the low wing, forget the lawnmower sweep. I think you get the picture. lol I think that because its a trick that needs to be executed within 1 second or less (being as the uneven fade is not something you can hold steady), I get a little ahead of myself and mess it up every time. Remember the movie "Groundhog Day"? Baby steps!! lol My mind works a little wierd when I get into complex situations. It kind of shuts down, and runs on instinct. Thats not good for when I am learning new tricks that have multiple variables to take into account -- takes me a little longer than usual to memorize movements, and make them 2nd nature. Same thing goes with the Cascade. Looks a lot easier than it is accomplished for me. Half axels? easy peazy lemon squeezy, but to link them together?? Thats a sequence that I will be learning for months to come. Some tricks (like the Cascade) I feel I could accomplish better by watching someone in real life do them, and others (like backspins) I know myself that I'm my best teacher, and I'll have to suffer through the motions til I grasp them. I'll most certainly take that advice you gave to the field. Thats what happens most the time, the fade rocks into a flic flac. With the Widow especially, its a VERRRRY subtle input kite, and Im just giving too much juice with my movements. I think that also having a wrist brace on (strained my wrist at work) is having a little to do with it. Screwing with my chi -- my balance. lol Thanks m8. ~Jon
-
Went out this morning with T's genesis UL (so..in...love...with...that...kite...) and worked on fades. I figured out that the problem is with the wind intensity and my slack. After playing around with the UL, I moved to the Widow, and was able to more accurately sense the inputs and slack. The winds were around 6-10Mph. I pulled off a backspin accidentally (attempting to recover from a flic flack in the fade position). When I made me last fade on the flic flack and attempted to recover, my fade was severely cocked, and wham-o -- a backspin. SO..... I just need to practice fades over and over and over and over until I can hold them steady in heavier winds -- THEN..... work on precisely getting the kite to an 'off-horizontal' fade, over and over,,, and over and over,,, and,,, well,, you know...... maybe I'll give this a break and work on cascades before I lose it. left-right,,,,,right-left,,,,,left-right,,,,,,right-left,,,,,wax-on,,,,,wax-off,,,,,wax-on,,,,,wax-off,,,,,.....
-
I've read on a couple different sites (and it seems to make sense from a physics standpoint) that the reason for the Widow's oversteer could be caused by the weight in the leading edges. Skyshark P300 rods, and solid ferrules. This seems to make sense, being as the added weight on the wingtips would cause some added inertia, thus causing the kite to not want to recover from a turn so easily. I've already upgraded my lower spreaders to P200 and the center T ferrule to a hollow one -- shaved 6 grams off my kite. Really not much difference in oversteer -- although she flies a little more gracefully in lighter winds. Im thinking of soon upgrading my leading edge frame to P200 as well. With replacing the 4 rods and 4 ferrules (including the 2 nock end caps), I can shed another 16 grams off the weight of the kite. And yet another 4 grams if I replace the spine and the ferrule at the base of the spine. Thats a total weight reduction of 26 grams -- almost an ounce. With the P200, theres not much difference in strength of the rod -- although a little more flexible I suppose, so I cna only see an improvement coming out of this modification. I thought I'd start a topic about reframing, and peoples experiences changing to lighter materials -- any flight complications, or improvements, etc... Cheers all.
-
Maybe its me, or the widow, but I can't seem to A) get my widow to hold a fade, and get a damn backspin! I had the principle of the backspin down, and was getting use to the sweeping pull (and pulling off a few here and there), but now I can't seem to get it. I know its got to do with my fade position, but thats the hard thing here -- my Quantum can hold a steady fade better than my Widow. The Widow - when popped into a fade from a flare - just wants to "over fade" and bang! Starts with the flic flac'in... I'm minding the slack the best I can, but its so touchy, that it just wants to recover. I've tried a fade from an axel, but thats a little harder to achieve in the middle of the window, so Im stuck pulling those off closer to the edge, which messes with my backspin as well. Time for another lesson John. lol
-
http://www.thekiteshoppe.com/sport-kites/d...w/prod_218.html Theresa is awesome. She'll hook you up.
-
Get a Widow o.0 ~signed; Vayu -God of Wind
-
Try the red one m8. thats the one I wanted to initially get but my kite dealer didnt have it in stock. The blue is great too. AND Theresa from www.thekiteshoppe.com should still have a green one in stock if ur interested. I LOVE my widow. Its a great kite, really. Not much for precision flying right out of the factory, but it'll do any trick I can throw at it, and more that I cant, but friends have. It can take some damage as well. It has a re-enforced nose, as well as some pretty heavy duty re-enforcement on the leading edges. She's got some oversteer issues, so I would recommend reading this post >>HERE<< after you pick one up (look through it, but the critical info is post #13), as well as my tutorial >>HERE<< on installing a leech line (I show a quantum in the guide, but have installed one on my Widow as well). That helps quite a bit to quiet the kite down, and curbs some of the oversteer, and just makes it all around easier to fly (hold wind better -- less dissipation off the trailing edge). I would also put some duct tape just below the yoyo stoppers -- that'll help with wear on the leading edges, as well as some tape on the trailing edge, inbetween the standoffs (that is, when you get around to doing yoyos). Also another good kite that takes a whole lot of abuse is the Prism Quantum. For the price its a great kite. Has the added bonus of having a shock absorbing system on the spine for hard nose crashes. Then, once you get good, you can modify it like I did >>HERE<<. LoL Me and my damn Mods.... Hope that helps. Any other Q's, just fire away m8. ~Jon
-
I'm workin on that one (now I just need to fly a WM to compare. o.0 ).
-
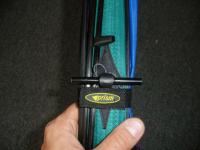
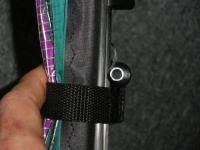
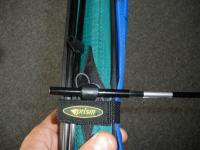
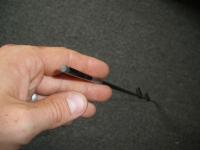
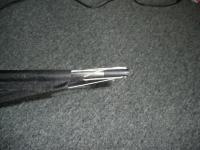
Some photos uploaded. The cross section of the T is metal. It is hollow straight through, with 2 stoppers dead center so the spreaders won't float freely inside the T. If that T section was rubber, and slightly smaller (by say, 1/16"), with a small insert set dead center in it, I think that would work. Thats the only thing I could come up with -- an idea in which the parts Im thinking of could quite possibly not exist. lol The actual spreader diameter is 3/16" The spreader sits inside the T section 1 1/4" the T section's diameter is 1/4" The length of the "T" is 2 5/8" Ho-Hum... ~Jon
-
Good idea. Thing is, that my spreaders arent hollow. they're solid core carbon. the real $$ stuff. lol
-
Right on, I'll try that. Should have some broccoli stocks in the fridge with some rubber bands on them. hehe. Gave that a shot, and for all intents and purposes it works, but man, is it a b*tch to set up. I have to think of another way here. Theres gotta be something. Got some brainstorming to do. ~Jon
-
A lighter # line will reduce the weight of the lineset, thus reducing downward drag on your kite in lighter winds. I use 100ft @ 75#, for 5-10Mph, and 50ft of 90# for anything lower (until I get a set of 50# 50ft.). The shorter line really helps in the lightest of winds, but theres not a lot of 'room' in the window. Good lineset for indoor flying though. In super light winds, you're going to have to pump your kite quite frequently to keep it in the air. This is where having your bridle set for "light winds" isn't the best thing (as I myself learned recently). Every time you pump, and go to reload your arms for another pump, the nose of your kite will fall back slightly, dumping wind off the top of the sail. It will have the tendency to want to fall on its back between pumps. Makes it extremely hard to rise your kite effectively. To stop this, set your bridle so that in between pumps there is little bobbing coming from your nose (I call it the sweet spot -- good place to mark with a sharpie on the bridle). Then just pump smoothly, and step back smoothly (try not to run back -- just take long smooth strides). Also try moving the outer standoffs on each side of the sail, inwards towards the in-most standoff (move it about 1" or 2"). It will reduce the tension on the sail and help keep it afloat (a little). If all else fails,, bring a good book out into the field, and wait for the wind to pick up. ~Jon Good KL issue Jb. Great info on there.
-
Right on, I'll try that. Should have some broccoli stocks in the fridge with some rubber bands on them. hehe. If Im still not working on Friday (rain + economy = no work this week in my field. ), that may be the day I come and see ya for some supplies, cuz we're thinkin of Cannon beach again this weekend. Got to meet with our caterer, as well as finalize our reception hall. That is, if MaryBeth is over her cold by then. o.0 I'll need a new standoff for the widow, some 7/16" nock end caps, and 2 APA fittings for yoyo stoppers (gonna install em on my Quantum). Oh!! Do you carry self-adhesive ripstop nylon as well? I've seen it in shops at the coast. Neat idea. I was thinkin of carrying a yard or so in my kite bag for when I get rips or punctures (got one now I need to fix on the Widow). I'll call ya on Fri T. Thanks for the advice.!! ~Jon
-

Installing a Leech Line Step by Step Tutorial
JoneZ replied to JoneZ's topic in Adjustments and Modifications
here's a word document with the same instructions, for reference. -cheers. ~Jon Leech_Line_Installation.doc -
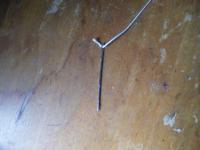
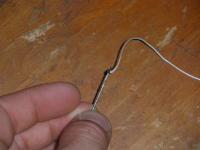
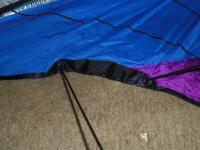
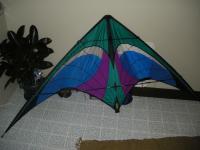
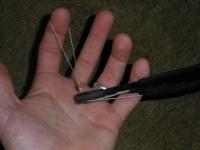
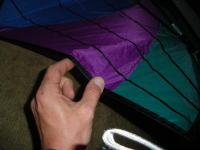
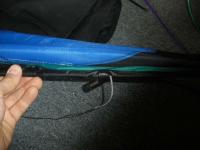
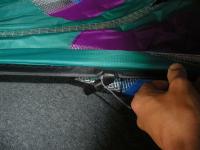
This tutorial will show you how to install a leech line on most dual line kites. Keep in mind that you do this at YOUR OWN RISK!! This tutorial is for reference purposes only and I can not/will not take any responsibility for damage incurred from this process. If you take your time, and follow the steps, you should have no problem installing this line on your kite. What you'll need for this project: -- 8-10feet of 30# spectra line (or Dacron, the smaller diameter the better) -- a blunt tip needle -- a lighter -- a marker -- needle nose pliers -- a wash cloth (you may not need this, but have one handy:: you'll see) -- patience The leech line will be a single piece of spectra run through the length of the trailing edge (seen in pic 01). (1.) Thread your spectra through your needle. Only pull out about 1/4 inch (seen in pic 02). (2.) Use your lighter to burn the thread down to the needle, then quickly apply pressure to flatten the line to the eye of the needle (seen in pic 03). It needs to be as flat to the eye as possible so it doesn't snag on anything (really important when passing through the re-enforced standoff section). (3.) Next, loosen your leading edge, and loosen the tail section to locate the openings to the trailing edge (seen in pic 04). We will be installing the left side first in this case (Afterwards you will repeat the same step on the right side, entering through the spine section). the kites sail will have to be loose to feed the line through. (4.) Insert the needle into the trailing edge UNDER the stitching (seen in pic 05 and 06). (5.) Next, start feeing the line through the trailing edge SLOWLY, by holding the base of the needle inside the trailing edge, while bunching up a small section (seen in pic 07), then pulling it straight (feeding it through) by pinching the tip of the needle with the opposite hand, and feeding the line into the edge (seen in pic 08). (6.) Be careful around the standoffs (seen in pic 09)!! Most kites have a re-enforced patch for the standoffs that is stitched over or under the trailing edge fabric. Care must be taken on some kites to not pop this stitching. You may run across too much resistance for your fingers to pull the eye of the needle through the beginning and end of this stitching -- this is where the needle nose pliers and a wash rag come in handy. Bunch up a section like described in step 5, but instead of using your finger to pinch the tip of the needle before you pull it through, take your cloth, and place it over the tip of the needle, then use pliers to pinch the tip, and give small tugs until the needle passes by the stitching of the re-enforced patch. This part can be extremely tricky on some kites, so be patient. If it just won't fit through, then your line may just be too thick, or your line may not be burnt flush enough to the eye of the needle, causing a snag. There's a couple of things that you can try. You can take the line out, and re-burn the line more flush to the eye of the needle. You can also try using a thinner needle (just make sure its a blunt tip). Remember, you risk popping the stitching on this re-enforced patch, so BE CAREFUL, patient, and don't over do it. It may take some time to work it through. Just know kites limit. You "may" not be able to pass a line through this, it is not guaranteed that you can. On the kites I've tried (Quantum, and the Widow), the Quantum was pretty easy, and didn't require the pliers, but the Widow was more trying, requiring the pliers, and a little patience and care. But both made it through. (7.) Once your line is fed through one side of your kite, pull about 1 foot of excess leech line out from the wingtip. Then pull the needle (snip it off if need be) off, attach it to the other side of the line, re-burn it, and repeat the process to the other side -- starting from the spine, and working your way to the other wingtip. Once it is fed through, you should have one solid piece of line running the entire length of the trailing edge. Congrats, your almost there. (8.) Next, re-nock your leading edges and assemble your kite (pic 10). (9.) Tie an overhand knot, creating a loop point on one side of the leech line (seen in pic 11). You may want to tie a few knots to make the knot larger so the nock will catch it when its pulled over the wingtip. Now, nock that side of the leech line. Then go to the other side, and pull the line taught, then over the nock and mark the position where you will knot it with a marker(Note** The line should not be too tight as to distort the sail). Tie another series of overhand knots, and knock it over the wingtip. (10.) Test the tension in the trailing edge (seen in pic 12). just pinch it as shown, and make sure both sides are more or less equal. If one side is way more tense than the other, then just 'over'-pinch as shown in the picture, close to the spine, on the side that is more tight to draw some line from the side that is looser, over to the side that is more tight, equaling the tension. Endcaps (pic13) help in making sure both the leading edge tensioner and leech line stay in place and secure, and do not slip during flight. As well as provide some protection against wingtip line snags. You should test the tension on both sides every time you assemble your kite. And thats about it. Enjoy your Leech line.
-
Went out in between the rains today with the Quantum (since my widow is one standoff shy of a kite) again. This time it was about 10-13Mph winds steady. I remember flying the booger (my old green quantum), and even the fact that I was new to flying at the time, it didn't fly even close to the way this one does now, or how it flew before the Mods. That leech line really spiced up that kite. Believe it or not, it has more crisp precision turns than the Widow does (although I haven't adapted a turbo bridle to the widow as on the Quantum). Fades are so much easier to hold. Flares, not so much, but that could be me just getting use to the kite -- seem to be a little "left-to-right'ish". Pulled off a solid YoYo with no stoppers, so that was fun, and relatively easy to pull off, although I didnt dare hold it for more than 1 second before unwrapping. Now that I have the breakdown ferrule covered completely (took off the duct tape and fastened some ripstop over the ferrule), as well as the back sides of the LE fittings the lines just roll off the back of the kite if theres not enough slack on a trick -- making recoveries a snap (or a couple snaps, if they get caught on the wingtips [which are also wrapped]) Getting the Kite on its belly for a lazy susan is kind of a chore still, but once its in that stalled position, its very comfortable (was able to easily coast it down for a wingtip landing and launch). Still havent pulled off a lazy yet, as getting it on its back is a little difficult (mostly due to wind conditions atm). All in all, I would seriously recommend installing a leech line if you own a quantum. Im going to work on some step by step instructions for ppl interested that aren't quite sure of how to go about it (not liable for damages, mind you ). One thing I need to come up with a solution to, is the damn lower spreaders. Since I removed the shock absorber on the tail section, every time I land hard, or try a tip stab (which usually ends up in a 'hard landing' since Im still learning that one), it pops the spreader out from the center "T" post, resulting in a very shameful walk. I was thinking of possibly removing the "T" and gluing it to one of the lower spreaders (about 1/4" farther out than it would normally sit, to create a little more tension when the other spreader is attached to it), then feeding it through the center hole and attaching it to the other spreader. I'd have to stick a couple of 1/4" spacers into the "T" section, and also maybe reduce my standoff lengths by 2/16". thats a hardcore Mod, so Im trying to think of another way,, possibly replacing the center T with something completely different and more secure that will still allow the spreaders to sit in their normal positions. Any sugg. on that one?
-
Totally understand where you're coming from bro. Im learning everything (precision and freestyling) on the Widow. The Quantum is just another kite to my collection -- and something I can work on. hehe. As for tweaking, yes, definitely agreed that kites are made to work within their limits with only minor adjustments to flight and physics based characteristics (bridle mods, frame mods), with the exception to physical characteristics. Now from my experience, the quantum straight out of the factory is a frustrating kite to learn the basics on, flat out. The beginner is going to snag his/her lines every 3 minutes, and with the quantum (or any of prisms lower end factory kites for that matter) its more like every 30 seconds with the addition of that breakdown ferrule, and the LE fittings not being covered. Ask shanobi187 (my neighbour). lol Bought him a Nexus for his B-day, and just watching him in his constant battles with walks of shame make me hurt. lol. Keep in mind, that this is regarding slack line tricks. And lets face it,, even beginners aren't just going to stick to flying patterns and angles -- they're going to push the envelope and learn their axles and flic flacs and lazy susans, etc, on whatever first kite they have. Im not saying to beginners to go out and mod their kites (but it sure does seem like it huh? lol ), but to just be aware of what they are buying, in relation to what they are going to use it for (freestyling vs precision). Thanks for the props on the Mods m8 . They turned out really well actually. Im impressed on how much my sewing skills have improved. Broke the needle on the sewing machine punching through the tail -- luckily I had a few replacements. How's the repairs on that MEFM going? I can't wait to see it up in the air. And you better be PMing me on when ur going out for the maiden voyage. I wanna be there! -cheers bro ~Jon
-
grabbed some 5-10Mph wind this afternoon before the rains, and she flew great. Leech line stopped the noise, and increased the sails ability to hold wind. The new tail held out great, and no more L.E. fitting snags.
-
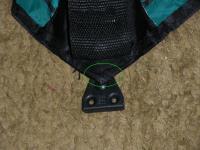
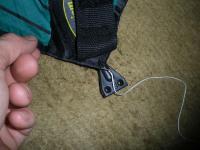
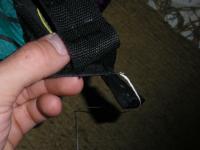
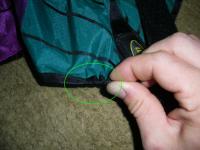
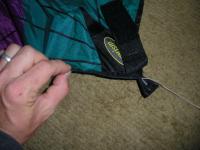
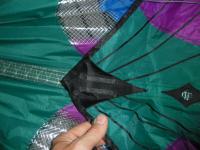
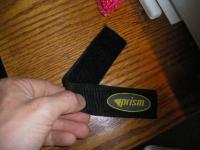
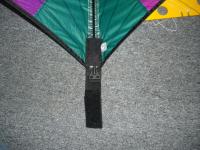
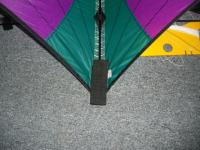
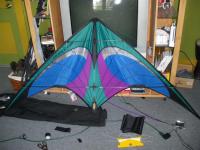
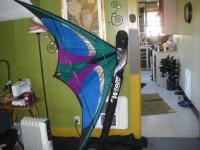
Did I say over the next month? lol. More like next week. These are the modifications I have made so far (pictures below sequentially) --fastened the ripstop onto the upper/lower L.E. fittings to prevent snags (2 pics) --removed prism label on base of spine, and sewed it to my new spine tensioner (2 pics) --removed shock absorber on the tail, and installed my new rigid spine tensioner (2 pics) --installed my leech line (1 pic) --fully assembled, yet to be tested. (1 pic) --my future wife snapping a pic of me sewing. Winds are light today, so I can't go test it out, but needless to say, I can't wait. I'll let you all know how these mods worked. PS. for the mean time, I threw some duct tape over the breakdown ferrules on the leading edge. we'll see how that works for now. -cheers ~Jon
-
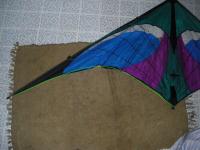
I admit, I was a bit harsh on the quantum in my post of my experiences from beg. to adv. (here -> http://kitelife.com/forum/index.php?showtopic=3157 ). I picked up a Quantum (Ice pattern) at GI Joes (YES GI joes ::: it will never be just "joes"). Going out of business sale,, I ended up finding out that they were cheap cheap, so I trolled around the GI Joes til I found one (pic below). $60 -- YOINK!! I just got done with its maiden voyage and I must say that I was a bit harsh in my initial opinion of the quantums capabilities. Mind you, I made some adjustments: - took off the "EZ Line connectors" - replaced the L.E. tensioners with solid 150# bridle line - tightened up the "shock absorber" on the tail end of the kite to take away the elasticity factor I actually tricked her quite easily to be honest. I think at the time, I was obviously a beginner, and somewhat frustrated that I wasn't quite "getting it". Frustration leading to instant gratification syndrome I think. I still stand by my word that the quantum is a yanker kite -- meaning more harsh inputs are required to get some tricks off -- as well as it being a tad touchy in stalled positions -- mostly flares and fades -- due to the wingspan difference (7ft as opposed to 8). The wingtip snags, upper L.E. fitting snags, and "breakdown" ferrule (midway down the leading edge) snags are still a b*tch, and will require some custom modifying, but I think this kite has the potential (when modified) to be a pretty decent kite. Still, if you are starting out kiting, I would still recommend getting a beginner 5ft wingspan kite,, learning the basics of flight, then grabbing a full size (8ft) kite to learn the more advanced maneuvers and tricks. It'll save you a lot of headaches. Im going to keep this thread running with my mod's to the quantum that I will be doing over the next month or so, hopefully to create a log of how to improve this kites flight characteristics for other quantum owners. Mods on the list so far: -- Fastening ripstop nylon over the "breakdown ferrule" midway down the leading edge (because Im NEVER going to break down the L.E.) -- Fastening ripstop nylon over the backside of the upper and lower leading edge fittings (to prevent line snags) -- Installing end caps on the Nock end wingtips (if thats even what they're called. lol) -- Removing the current spine tensioner (which has an elestic shock absorber -- bad for sail distortion) and installing a rigid velcro spine tensioner. --Installing a Leech Line (after the spine tensioner is replaced). oh woah is the life of a kite tweaker (modifyer, not meth addict. o.0 lol). -cheers KiteLife ~Jon
-
no dice. Post a hyperlink here.

