All Activity
- Last week
-
Thanks! I'm used to forums on a sewing site that is very active. If you post there and haven't had a response within a few hours it usually means no one is going to take up your question at all. I'm glad to hear this is nothing like FB. I have found the tutorials here to be wonderful and I paid to join primarily to offer thanks for creating them and making them available.
-
Yeah. This is nothing like FB. Quiter but a lot higher quality Th flying tutorials are awesome. You can learn a lot from them.
-
Hello, It seems pretty quiet here. I joined yesterday and posted a question about indoor flying. While I'm waiting for answers there I'm watching the indoor flying tutorials. There's a lot of good information there. I've got a few dual line stunt kites but have never progressed beyond beginner stuff because I only fly once a year or so when my family goes to the beach. I've never found anyplace at home without obstacles that's good for flying and our winds tend to be gusty and variable, not the nice steady onshore breeze you get nearly every afternoon at the beach. Looking forward to trying indoor flying.
-
While not a newbie to kites, I just discovered indoor kiting by stumbling on John Barresi's Zen Glider demo video and could not stop watching. Ditto my 9-year-old grandson. Naturally we want to try it for ourselves but I really have no idea where to start. After a little looking around, I thought I'd order up an iFlight from the closest kite shop to me as a start. That's a single line kite, yes? I also see what I think are dual and quad line indoor kites. It's hard to see the lines and controllers in most of the videos. I know how to do a few basics with my 30+ year-old Delta Wing dual line kite if I have good wind. I can launch and land reliably without crashing, fly simple patterns across the wind and fly twists in and out of the line. That's about it since I only fly about once or twice a year when my family goes to the beach where there is nearly always a lovely sustained onshore breeze in the afternoon and all that nice soft sand for when the kids crash my kite. It's nose is starting to fray but that's a question for another part of the forum... So what do you recommend as a good starting place for my DGS and me. He says, "Grandma, it's just so peaceful, can I watch it again?" and, "I want to be that" when he watches John's video. Thanks in advance for all the good advice I know is coming.
-
 KDdid joined the community
 -
Hello, I just ordered a Synapse 170 from Amazon. We are going to the beach later this week and my wife said it would be fun if I bought a kite (her mistake for making that suggestion). I've flown kites when I was a kid, but only single lines. I bought the Synapse 170 but I can't help but wonder if I should have gotten the 200 instead. As a beginner, I'm not really after the pull as I would just like a chill flying sessions at the park... at least for now. I really like the presence of the bigger Synapse 200 kite but it seems the 170 is much more common than the 200. Initially, I bought a cheap 5ft delta from Amazon. It was a blast to fly in the front yard so yesterday I bought a Zenith 5 Aurora when I found out that REI has them. I also just found out that the AirBNB we're staying at is just 5 miles away from Kitty Hawk Kites so I will drop by there and most likely buy the Zenith 7 Infrared and maybe a Bora 7 as well. 375b8097-2e83-4130-9b32-210643d6fc52.mp4
-
Looking for Dimensions for New Tech Cherry Bomb stunt kite. The width and length of the upper spreader bar. Thanks
- Earlier
-
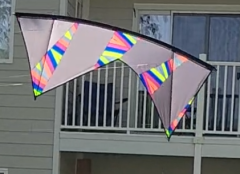
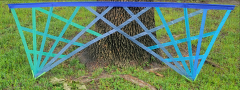
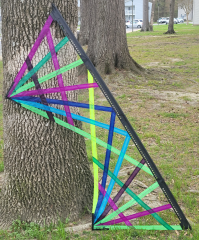
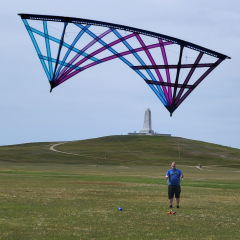
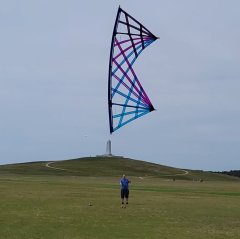
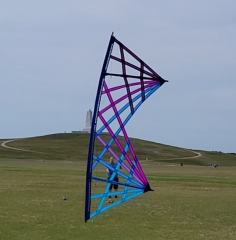
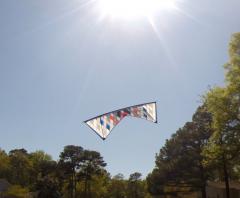
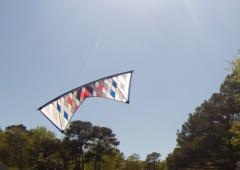
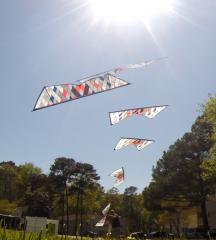
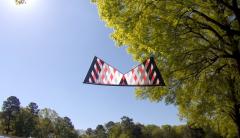
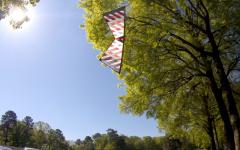
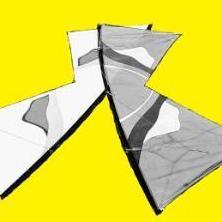
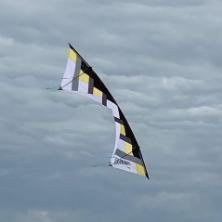
Photos of my home made kites and accessories. Early ones made from Gomberg Kite tails.
-
-

New section in Quadkites.org: Behind the scenes
Bunduki Vlieger replied to Alban's topic in General Sport Kite
Hi Alban! Nice article. I enjoyed reading it -
Hey all, Looking to design my first kite and thought I'd start a thread to chronicle my ideas and get some input. The idea is a giant Giraffe Kite. Now i've never designed a kite and hell i've only been flying for a few years now, and intermittently at that, with SE Mi inconsistent winds and some health setbacks, i thought it would be fun to tap my engineering skills and put them to the test by breathing flight into lands most majestic animal. My first thoughts were to just get/make a large sled, paint it to look like a giant giraffe head and throw a long tube to be it's neck floating in the breeze. I think this will be a good basic start to learn the proper techniques and slowly hone my ideas in. Once that is up in the air and i decide I'm not impressed enough (i mean a giant giraffe head peaking over the trees as you drive through the forest to get to the lake sounds pretty sweet to me, but come on we all know the journey won't end there) i'll move into figuring out how to make the monstrosity i have imagined in my head. Bonus points, I imagine i'll be working on a few miniaturized versions to figure out the proper internal baffling and how to bridle this, and for that I'm toying with the idea of doing Ostrich ground display's as ground displays that i could eventually turn into line laundry. With all that, before i dive into my own research I have a few questions. What is the most economic fabric to use in projects like this. Just run of the mill ripstop nylon? Is it smarter to design a giraffe as line laundry under a big lifter sled or do you think incorporating the sled into the giraffe can be accomplished? I think my biggest hurdles will be, how do i keep 2 separate entities afloat, connected by a long neck that ideally would be allowed to lurch around in the wind. Wish me luck. I think the biggest reason i'm writing this is to put my commitment out into the world so that I HAVE to start and stop just thinking about it. Can't wait to update this thread and get some pictures/builds going!

-
Hi everyone, I’ve just launched a new section on QuadKites.org: “Behind the Scenes”. The idea is to shed light on what we don’t always see — how workshops are put together, the unexpected challenges at festivals, the little tricks that make things easier… in short, the day-to-day reality of : begpassionate kite flyers. 🎤 The first article is an interview with Thierry Deschamps, who runs 2-line and 4-line kite bootcamps in Normandy, France. He talks about his decisions, logistics, what he’s learned over time, and what makes these moments so unique. 📖 You can read it here: 🇫🇷 https://quadkites.org/fr/dans-les-coulisses/interview-thierry-deschamps 🇺🇸 https://quadkites.org/en/behind-the-scenes/interview-thierry-deschamps Feel free to share your thoughts — and if you have ideas or people worth interviewing behind the scenes, I’d love to hear them. Happy reading, Alban
- 1 reply
-
- 1
-

-
LPG 75x90# quad set by Kite Forge (April 15th, 2025)
Cot51stState replied to John Barresi's topic in Current Drawings
Congratulations @snapper5. Happy flying! -
LPG 75x90# quad set by Kite Forge (April 15th, 2025)
leen replied to John Barresi's topic in Current Drawings
A lucky winner, congrats snapper5 and enjoy your winning. And of course, thank you very much John. -

LPG 75x90# quad set by Kite Forge (April 15th, 2025)
John Barresi replied to John Barresi's topic in Current Drawings
Alrighty, subscriber list reconciled and drawing completed... A very hearty congratulations to subscriber #1254, @snapper5! Endless, endless thanks to all for your support and patience, stay tuned for a new prize soon!
-
Welcome to our latest supporters! 1774 - @Michel_de_L 1775 - @PerryP Current subscriber count, 335.
-
LPG 75x90# quad set by Kite Forge (April 15th, 2025)
John Barresi replied to John Barresi's topic in Current Drawings
Oh man, I'm so sorry... I didn't have any bandwidth with my trip to Italy. 🙈 I'm back now and catching up - stand by, will post the winner today! -
Would anyone know how to go about making the sheet metal sail panel templates some folks seem to use for precisely cutting out the sail patterns from Icarex?
-
Thank you, Alban, magnificent!
-
Here a new link for tom's kite building site https://tom.quadkites.org/en/ Look at the building section: https://tom.quadkites.org/en/build.html You should get what you need
-
I have also been looking to find information on building sport kites to try and make some of the OSTK ones out there. But…the link that many have highly recommended in the past(https://www.tweelijners.com/tom/tomskitesite-en/KB0.html) does not appear to work anymore. Does anyone know of similar resources to learn how to build (sew, cut, materials, etc) for making OSTK kites like these, https://www.kareloh.com/kite-plans/ Thanks for any help!
-
I have not been on in ages, so, sorry for the lateness of the response. I have a bunch of tricktails which used dynamic spars from about 20 years ago. My stash is about used up. I would replace with skyshark. However, about 2 years ago I was in Ocean Shores Kite Shop and he had dynamic spars, so I bought one for a broken Utopia I had. It has quite a different logo on it, but otherwise seems to fly just fine. They don't match exactly. Somewhere I have table for the two, but it is 20 years old, and I haven't looked at the current skyshark offerings. For Dynamic, it used to be if it started with a T it was a tapered tube and D was a straight one. T8's used to be the lightest and I heard that they were 2 wrap, while T10s were 3 wraps. I've only broken the T8's which were quite fragile. I've never broken a D tube. Good Luck. Brett
-
LPG 75x90# quad set by Kite Forge (April 15th, 2025)
John Barresi replied to John Barresi's topic in Current Drawings
Dang! Terribly sorry, been wrapped up in prep for the biggest kite event of my year, Cervia Italy, and spending quality time with my son beforehand... I'll try to get this taken care of on one of my planes tomorrow! Thanks for the nudge! -
LPG 75x90# quad set by Kite Forge (April 15th, 2025)
leen replied to John Barresi's topic in Current Drawings
Any news about the lucky winner?😉 -
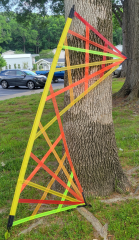
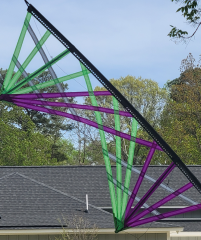
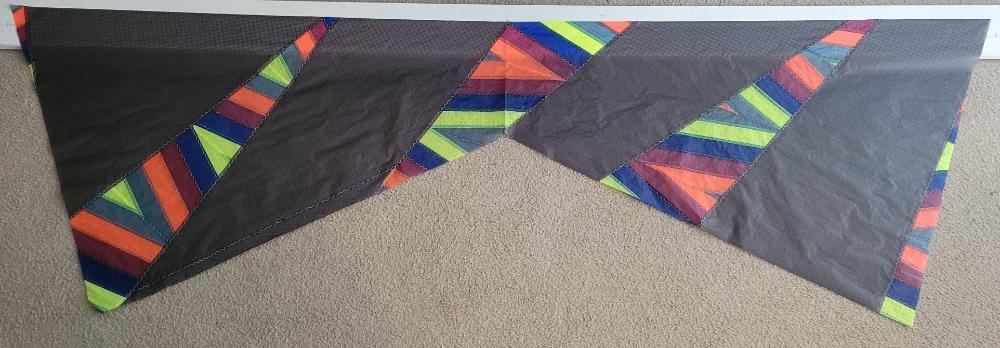
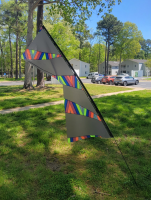
Making this kite from scraps of a previous kite. This will be Kite #95

-
- 1
-
-
I've this kite HQ Salsa 2 bought used some months ago and received it with untied bridles... I found these sheets on the official website and searched online for info about bridles tuning and adjustments but everywhere seems common a three leg fixed bridles, here we have instead four legs (and i would like to know how are you going to tie them for example, i think i'm using wrong knots) and also how sliding knots affect the tuning because the kite also with strong winds doesn't stay in the air but stalls immediately and land... it's also very slow and unresponsive of the pulling... do you think I could convert this bridles to a common fixed three legs using the same length and start working from there? I mean avoiding the FL leg or also using a single line for O+A and leaving M at a fixed lenght instead of O+M and A at fixed length I hope to have been clear enough in explaining... I'm losing hope in seeing it flying, i'm wasting a lot of hours trying to set it up P.s. If there are problems with the image attached this is the link to the tech sheets https://www.invento-hq.com/myfactory/CustomUpload/374O357O340O370O356O369O350O328O365O373O356O365O371O366O350O326O364O353O327O/116736_SALSA_II_RED_Technical_DataSheet.pdf

-
tuning Pigtails / Leaders (tuning your quad revisited)
John Barresi replied to Naksa's topic in Quad Heads
It might also be worth looking simply for sake of discussion, at how fliers hold their handles during flight... My leaders are tuned first and foremost so that when I go "full gas", it's the right amount of gas with no oversheeting or loss of pressure - I've tuned out any additional amount of thumb back / forward that might cause the sail to flutter or loose pressure (key signs of oversheeting). Basic looks at how I'm holding my handles during flight... https://kiteforge.com/tutorials/quad-line-kite-tutorial-figure-8-and-180s/ https://kiteforge.com/tutorials/quad-line-kite-flight-and-control/ What you might notice is that I'm not "holding" my brake lines back when I'm in normal forward flight, not really managing them at all - bottom of the handles are nearly straight out, thumbs at full tip back. Another pilot, using more forward in the settings, but almost always managing or balancing the brake lines through forward flight, a balancing act between top and bottom lines throughout: Neither right or wrong, but good visual contrast between the two different approaches to tuning.