Exult
-
Posts
580 -
Joined
-
Last visited
-
Days Won
27
Content Type
Profiles
Forums
Gallery
Downloads
KL Shop
Blogs
Articles
Everything posted by Exult
-
To me, in the video, it looks like the mock french seam (though I have never tried one just read the 101 kite sewing). Consider yourself lucky in this aspect. Often when I have a kiting session I instead just get late to work - as expected no bonuses and applauds there. If you happen to have a surrounding "crew", lend out your mobile phone and "officially" appoint one of the children to "Photo Officer in Charge" (perhaps a child that otherwise would stay unfocused). Apart from being handy, such things can make a child proud. Study the "holy" weather forecast, but be prepared for surprises. What about folding one of them double for light wind (I don't know how much resistance the folding part adds though) and allow two full tails for days with more and stable wind? Wait, are we talking about halving the length or the width? Making four narrow tails could add some flexibility. Add more tails the more wind it is? I also find this post about tail making interesting: http://kitelife.com/forum/topic/1591-revs-with-tails/?do=findComment&comment=13038 or actually the whole topic: http://kitelife.com/forum/topic/1591-revs-with-tails/
-
It looks like you have by your own (re-)discovered the plain seam. Go to: https://sites.google.com/site/kites4all/home/kite-sewing-101 and search for the first instance of "plain seam" and compare - was the principle the same? Another reason for moving from pins to tape than puckering (as @makatakam suggested), as you now also likely has discovered, is that the holes from the pins will remain afterwards in the ripstop. When joining the panels of my model kite using the plain seam, I instead of the tape or pins used glue: http://kitelife.com/forum/topic/8756-a-first-model-kite-probing-the-kite-building-ground/?do=findComment&comment=70908 which also worked as well. Any pictures of the final result and kite-in-action?
-
Welcome to the forum kite maker and pilot! If I could ask for a favor? - I'd like to see those attempts. In a future I wouldn't mind seeing some of that work. I have relatively recently started out with the sewing machine, but have not yet tried appliqué, so I'm curious about any difficulties and hints (preferably with some nice pictures). E.g. what method do you use to attach the end of the thread when starting and stopping sewing? Cold or hot cutting of ripstop panels? Why a certain type of stitches happened to be used...
-
I don't know. Never really seen a sled kite close up, less so how to make one. I'm in the process of demystifying QLKs, while SLKs are just exotic. Also every time something is done in a different way than you do or intend to do you can always start to think of if you should try it later. Talking about the risks of flexifoil stacks. I vaguely remember a warning about flexifoil stacks from some time about the end of the nineties (though I have forgotten the probably written source - never seen the kite type). There were some small/mid(?) size ones that gave a very large pull when stacked, but turned very quickly. If instead using one flexifoil with a larger span width it couldn't turn as quickly into the power zone and left more time to think so that surprises were avoided. It is in a way remarkable that I now 20 years later might be "talking" the origin (or one of the origins) of that flexifoil stack warning. Yes, I forgot ... Welcome to the forum!!
-
And I thought my (nearly total) kite pause was long (about 15 years). No kites since the 1990 Flexifoils for you? I'm curious about the ideas and the development of the projects (along with any nice techniques that would be nickable).
-
Now, that is what I call an offer!
-
But if the spars are sensitive as stated in the original post - shouldn't an effort be made to reduce load on the spars in the middle of the kites? I see two principally close ways here - both require a hole in the sail: Add a extra bridle lines to the to the image above. These extra bridle segments should form a continuation of the kite line. In this way connecting the central point of the spars of each kite to the neighboring kites'. Let the kite line pass through all the sails except for the last kite. Then connect all the bridles of all kites to this line.
- 10 replies
-
- 1
-

-
- single line
- kite train
- (and 1 more)
-
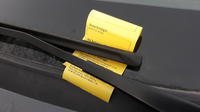
SLKs are not my thing (yet?) so I'm not the most suited to giva any advice here unfortunately. However without a set of good quality photos that describes the parts involved in the problem-to-be-solved, the chance of getting good answers from anyone is reduced. Without any more details it is likely that you'll get only general answers. An attempt to help out: If you could deviate from the condition that you only could connect to one point on the previous kite (as expressed in the above ASCII graphics), there would be the common dual line stack way (the only way that I've tried). The typical way to create a DLK stack would be to connect the bridle attachment points to each other, thus reducing the load on the frame of the first kite. If the first kite still would have a too weak frame, a stronger frame (with or without a sail) could be put before the first kite. In the below image you can see the yellow lines connecting the two kites.
- 10 replies
-
- 1
-
-
- single line
- kite train
- (and 1 more)
-
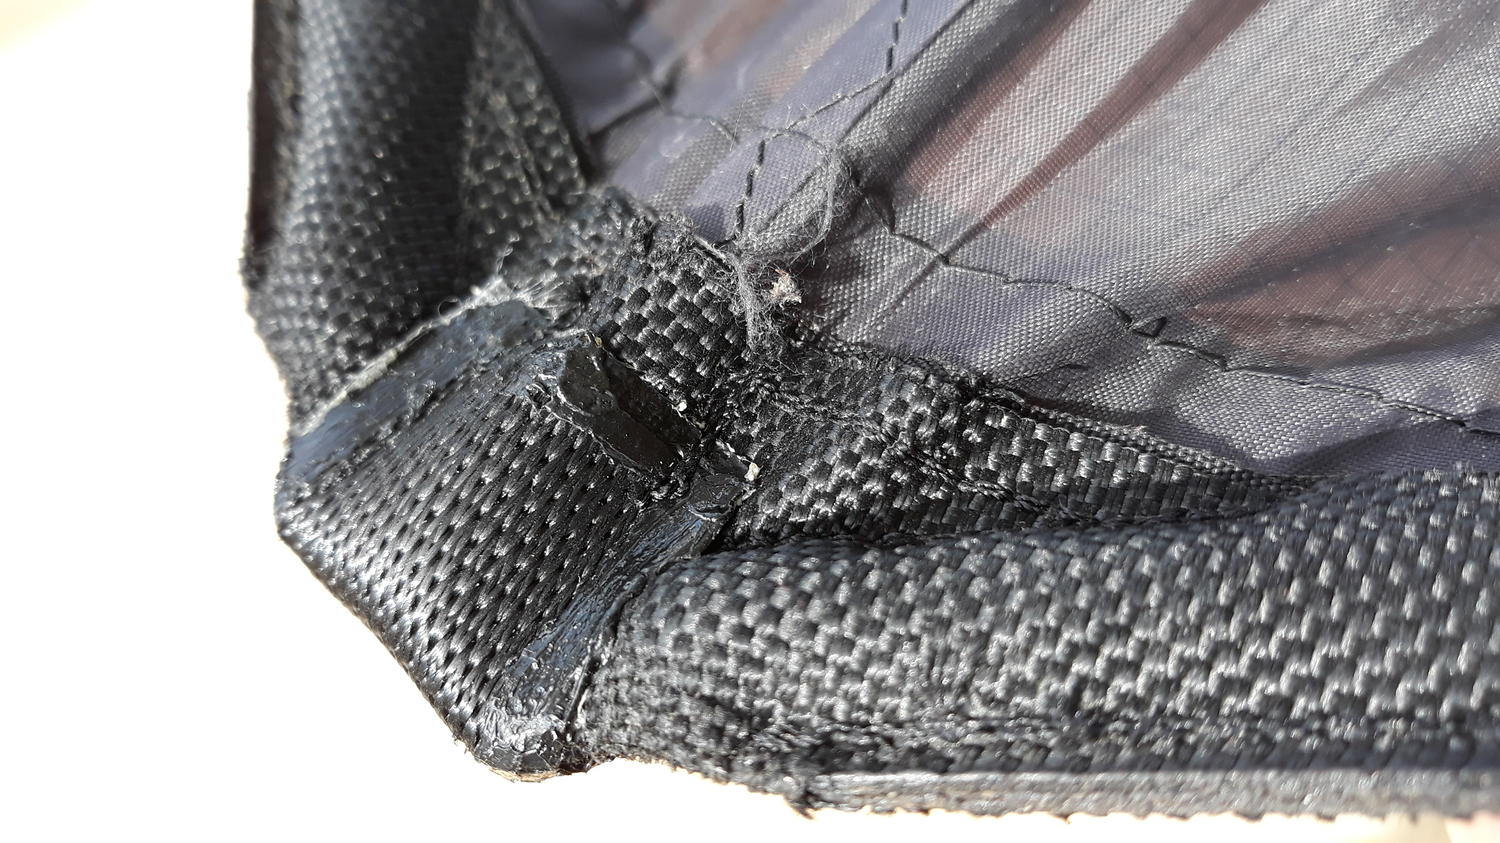
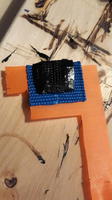
Thank you @Paul LaMasters for the nice suggestion of methods! That is a nice idea. I could sacrifice one of the funnier shaped (= never used) hot iron tips and weld a needle to it (if the flux core welding tool now restarts nicely after two-three years of rest). The hardness of the needle should prevent it from going blunt (if that would be a problem). Add some excess material around the needle and file it into a cone to help the heat transfer to the needle tip. If I get hold of the spray mount bottle I think that I'd use the panel templates to mask off the areas that I don't want light-tack on. Put the template on top of the cut out ripstop panel, then shift it one cm or so to expose one edge of the ripstop panel at a time. Now there is less need to just go lightly with the spray. Or one could perhaps spray the tacky stuff on a piece of plastic into a small puddle and use a small brush to distribute it along the edge. But I have no idea if this tacky spray is easily distributed with a brush however. I have used (very) small pieces of surgical tape here. To peel them off, the tip of a BBQ stick was very handy. The tape bits could be removed from even under the "toe" of the presser foot. Thank you, but no thanks I'm afraid that I must say - wasting is not my cup of tea. Even If I got hold of a large amount of ripstop at a good price, ruining most of it would leave something of a bad taste in my mouth. I'm afraid that the only persons showing up here are the three old familiar ones - me, myself and I. To my knowledge I'd need to travel "in time and space" to find a workshop: http://tangokites.org/ - an old site devoted to kite making/flying and mostly SLKs and tango (yes the dance). I really think the practice part is mandatory. The improvement when applying a method that is new to you is especially pronounced between the first and second attempt. Though there will still remain room for further refinement of the method after the second iteration. Kite building experience can also be gained piece by piece - Kite repairs can also get you kite making experience without requiring much materiel. In this model speedwing project I did not get any experience in the more common type of thick fabric DLK nose sewing. The recent repair of the (long time punctured) HQ Maestro3 nose only required a negligible amount of material. This fabric was seat belt thick and with a really solid feel so that I felt, not to cause any line snags around the nose, that I had to melt the edges into a tapered wedge like shape with the hot iron first (mostly). The thickness of the fabric and the hardness of the molten areas was a good sewing exercise. And naturally, I started off with some test pieces first (in orange and blue above).

-
Take it easy and develop a well thought through and tested product. We can all(?) wait some time - I'm sure there are some much needed DLK/QLK/SLK practicing (there always is) and kite repairs/making to do in the mean time.
-
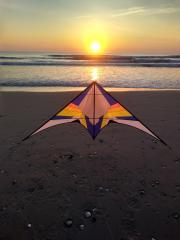 A study of symmetry and reoccurrence of colours.
 -
Good piloting! I'm soon half way through that (framed QLK) time and you certainly offer no rest for me by showing this video. The high tempo in the video and chosen music match well - it kind of gives an impression of precise juggling.
-
I find that the sheet bends are of a bit more permanent nature in general. Perhaps bridle line is such a good (stiff?) knot materiel so that square knots are ever lasting as well? There should be some kind of reference of where to position the (whatever) knot, like two dots of permanent markers - one on the bridle and one on the nock side. Both dots could be inside the knot that joins them e.g. Furthermore, IMO, the cap/nock should be of such a design that the bridle lines are not exposed to abrasion anywhere close to the outer end of the nock (no, I have not implemented such a nock myself).
-
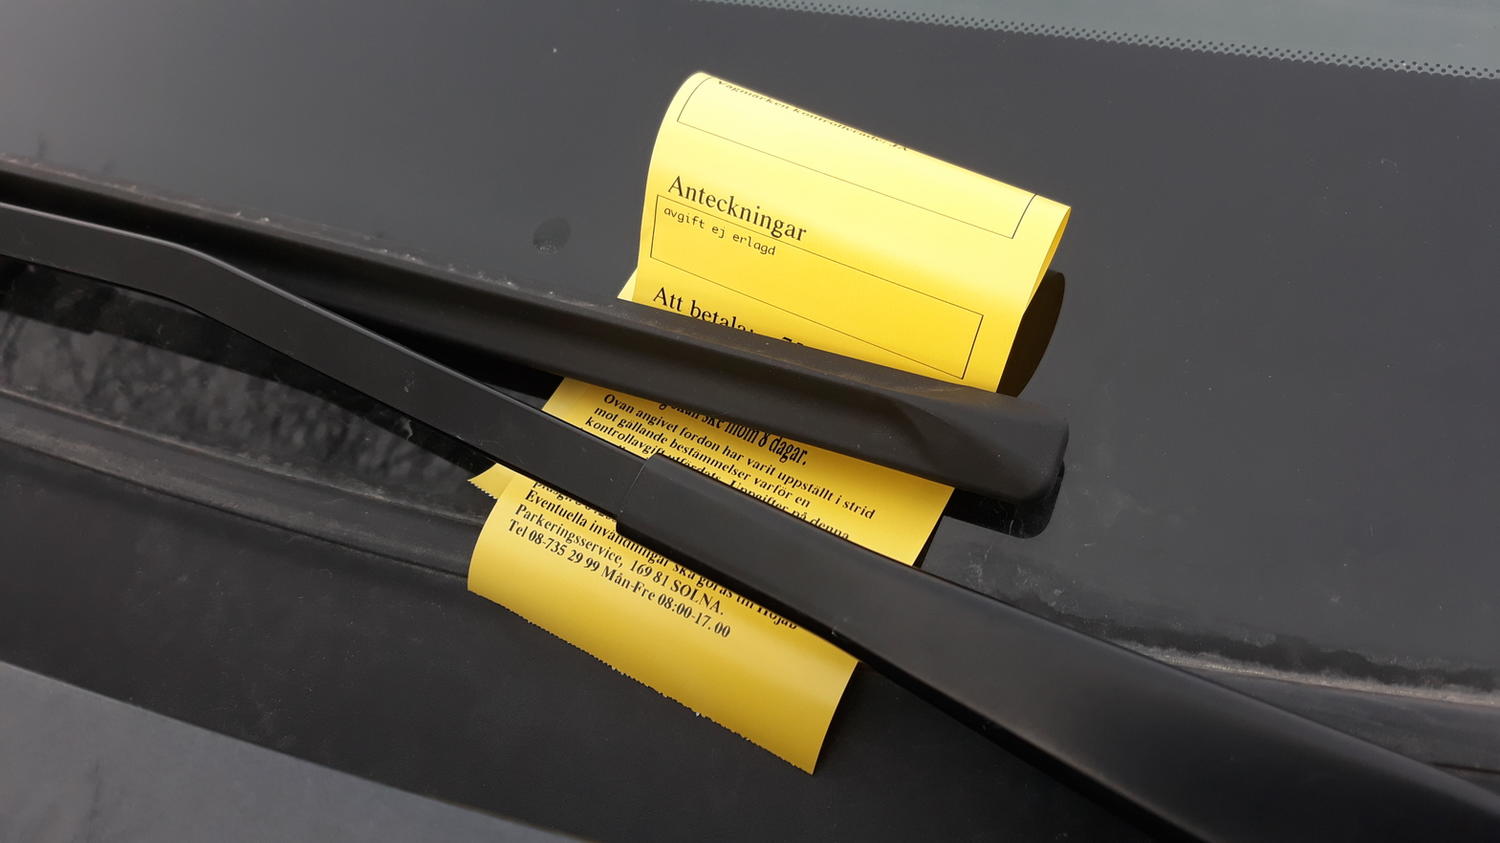
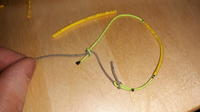
I don't like this nock design. Both with DLKs and QLKs I like much ground contact. With these nocks I feel limited. The bridle line is so close to the edge and is too exposed IMO. So after wearing the outer layer of the bridle out (something I saw after dragging the wing tip along the grass a couple of times) I attempted to put some heat shrink tubing around it to make a light weight sacrificial layer. The heat shrink tubing did its shrinking, while the spectra/dyneema core melted - Not good. Then I replaced this part of the bridle with some other bridle line (that happened to be so stiff it could be held horizontally). A sheet bend was used for the splice and this knot has lasted for more than half a year now. The core consisted of black fibres that couldn't be melted - only burn. Now I could add the heat shrink tubing. Today however (on my second QLK street session ever), I instead used the more common method to cover the LE nocks with vinyl end caps to protect the nocks from wear because the asphalt is so abrasive.
-
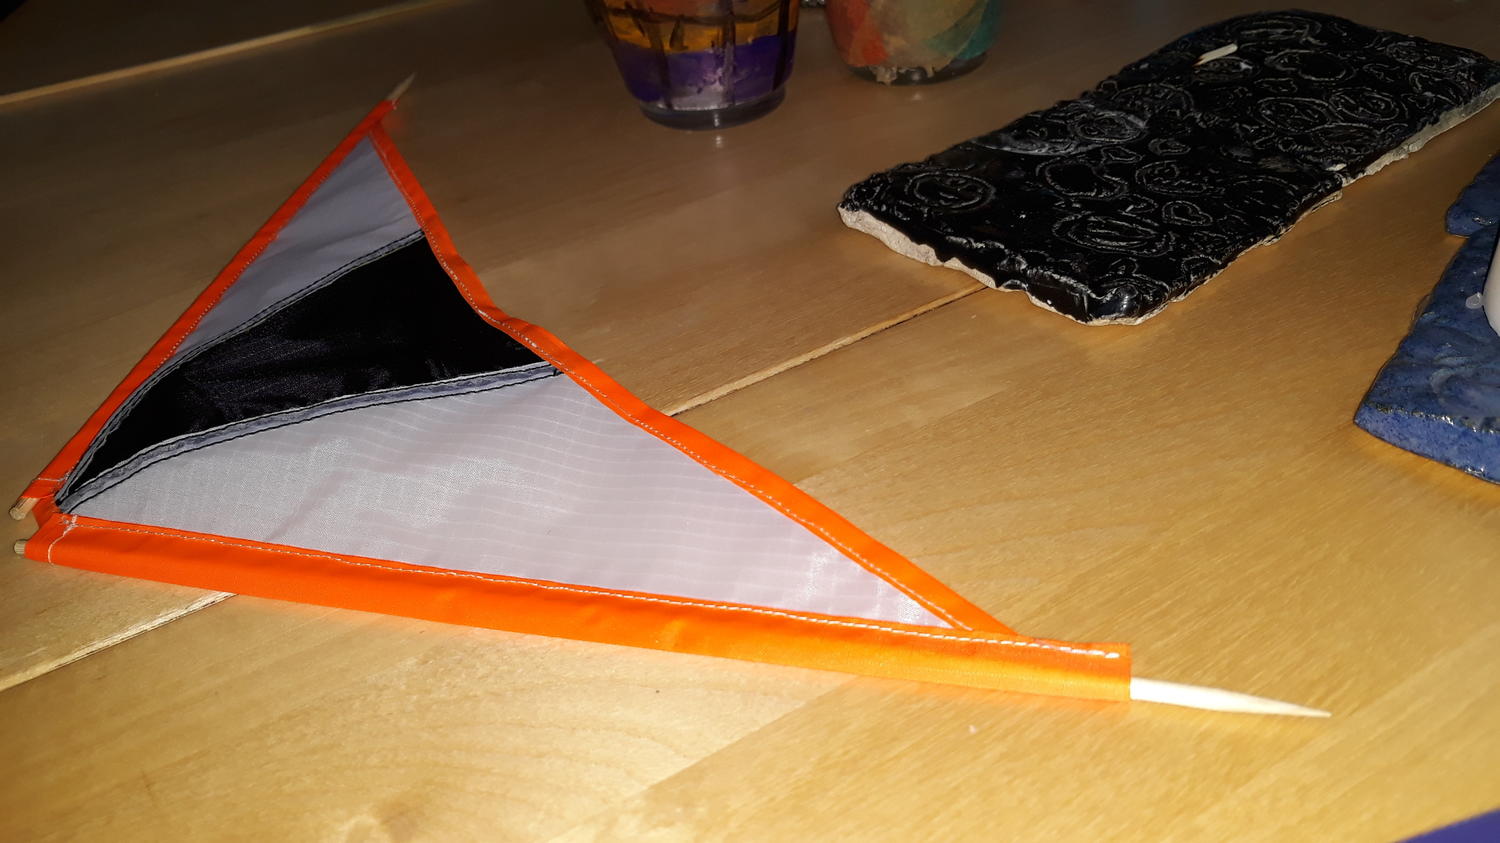
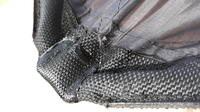
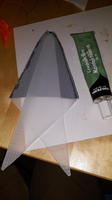
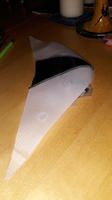
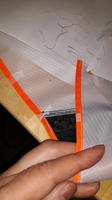
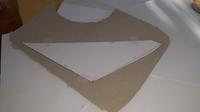
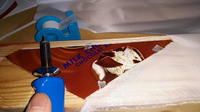
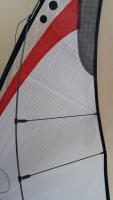
Gluing, taping and sewing Since I had no double sided tape I tried gluing the panels together. The first attempt was to glue the panels together with a glue stick for paper - worthless and close to no effect! Then I switched to the contact rubber glue - a solvent smelling turbid snot like glue that works well for flexible stuff like e.g. foam rubber. It was a little tricky to distribute evenly (old glue sample?), but held the panels well together. Did I have the patience to wait until the two glued surfaces were completely dry before joining then (as you should for this type of glue)? - No, but it worked out anyway. Here the panels were glued face to face. The stitches and seam used was a straight stitch plain seam. A first seam was made closest to the centre of the panels. On the rear side of the kite, the brighter panels were folded over the darker panel and sewed with a seam closer to the edge. Folding the black panels over the white panels would have caused the black panels to be partly visible through the front side of the sail (ugly). In the third image above you can see the resulting camber of the sail. The orange strip of the trailing edge was just folded double around the black and white panels and held in place with tape. As can be seen in the second image the resulting hem is not so good. Perhaps use some type of glue and let it dry while keeping the strip flat in the same plane as the trailing edge of the sail by putting a book on top? The pockets covering the wingtips are not yet in place.

- 16 replies
-
- 2
-
-
- kite making
- blunt needle
- (and 3 more)
-
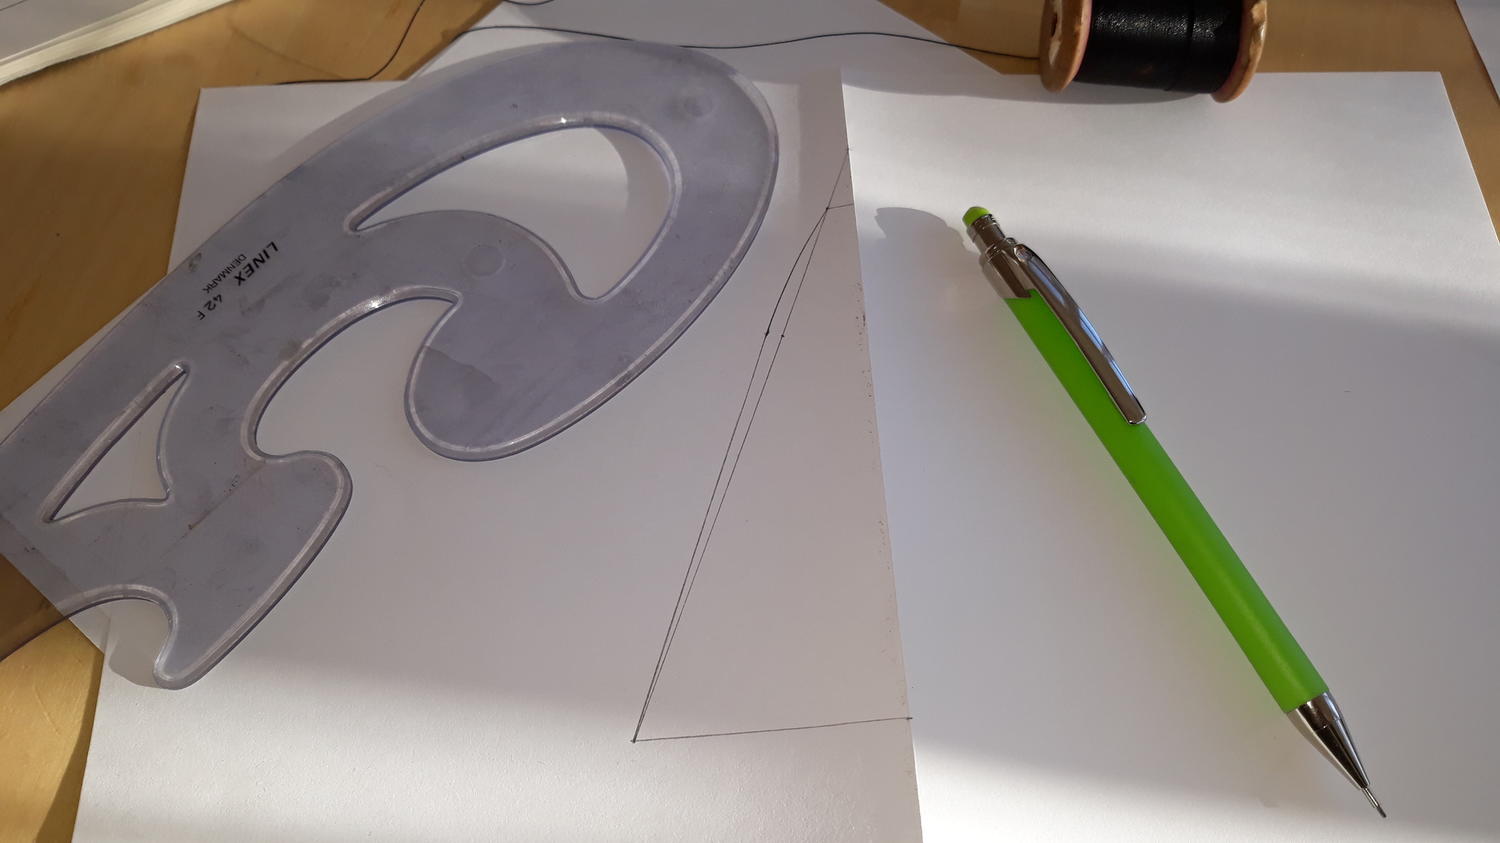
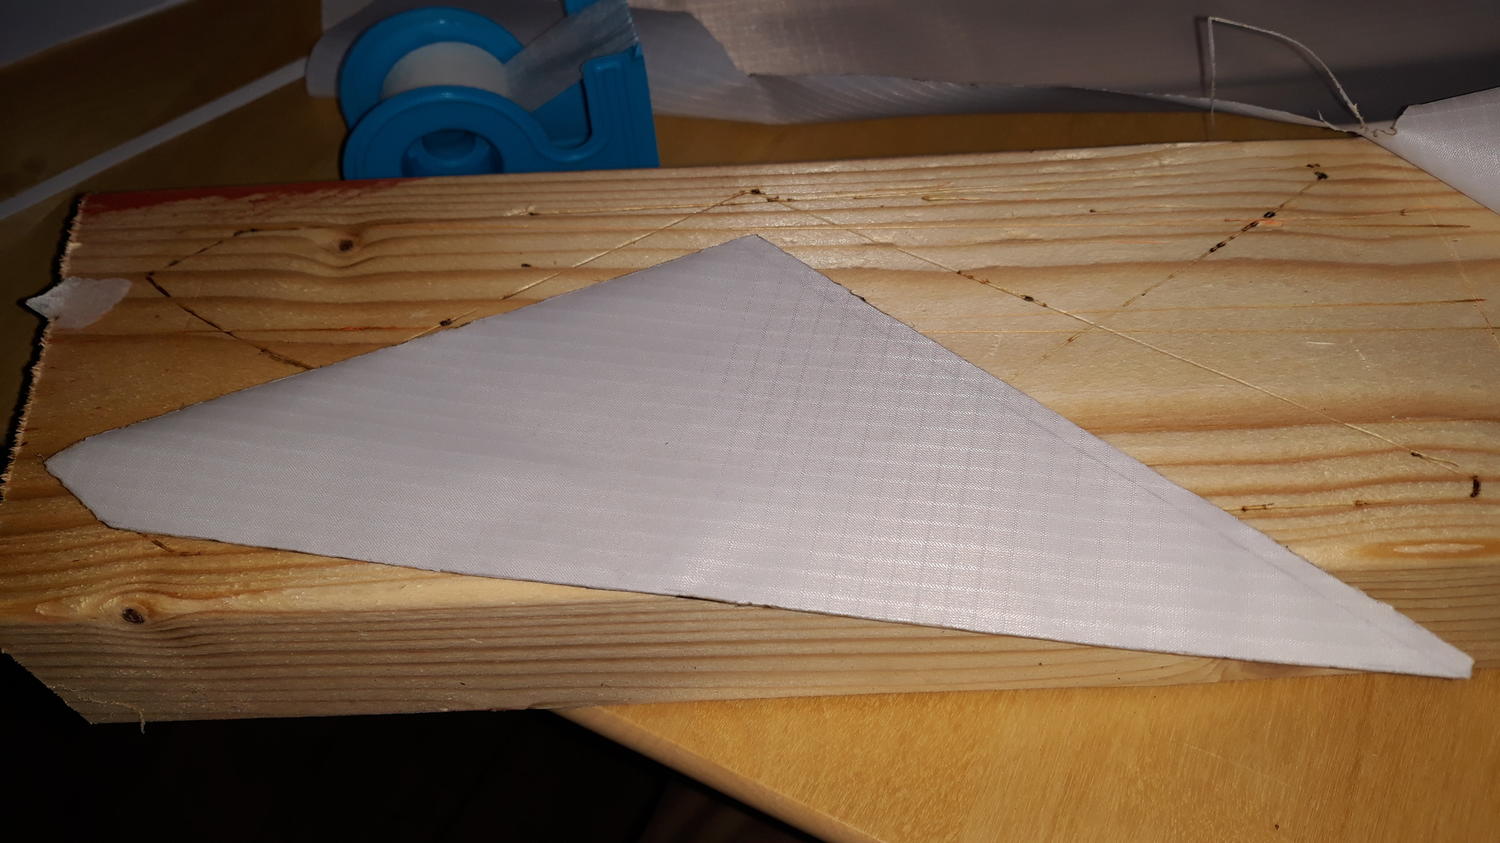
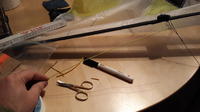
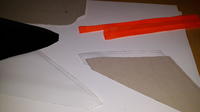
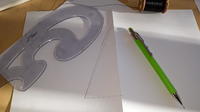
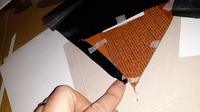
Hot cutting the ripstop Got the sail dimensions from the Stunt Kites 2 book. Made a scaled down version of the smallest speedwing. Liked that it was a design coming with a camber. This book mentions that the speedwing is a patented design - I doubt it very much since it is so old (however making an exact copy of a certain Speedwing model commercially available is another thing). I drew the panels first on paper (would have been quicker using cross ruled paper) and then used the pen to transfer the pattern to cardboard to serve as a template for later hot cutting. The thick black thread served as a make shift drawing compass when drawing the triangles of the panels Cutting with a hot iron for wood burning (about 15USD, 30W, 19 different tips). One need to make sure that the tips are well screwed in for best performance(/heat transfer). The sharp blade tip was a bit of a disappointment since it didn't conduct enough heat to melt the ripstop. The narrow conical tip worked instead. There was no need to remove the surgical tape before cutting - the tip just burned rapidly through as though it wasn't there. Did not notice much (any?) difference between the cutting of the different kinds of ripstop here.


- 16 replies
-
- 1
-
-
- kite making
- blunt needle
- (and 3 more)
-
Is a pocket necessary? I mean I keep my kite stake (when using one) in my right back pocket. I have never hurt myself in this way so I see it as risk free (so far). Any opinions on this? B.t.w. the design looks playful, like three giant pins for sewing.
-
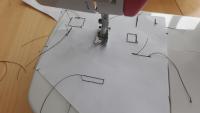
 3/4 of a year ago my old time kite guru from the end of the nineties, @Anders Matson, suddenly surfaced on KiteLife and back "into existence" (a very subjective statement on my side) last summer after say 18 years. Anders lives on the west coast, while I live on the east coast (of Sweden i.e.). About a month ago he kindly sent me an animation and an illustrated document describing a QLK kite routine and when I asked he allowed me to share them (they are attached at the end of this post). The kite routine will be performed as a part of the 20th anniversary celebrating Nordic Kite Meeting ( http://kites.aerialis.no/its-getting-closer/ ). This meeting will coincide with the Blokhus - Lökken wind festival on the north west coast of Denmark ( https://www.facebook.com/BlokhusLoekkenWindFestival/?hc_location=group ). This is how I, an absolute quad team (sub-) rookie, approached the routine documents. As there are no serious (non power) kiters around me I had to practice this without a team. In fact, there a no other framed QLKs in this part of the country that I know of and the only framed QLKs I have ever seen are my own. I got the first one, a Rev. B-series 1.5 Std., in June 2017. My two months of intensive QLK started out a month later. This intensive training period was due to (should I really say thanks to?) the missed JB QLK-clinic that happened to take place reasonably geographically nearby (in Denmark), which to my knowledge never has happened before. Feeling frustrated, I set out a goal to at least compensate through intensive practice for this missed opportunity of learning - I raced against imaginary fellow QLK pilots and stopped doing DLKs for the duration of this period. Not until that point that the clinic was over did I return to do DLKing again or rather from that time I did both disciplines. Some remaining questions: What are the most common beginner difficulties? Are there any other things that I missed preparing for (see further down below)? Are there standard routines that are well known and spread so that people can be more prepared for spontaneous formation/team flying at festivals? Where can you today find advice on getting stated (other than the below). Is there a standard vocabulary that a "skipper/captain"(?) would use (talk/shout) when coordinating a group? Initial impression/digestion of the routine description After going through the Anders Matson routine material several times, I realized that I needed to to work with the material in some way to remember it more easily. I looked for sequences that were/could be grouped together and found that the landings formed natural start and endings of the sub sequences. There are several landings in the routine. I believe that this matches well with the designers intention of the routine to be inclusive and allow reasonably skilled QLK pilots to join in, since the landings should serve to collect and synchronize the group (I believe). Even if it has been designed to be available to everyone that can control a QLK, it is certainly not the case (IMO) that you can do this well without practicing. Below is a condensed terse form of the routine that Anders sent me. It contains much of the info, but not everything and is therefore not "stand alone" from the other attached documentation.: Abbreviations RHS Right hand side LL Landed line HL High line CCW Counter clockwise FYK Follow your kite. This will prevent that the kite lines (kite to kite i.e.) get twisted around each other. CW Clockwise ML Mid (height)line OL Offsetted line - the right half is at 60% of wind window and the left is at 40% height. GRID A kite double line - two rows and several columns RSRP Rotate step rotate pause: From horizontal pos. turn 90deg to side, wump sideways one step, rotate 90deg to horizontal. When reaching an end of the line, drop or rise vertically with the LE remaining in orig. direction. The pace of this part is: And rotate, and step, and rotate, and pause WGRID Widen grid The Routine LL - Repeat 4: WAVES(fr. RHS) - LL Repeat 2: LL - ARCHES - LL LL - Repeat 2: CIRCLES(fr. RHS, CCW, FYK, LE forward) - LL LL - ML - OL(FYK +/-2step, form CCW) - GRID - OL - GRID Repeat until orig pos. (CW, FYK): RSRP WGRID HL - LL or shorter LL - Repeat 4: WAVES - LL Repeat 2: LL - ARCHES - LL LL - Repeat 2: CIRCLES - LL LL - ML - OL - GRID - OL - GRID 1 lap: RSRP WGRID HL - LL or even shorter 4 WAVES 2 ARCHES 2 CIRCLES ML 2 (OL,GRID) 1 lap: RSRP HL Mental images for avoiding line tangles The largest worry of managing to do the routine well was flying with others and this thing about getting the lines tangled - the flight pattern of the kite was something that I could practice. Simply how did the line thing work when flying in a team? Anders had clearly drawn how the pilots should move on the ground, but it didn't feel like it was a good general way to just memorize it. I therefore sought a model that one can "always" apply. First I imagined that the pilots movements were an in the horizon mirrored image of the kites movements. That was a valid image but was to complicated for me to to function in real time when practicing the routine. The next picture I made to avoid line tangle was to follow the shadow of the kite on the ground (provided that it was a back lit kite). This was easier to remember. After the second routine training session I narrowed it down to just follow your kite (sideways). The down wind/up wind (ground) movements didn't need a mental image. It is intuitive - when you want the kite to go down you walk towards it when you want it to rise you walk backwards. Line set choice, handle adjustments and general wind challenge identification First action to get prepared for the event was to start using the (completely?) unused 40m line set, since Anders recommended 35m to 40m lines for the routine. Handling this new line gives me Climax (the line manufacturer i.e.) yellow left index finger tip when winding the line set up. The so far three 40m line practice sessions I have had here revealed some wind related possible problems. If the wind dips and/or there is ground turbulence, keeping the place of the kite in the (imagined) formation became difficult without much upstream movement/backing. To create more margin I moved the larks head in from the outermost position on the top leaders a couple of knots closer to the middle of the knot range. I imagine that one easily could cause disorder in the team if some of the members started to run backwards. I expect that the first ones to run backwards are those whose kites are lowest in the formation, because the wind is typically lower there. When they try to back the other pilots might not have the same need, because they got more wind as the kites are higher up. On the other hand, in the upper part of the wind range the challenge is another one. There maintaining position or a stable slow pace in the strongest gusts in a carefully planned way was the challenge. Nowadays I don't mind making a mixed DLK/QLK session as in this image from my latest session to prepare for the routine. I believe it increases the over all efficiency if one aims to progress in both types of kiting. I also think that the colours of my 1.5 B-series mid vent and my Level One Oneleven match very well. Drills related to the routine General The stand by position of a quad IMO is inverted. It is the easiest position to hover the kite in light wind. For me (and for many others I assume) it is also the stable position that minimizes any kite movement. Compared to any other hover, the inverted just looks best for me. It doesn't stop there, I see the inverted slides as the easy one and most often end up doing this rather than the non-inverted. This means it makes sense to practice the very basic regular hover since the routine is 100% free of any inverted hovers and other inverted moves. The waves and the arches Not much to say about flying forward and up. What requires some practice is to fly backwards and down as fast as possible in some possibly turbulent winds without having the kite wobbling. The circles Initially I assumed that you flow the circle much like a DLK. It was then quite straight forward, only the part around "07:30" in the CCW circles needed some finishing. Then during a mid vent session in a high wind period not really suited for the mid vent I dropped the assumption that the kite was choosing the speed and then more slowly positioned the kite along the circle. Now it became a challenge and a more thorough preparation for the event. The formation, execution and end of the grid This is the most challenging part, both in complexity (to remember) and skill of kite moves required. Apart from memorizing the paths/patterns, several things needed practice here: The snappiness of the 90deg clockwork like rotations. Maintaining the height in turbulent winds when being in the lower row of the grid. Doing the vertical slide upwards quickly (I originally thought this was very necessary and the single most demanding part). Keeping track of the four steps (backward/forward) required when doing the vertical slides. I have not been happy with my clockwork's snappiness. Now it is high time to start working on it. If one use flicking movements of the (lower side of the) handle. Then the kite movement will be snappy as well. If you inputted the right amount of start and stop movement of the handles you just made as successful snappy 90deg kite rotation. Still working on reliably avoiding wobble here. My first idea of the pace of the steps (the above RSRP) of the grid was a 1-2 or a 1-2-3, but Anders informed me that it was much slower: and rotate, and step, and rotate, and pause. When thinking the 1-2 or the 1-2-3 option was the case, I saw it as a problem to be able to do the vertical slide upwards quickly enough. Speed of the upwards vertical slide might still be required so this is something I practice. So a general rule of thumb to counteract the DLK steering effect when setting the left/right kite angle to drive the kite sideways (in the direction of the LE) is to add to LE angle by twisting the left/right handles in opposite directions. In other words, enhance the LE slide angle (that is set by extending one arm) by twisting the handles relative to each other. Pretend that you have the top of the handles connected with a rubber band that you want to stretch as much as possible by adding a twist to the handles. Being aware that this is what you do in a slide to maintain the orientation of the kite, enabled me to exaggerate hand movements/positions and run upwind and still keep the kite orientation in the upwards slide. To make my muscles remember this I did an exercise. I let the kite do an upside down "U" while sliding from left to right and keeping the LE pointing outwards. In the straight parts of the "U", both up and down, angle the top of the handle that you keep closest to you so that the handle top comes even closer to you, while on the extended arm angle the top of the handle from you. In the curved part of the upside down "U" reduce the relative twist of the handles. The second exercise I had that was related to the grid was also geared towards the vertical slides. I pretended the team consists of two or four persons so that the part of the time I did the vertical slides increased. The steps of the grid was then repeated over and over and over. After the latest training session I came to the realization that this art sometimes requires a sacrifice. Finally, before publishing this post I got the bright idea to read what other experienced pilots have written: https://web.archive.org/web/20060127225614/http://www.kitelife.com:80/archives/SEPT991/team.htm http://www.rehilliard.net/pdf/AKATeamFlyingManualbyTroyGunn.pdf (thanks again A. for the link) http://kitelife.com/1998/05/01/issue-2-beginning-ballet/ http://kitelife.com/1998/06/01/issue-3-team-basics/ Ouch, there were many issues with coordinating with others in the above links, this is a bit hard to do on your own. Perhaps I'll try to do the mini kite on a stick anyhow to rehearse the routine (for the event above) as also recommended in the links above. Perhaps it is more efficient for learning than the compressed terse text form is? But on the other hand, writing/reading text during a public transportation ride doesn't look funny, while waving a stick kite could. In an unrestricted wish list, there would be an online common stick practice simulator with verbal communication option, so that at least that aspect of team flying without distant travelling could be covered. Perhaps a (sub set of a) FPS like WASD/mouse control input for controlling your online kite? Rev rutin BLOKHUS.mp4 NKM2018Revrutin.pdf
-
That is remarkable! I have one (well two files then) with quotes I collect from mostly quote of the day servers. This one (yes the "First the came...) I first saw say two years ago and decided to save it directly when I saw it. I got it from alpha.mike-r.com (port 17 as is the standard for QOTD-servers, in fact the QOTD-link from the web page doesn't work). To get a new quote (typically when my focus is dropping) I just type "nca" since I got the alias alias nca='nc alpha.mike-r.com 17' in my environment.
-
Lets rephrase the question, should every KAP photo (etc.) of a church be considered as not appropriate and therefore should not be even exist? Of course not! That being said, one can be respectful to the living persons being there. If there would be on ongoing funeral it is certainly not the most considerate thing to do to fly close to/over the church at that time, especially with a noisy kite (or multi rotor etc.). On the other side, if one would apply the eventuality of a geographically localized souls argument (as in the above link), close to no photos taken on earth should exist because "residues" of generations over several hundred thousands of years have ended up well mixed with soil and current life everywhere. If you think it takes the fun out of kiting or thinks it is intrusive to people in your surrounding, go up very early when there are few persons around. I think this is close to the usual considerations for any type of kiting that you need to do whenever there are people or traffic around. What density of people (or how close can they be) can it on a beach before it is time to stop flying (not to be intrusive and for safety). How desolate should the parking lot be to be safe? How close to a road can you be without distracting drivers and others?
-
I appreciate your comment not so much for the recommended kite model (that however seems to be a popular one), but more for a pointer to and a remainder of a place of many kite plans and much knowledge. Building this particular suggested kite model would lead me into the unknown (past petrol station/toy store kites of my childhood) territory of SLKs. There I'd need to handle scary things like kite anchors popping out of the ground and then starts to smash things and people, multi kite anchors when you want to be on the safe side, kite refusing to go down, gloved handling of kite line, (and worse) un-gloved handling of kite line, wind changing direction forcing a rapid change in the set up, wheels for walking down the kite (and really hope that you won't get hit by the anchor in your back and who knows even an (with line length) increased risk to do a Benjamin Franklin (ZZAP!). SLKs are scaaary - personally I'd wouldn't like to meet one in a dark alley... Really, I do have a respect for SLKs and think that I unfortunately haven't the time to learn to deal with them now. Another contributing factor is that I have no one locally to learn from. On the other hand I never thought that QLKs were my thing until soon a year ago, so I don't know for how long my SLK hesitation will remain. And I must confess that I have spent some time thinking on how to make tetra kites with easy handling...
- 16 replies
-
- 1
-
-
- kite making
- blunt needle
- (and 3 more)
-
The 3-4 times I have tried it this matches quite closely to what I have experienced (minus the QLK, the stakes and knock-on-wood spars). If you are troubled by waves you could try to find a part of the beach that got an area of the water where plenty of rocks/boulders are scattered, that can reduce the wave height (if available). Another thing to try is to feel for the difference of a dry and wet UL. The HQ Shadow dried quite quickly when being used, while my HQ Maestro3 took a bit longer time. The reason for the longer time to dry for the Maestro 3 should be: I stopped using it wet, there was some remaining seaweed that I had "harvested" and that the ripstop of the Maestro3 is thicker than that of the Shadow.
-
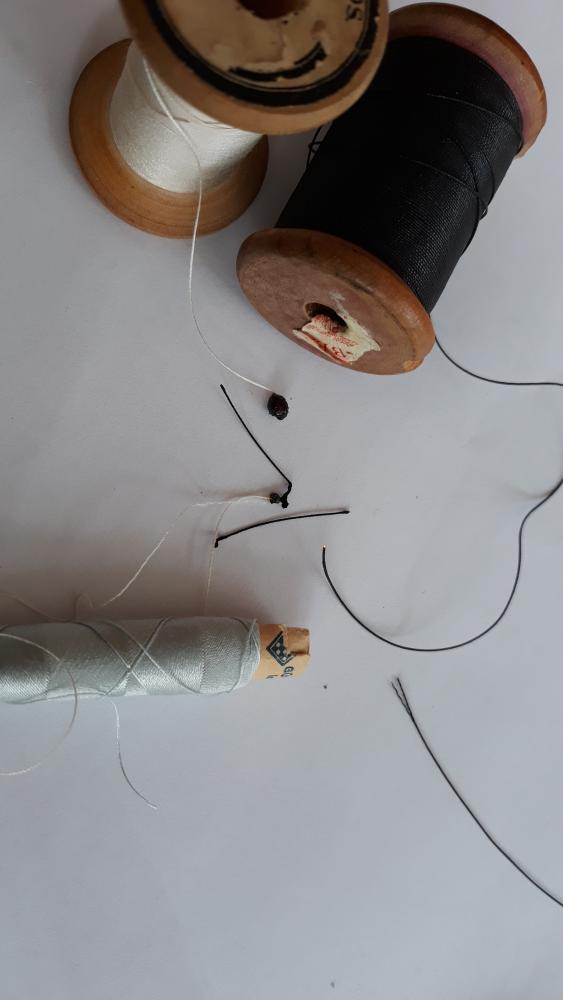
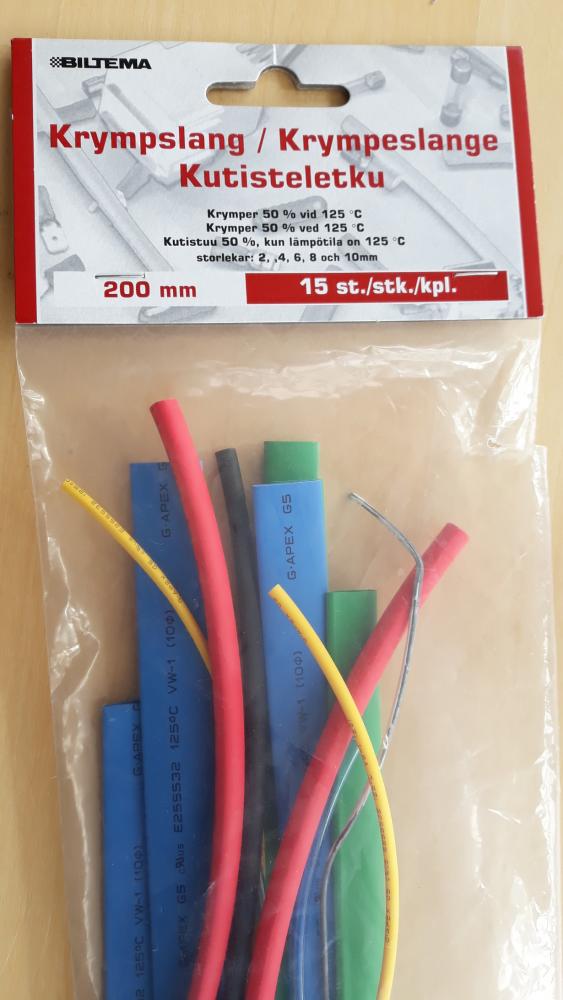
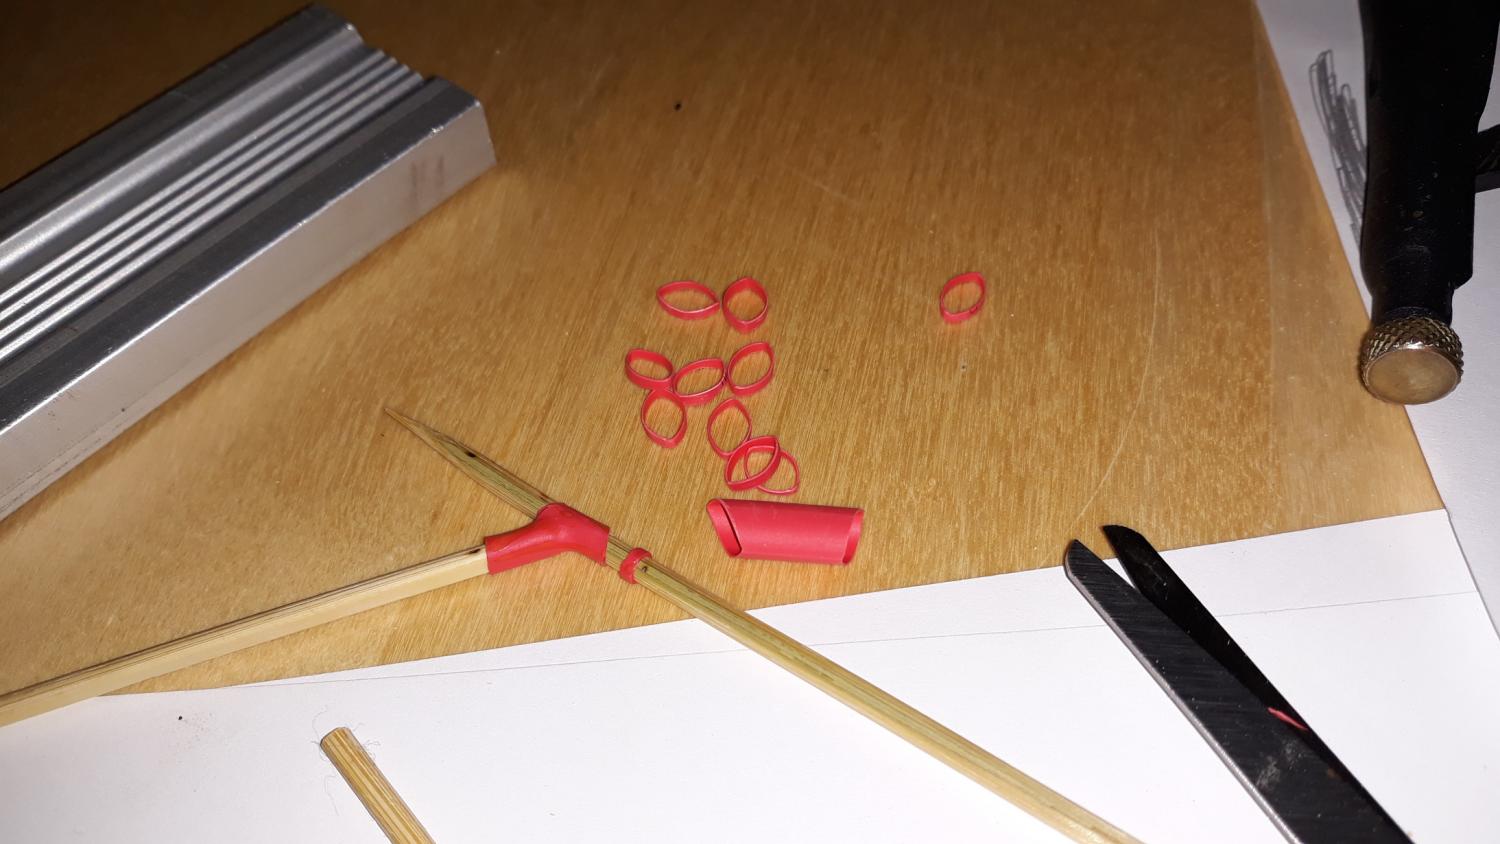
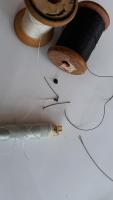
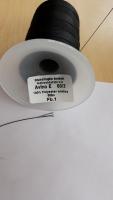
List of material and related thoughts/discussion/background The Ripstop When ordering the ripstop I wasn't certain that I was ordering the right thing, so I more or less went after what was offered at a low price. Afterwards I did some more thorough comparison... Black and white nylon ripstop M-40 44g/m^2, Metropolis Drachen. 44g/m^2 seems to be about standard thickness when seeing what is offered in kite stores. On the other hand Icarex PC31 polyester with a mass of 31g/m^2 seems to be good for the low wind kites (as stated in Drachenmarkt). For really light sails there is 25g/m^2 mylar that can be bought in kite shops. Orange 60D Polyester ripstop (70g/m^2), Wolken Stürmer. I got this polyester at a good price, 4.40 EUR per metre. This feels thicker than (most?) of my other DLKs, possibly with the exception of the Fazer XL and Fazer XXL Maesto3. For this little model kite I used it as an LE dacron substitute, but also for the trailing edge. I find the numbers appearing in the names of the ripstops confusing. I don't mean the number of g/m^2 but numbers like M-40, PC31, sometimes even just a number appearing after the type. In this context the (somewhat sad unit of - see below for an explanation) Denier becomes most sensible to describe the roughness of the ripstop. To my understanding it is the thickness of the thread used to make the ripstop. The feeling of Orange 60D ripstop is somewhat rougher then the sails of the kites that I got. So it is a question of experience and knowledge, but it would be educational to have a small (2cm2 would be sufficient) sample chart of various types of ripstop. I feel I must largely must pass on the question of the feel of nylon vs. polyester ripstop. Of the ripstop material I got at home (two colors of nylon Contender Superkote 75, three colors of nylon Metropolis Drachen Spinnaker M-40 and one polyester Wolken Stürmer Spinnaker 60D), only two ripstops does not rustle paper like - two Spinnaker nylon M-40). All other ripstops does rustle both nylon and polyester. The ripstop polyester on a few of my kites that I also compared also rustled. So summing these few ripstop observations up: polyester rustles while nylon might rustle - if it doesn't rustle it should be nylon. Correct? Btw, would mixing nylon and polyester ripstop be a big no-no (or could one use it in areas where low stretch is required - a bit like a somewhat flexible mylar?)? Though I now have done some limited work with the ripstop there are several things about the material that are still not clear. Is keeping track of the slightly more glossy side of any importance? Does the ripstop have any main/straight/lengthwise grain/warp direction (over the supposedly spongier cross grain/weft direction) of any importance? How should one orient the main grain in a DLK or a QLK? Could one draw the ideal main grain "field lines" on a sail? If bias grain strips is an improvement when applying over rounded edges (like a TE or some opening in the sail) when making a hem, it is not a huge one - I'd need to do some more testing to be able to make my mind up here. Also all spinnaker (ripstop) strips for i.a. TE are cut along the grain - not the bias. With the ripstop coating, is bias strips of any importance? Can you remove the ripstop coating in some solvent to make better bias tape? The thread Black sewing thread, Avion E, #60/3 (mass of 60m is 1g), 600m roll. This tread appears a bit thick in relation to my kite model (Just to put it into relation to something: Drachen Markt offered slightly thicker (#50/3) thread as well (perhaps a Drachenmarkt heritage of Mikael Ryll's "Pure"-series of large DLKs?) - otherwise this seems to be some kind of standard.) Used it to the black and white sail. An unknown thin white cotton(?) thread that was used for the LE. Thread dimension and colour matched the LE better than with the thick black one. You shouldn't use cotton with ripstop should you? What was the drawback? Cotton too stiff to distribute load (I think that I read somewhere)? After finishing the kite the white thread was still (big surprise) of unknown material. I therefore did a test to see of the white thread burned in the same way as the black one and some other threads as well while I was at it. All but one thread burned rapidly while leaving a blob of solid residue including the white previously assumed "cotton" one. So it seems like the white was instead a plastic thread (polyester most likely since they are common). The one exception in burning style was an old thick thread that burned slowly (and smelled differently) leaving only ash (probably cotton). Warning that old thread kept glowing after the fire itself was blown out as can be seen in the image!! Pinching the thread between the thumb and index finger put it out completely. The glow of the thread was hardly visible in the bright daylight... A combustion comparison test to figure out the material of the white thread (well at least compare it to the known polyester thread). Warning, all treads burned rapidly and the old thick black one kept glowing after the fire was blown out. Weight number wt and the number of strands/ply - a kind of sane unit of length per mass The three strands of the #60/3 thread. The "/3" part in 60/3 is the ply of the thread, i.e. how many strands it contains. The "60" part of the above thread, the "weight number", is written as 60wt in the US standard. For a 60wt thread it takes 60(kilo)metres to make 1(kilo)gram of thread. Or alternatively expressed in mass per metre: 1/(60m/g) = 0.017 g/m Denier - a seemingly arbitrary unit of mass per length Another, more messy, measure of thread thickness is denier. Denier is the mass in gram for 9000m. To convert from denier to wt: 9000/denier To convert from wt to denier: 9000/wt ( https://en.wikipedia.org/wiki/Thread_(yarn) ). So the thread above expressed in Denier would be (along with the somewhat funny unit): 9000/60 = 150 g/9000m Simplify: 150 g/9000m = 0.017 g/m = 17 mg/m I.e. 150 denier corresponds to 17 milligram per metre. Verdict Not surprisingly we got the same mass per length when calculated directly from the weight number or from the Denier of the thread. If one would like to determine how much mass the thread contributes with using deniers would be less obvious. A much easier unit for this would be the above mg/m IMO. Though the weight number would be quite OK for intuitive estimations like: I used about 30m thread for the kite, then the mass of the thread should be about half a gram". OK, it seems like the thread is not a large contributing factor of the weight of a kite anyhow. I think the convention of expressing the thread dimension without (well "proper") units adds to the confusion. So a 60wt thread should be referred to as a 60m/g thread IMO. Denier on the other hand is a somewhat sad unit. Choosing 9000m as the base length for the Denier sounds quite arbitrary as well. If on would like to express the mass per length - just do so (as above): 1/(60m/g) = 1/60 g/m = 0.017 g/m = 17mg/m This makes much more straightforward, 17 milligrams per metre! Paper-stitch drill: Make every stitch end up where you want. Make the stitch length large so you clearly can see the result. I can't guarantee that this control will make your kite fly better, but it will at least feel better when you see the result. I still don't know if/when to do a forward/backward seam to attach the thread when starting or just a backward seam. I still haven't decided if two or three stitches would be good either. When studying the stitch length the reverse stitches are shorter the the forward - you can't go into the old holes with the needle when reversing direction. Is this a bug or a feature? Anyhow it seems like two forward stitches matches about three backward stitches. When the seam is finished (after reversing to attach it) and after cutting off the thread you end up with one piece of thread on the upper side and one piece of thread on lower side. The next step I did was simply to tighten the threads somewhat. After the kite was finished I got a recommendation on how attach the threads when the seam is finished from a college at work (who is into horses and some sewing - not kites). More on this in a later post... Heat shrink tubing (for fittings) For the fittings I used general purpose polyolefin (6mm initial diameter) heat shrink tubing. Shrink ratio is 2:1, but it appears that you can shape it somewhat further with your finger tips after it has done its initial shrinking while it is still hot and soft. The fittings made from this heat shrink tubing were "semi soft" (after cooling down). The initial wall thickness of 0.28mm and the resulting wall thickness of 0.56mm (from data sheet) might sound as very thin, but it kind of suited this small kite. If one would like to make larger and stronger diameter fittings there are other sorts with resulting wall thickness of several mm, dependent on initial wall thickness and shrink rations ( https://www.elfa.se/en/cable-wire/heat-shrink-tubing/standard-heat-shrink-tubing/c/cat-DNAV_PL_090803 ). Note that I have no idea of the strength. Heat shrink tubing material vary, but I think of the polyolefin as the standard one though. The heat shrink tubing fittings might be worth checking out for light low wind fittings? Looking on my 4D I've always thought that the LS to stand off fittings looked a bit over dimensioned in relation to the standoffs. Even more so now with when my eyes gotten used to the mini speedwing heat shrink tubing fittings. Beware if you intend to use polyolefin heat shrink tubing close to sleeved dyneema bridle lines - the core will most likely melt (though heat shrink tubing around bridle lines of other core fibres might work). Other material 190cm, Climax 35kg sleeved neon orange bridle line. To me this long total bridle line length was a bit surprising. Also that the knots themselves takes up so much length (even for this narrow line) was a bit of a surprise: a single overhand knot of a double line correspond to 1.4cm (0.55"). I really like this small dimension line. This line is easy to work with and the knots last. The wing tip tensioners of my Shadow is a narrow orange sleeved dyneema. I wish I had used this nice line to secure the battens of my Fazers to get lasting knots. The most difficult cord I used was one intended for bricklayers. It was absolutely hopeless, constantly undoing itself- I had to secure the knots with heat glue. Sleeved rubber cord was almost as bad requiring occasional tightening. A fishing line would probably have worked? I'll see how the latest attempt will go - reusing some old broken kite line (dyneema/spectra) residues to secure the battens. A few cm 4mm (outer diameter) hose for the nose. Heavier but more robust nose alternative than the heat shrink tubing. No work required to make it cylindrical as when instead making the nose by heat shrink tubing. An observation, instead of shrinking when applying heat, this non-heat shrinking hose could be widened enough to slide it onto the relatively slightly too thick barbecue pin. Surgical tape. Good for holding cardboard template on the ripstop while hot cutting. The tape will be out of your way, since the heat will cut the tape as if it never was there in the first place. Also good for keeping ripstop in place when sewing and for preventing ripstop corners being poked downwards by the needle into the hole towards the bobbin. Cardboard from some empty food package. Contact (rubber) glue worked for gluing the panels together, albeit a little difficult to distribute evenly (old sample?). A paper glue stick turned out to be no good for this purpose, only to (as an alternative to surgical tape) somewhat attach the card board templates to the ripstop before hot cutting. 3mm barbecue sticks (bamboo I believe - very hard anyhow). Used for the frame of the model kite. Also used as a tool to remove the tape when close to the presser foot of the sewing machine. A detour: When discovering how strong those bamboo sticks were when cracking one I found these (hardly original) inspiring to use in kiting. Hmmm... Imagine something like this reed kite looking like something like a dragonfly/bird/moth ( http://www.firstkites.nl/vliegend riet.html ), but a little more lasting and portable. Could one make such a kite out of bamboo strips? Looking around on the topic of slitting bamboo strips I ended up on this very precise handling of it when making fly fishing rods ( https://www.youtube.com/watch?v=BYfeeyYaXgY ). There for a second he shaped the strip with a heatgun. Immediately I thought ahh perhaps something to shape the wings of a insect bamboostrip SLK? Making the wings into an elongated "8" of a curved bamboo strip. No, no, no, straighten up now @Exult, you are never going to learn something properly if you don't stay on track and choose not to do things sometimes. If you think that double sided tape is missing from the above list you are right - got a roll now, but that is for a next project.


- 16 replies
-
- 1
-
-
- kite making
- blunt needle
- (and 3 more)
-
In this video of "'Kleine' Pure von Ryll" in BFT4+ I get even more respect of the XXL version (sound on recommended): Though I know that how much a single pilot can pull is limited and a larger kite typically just means that you can't use it when it is too windy, I still can't stop me from imagining how it would be if a large Pure version would had been used in this video. ("Kliene" means small, i.e. here most likely meaning a non XL,XXL version )
-
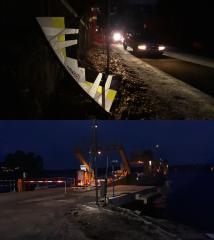
From the album: Exult's Photos
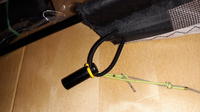
To use this today not very crowded ferry port for kiting I made a 4x8.2m 38kg line set from an old DLK line set (that a SLK polyester line had cut off earlier). I have never tried this short QLK length before, but longer lines would not have been practical in this place. I'd say that there was little interference with the traffic. The cars waiting to get on the ferryboat have their engines off while waiting - this was the time available for kiting. The two times when the ferry was approaching during the session, minutes before it reached the port, I put the kite stake in a icy sandy snow pack or the soil next to the road and landed the kite on the side of the road. Then I positioned myself along the lines on the side of the road to guard them so that no one would trip on them - however there were no pedestrians getting on or off. Because it was soon getting dark when leaving for the session, I thought that I was in a hurry and therefore didn't spend time looking for end caps to see if they could be fitted to protect the kite from the abrasive asphalt. Instead I used the crude method of putting a temporary sacrificial layer of duct tape on them. If there would be more sessions here I should protect the whole leading edge, including the LE caps of the vertical spars. A positive thing was that it turned out that I had not been in a hurry at all - not so surprisingly the ferry port was equipped with street lights.