Exult
-
Posts
580 -
Joined
-
Last visited
-
Days Won
27
Content Type
Profiles
Forums
Gallery
Downloads
KL Shop
Blogs
Articles
Everything posted by Exult
-
Would you expect (I don’t have the answer), that the reason why the sail needs so much more load during reverse is due to a need to flex the LE or is it something to do more with the air flow around the sail? If it is the first case, that the LE should be curved somewhat, shouldn’t this be available with a sightly more flexible LE (and therefore require less pull when reversing)? I like my P90 LE (very soft) in my Rev 1.5 B-series std in very low winds, but have not tested any P90 LE in the Rev Indoor. You did find it worthwhile to defy the ”the terrible inland winds” with the Rev Indoor or was it while using a 1.5 outdoors?
-
General flying – 360ies and up and overs First have you extended the top lines in some way if using the original Rev Indoor as originally configured? – if not: Do so! I added a pair of pigtails in series to the top two pigtails on the LE. When originally starting out with the Rev indoor I flopped seriously and forgot/hid the kite after trying a couple of humiliating times and didn’t touch it for something like 1.5 years. My recommendation (quite close to how I did it i.e.) is to address one difficulty at a time: Learn to do 360ies and low wind flying with your normal outdoor quadline. I used 10m (33foot) and 8.2m (27foot) for this. This step can take a long time dependant on your previous quad skills. Learn how to pilot the Rev Indoor as a "normal" kite to know its properties on ”long” lines (25 to 30 foot) outdoors on close to zero wind days. The Rev Indoor has a way of ”cutting/sliding downwards through the air” seeking the ground when doing horizontal flight or 360ies if you do not know how to counter act it. This behaviour is different from the 1.5 Revs. I think of the lower hand handle and lower hand wing tip as intersecting cog wheels – if the lowest wing tip starts to lag to much when doing a 360 and you want to bring the lower wing forward – rotate the lower hand handle so the top line of the handle gets pulled and the brake line gets slacker. Get used to the kite and as usual feel the kite through the lines while thinking of the sail surface/feel the presence of the kite/feel the pressure of the sail. Also: Beware of gusts – they are scary when piloting the Rev Indoor outdoors! Deal with the really short short lines - in my case 3.6m (12foot) and 4.6m (15foot). Being Indoors or outdoors is not so important. If/when available also try the longer line set indoors. When you do an up and over with a long line set (like 25foot), a nice drill is to try to adjust the brake (trim the sail) so that you don’t need to pull so much on the lines and (in this case) while keeping the handles far from the ground. How well you managed can be measured in how much you need to lower your hands to make the kite pass the top (and yes, the handles can’t go lower than the ground). Reverse flying I’m sorry, I’m learning reverse flying myself and the success rate for limited distances is perhaps 50%, so the only thing I can say is how it has worked for me so far. The sort of reverse flying that I have looked into is almost exclusively horizontal or 360-like flying. I have been more successful outdoors than indoors with the reverse flying. It could possibly be caused by more frequent "natural" load on the sail (if positioned downwind). Think of it, medium light wind when reversing a 1.5 Rev, one builds up some pressure in the sail or at least starts a bit slow the first bit. Although I didn’t get all parts in it, this old post got was helpful in creating a subjective image that seems to help me: https://kitelife.com/forum/topic/294-quad-flying/?do=findComment&comment=1915 I think that the post says that the kite should lead the way and you shouldn’t pull too softly(?). OK, now to my image (yes it will sound silly): I see the kite (and especially the now leading trailing edge as a locomotive) that way ahead leads/drags any (real or imaginary) tail. When doing so, I pretend that the air has turned much viscous. This image says that the kite goes first and (the viscous part) says I should have enough line tension. Let me know in a couple of months if any of the above descriptions held water.
-
Starting out with/mainly doing? ...and Welcome b.t.w.!!
-
I don’t feel the need to know the wind speed when arriving at the field (I feel the “need” to hurry up getting started though). It is more like feel the wind and chose the appropriate kite for it. When choosing what kites to bring to the session – have a look at the trees, listen to the wind and have a look at the forecast. It is not until you need to communicate with someone else that the actual measured wind speed would become a thing I suppose. If the one you are talking to knows the kite model that you are using, the choice of kite becomes a measure of the wind. If you feel the need to be preciser you can describe how the kite behaved in the wind.
-

Attending Indoor Model Aircraft Events – the Setting of a Goal with a Deadline
Exult commented on Exult's blog entry in Exult's Gentle Breeze
I know enough to know that it is very much left to learn about controlling RC planes. There is no intention of really ignoring skills here - My experience in RC planes is quite limited. I did some 1-channel RC glider piloting as a youngster/child. Much later I made a (was it?) about 25USD-bargain: Flug-Modell-Simulator (FMS, https://modelsimulator.com/ ) with a USB connected RC control-like box that could connect to the desk top PC when started in “Windows XP mode” (the “RC-control” could even be used when playing “Battle of Britain”). Flying the virtual model planes could be done with some practice (even upside down “over one’s head”), but the model helicopters were almost impossible. With this limited background I can barely relate to all the complex moves that these RC-planes (and upside down flying helicopters!) could do at the event. When the model planes at the event just hang vertically like a hovering helicopter it looks impressive, but I have no idea if that would be an extra difficult trick or not. When they do somersault-like rotations/rolls quickly sequentially around on several axes it gets really difficult to follow. I guess it is much like viewing high pace DLK tricking if you are not used to it. Another reason for the focus on the Rev Indoor and not the model planes is my own recent progress as a quad indoor newbie. After first un-boxing (un-sleeving?) the kite about 1.5 years ago I tried it a few times. Even with the mods in https://kitelife.com/2012/03/01/modding-rev-indoor/ (or similar) and an initial full pallet of beginner’s optimism, it quite soon felt like close to pointless exercises. The “totally incomprehensible kite” was just seeking the ground as I would have been a complete general kiting novice (though in zero wind). Eventually I hid it shamefully behind the other kites closest to the wall and (tried to) forget about it. Three months ago I found my way to learn the Rev Indoor in the sense of keeping it in the air/getting past the survival mode and start to address individual components/moves of the control. My hope was that they also would realize that. It was more kite interest during the indoor event here compared to when being on a general field/beach somewhere, but only a few questions of where I bought the kites (but on the other hand I didn’t investigate how to get their kind of gear either). It was nice to hear from a participant that something “new” was presented (well actually the kite models were actually mostly not so new). Another fun comment was when they had assumed from a distance that the kite was motorized and thought about how it was propelled even while approaching it. -
@Breezin you have seriously much kite-thinking bottled up! As I also tend to occasionally write texts that are a bit on the longer side (which may be finished/published or not) I *think* that I can relate to this. For me part of it is to structure observations and remember insights that you e.g. wish to bring to the future sessions. To avoid leaving the field without having practised that trick or element of particular current interest. Active learning! It is also good to keep track of your own past learning, so that one day that when you wish to share, you can remember how you handled the difficulties. How do you make use of your notes/texts? You went that extra mile to carefully describe the Superfly from your perspective + putting it into a context!
-
The early basic sessions If you flew your duals enough to know how to avoid hard (unplanned) landings by rapidly extending your arms that's excellent, because it carries over to the quads. I got by the first times with quads by pretending that the right brake line corresponded to the right line of a dual line kite and vice versa for the left side. Beware, I have not heard anyone else swearing by that method though. The next set of sessions At least if using a REV-like (Hadzicki wing) quad line kite start gradually ”extending the top lines”. I.e. start using the knots on the top of the handles that is as far as possible from the handle itself when you connect it to the top lines. When doing so, occasionally do a few leading-edge-deforming good tugs on all lines to get a feel for the sail (and to do a distinct start/stop). Continue to feel through the lines and be aware of the sail surface also when doing more gentle inputs. Avoid constantly fluttering trailing edges – Then your trimming of the handles/leaders/lines is wrong. Good luck and welcome!
-
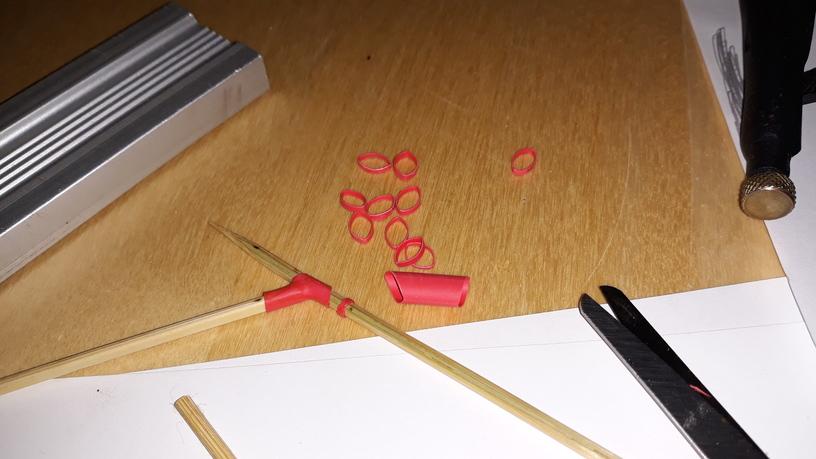
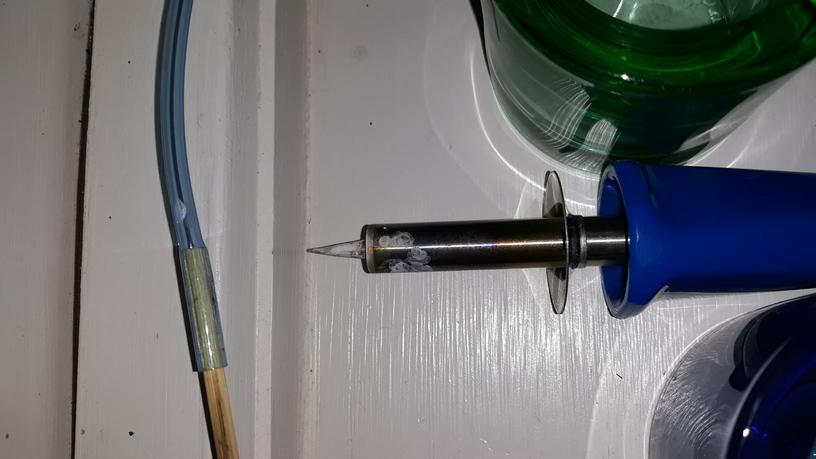
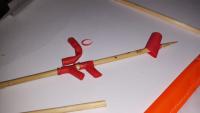
Making of the LE fittings First image: Time to do the fittings. Second image: The (polyolefin) heat shrink tubing I got shrinks at 125degC to half its original diameter. While still soft directly after shrinking it is sometimes beneficial to shape it or try to compact it further using the finger tips. Using a (initially) wider heat shrink tubing from the assortment bag gave a higher wall thickness. Unless getting hold of a thicker walled heat shrinking tubing type, the heat shrink fittings would be for indoor and/or small kites only. There are many dimensions (up to 4mm, 1/6 inch, of resulting wall thickness) and materials of heat shrink tubing, but if it would be good (or cheap) for general use I don't know - Beware I have not tested heat shrink tubing fittings on a real/standard sized kite (anyone?). Third image: Cut the side of the heat shrink tubing that would be facing the wing tip at an angle to make the edge of the fitting to become circle shaped after shrinking it (later). Impale it in the middle of the longest side. Then you need to also put the spreader in before applying the heat to shrink the tube to give it the right shape so that the opening doesn't become to small for the spreader. Fourth image: A robust alternative to to heat shrink tubing for the nose was to use a narrow hose. It was initially a little bit too narrow, but it could be softened by heating it somewhat, so it could be slid onto the barbecue sticks.


- 16 replies
-
- 1
-

-
- kite making
- blunt needle
- (and 3 more)
-
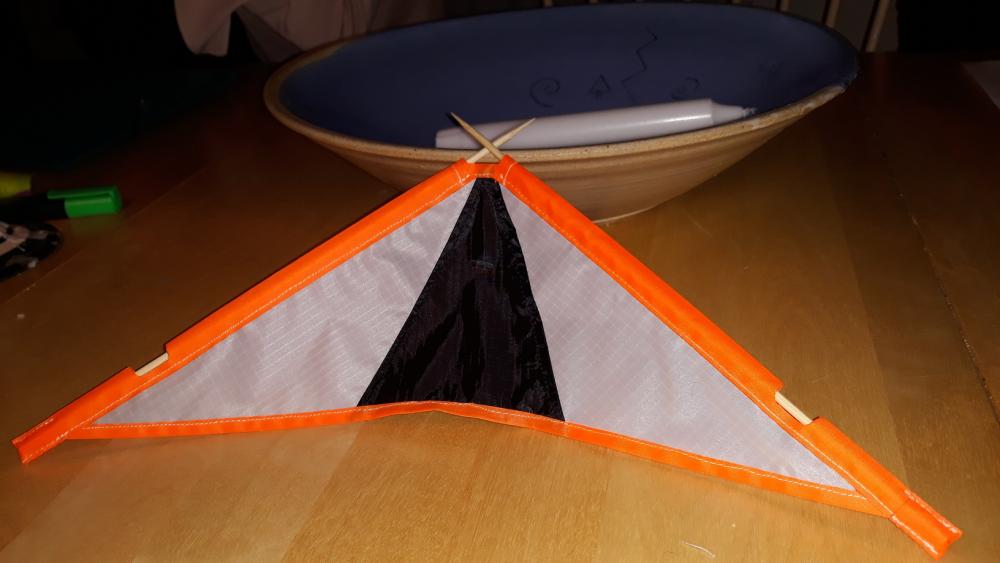
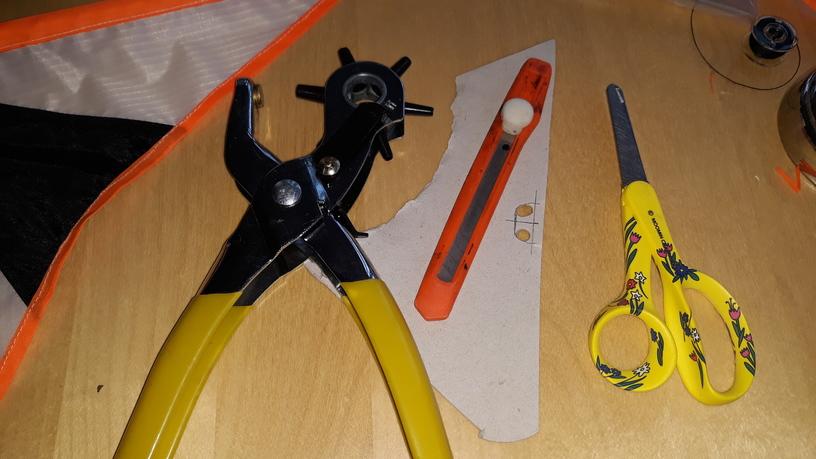
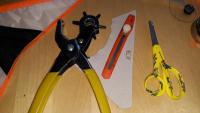
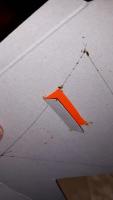
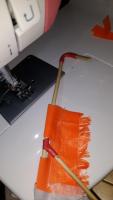
Making of the cut out for the LE fittings (+ misc.) OK, there was some time ago since the latest post in this unfinished topic. That is quite silly, since the photos are already taken and most of the text written (this semi-finished state is unfortunately not unique for this text). First image: Making the template for the hot cutting of the LE cut out for the spar fittings. The hole punch pliers were helpful when making the small radius inner round corners. Second image: Hot cutting the wing tip pockets. The edges melts and joins the edges of the template and the card board working surface. To separate them I use strips of cardboard. Third image: Before doing more or less anything on the mini kite I test it on pieces first. The red fittings are made of heat shrink tubing. Warning: It looks ugly and the fitting are backwards - somewhat misleading image. Fourth image: The cardboard strip is for prying lose the ripstop and template after the hot cutting. (Also representative for the sewing work is the large amount of tape strips)
-
Attending Indoor Model Aircraft Events – the Setting of a Goal with a Deadline
Exult commented on Exult's blog entry in Exult's Gentle Breeze
An Erroneous Step Resulting in an Annoying Pause – A Motivational Text (I hope) “Yesterday, All my troubles seemed so far away Now it looks as though they're here to stay” --The Beatles Just as a started going reasonably well with the indoors stuff and the soreness from the latest looong indoor session (the event described above) had recently gone away it went wrong. I hurried up one day, ran along a pavement, then stepped on a small innocently looking edge/”crack” not much wider than the heel and fell. No fractures, but the foot went on hurting. And what is worse, me and my wife have a daily pedometer competition where we text each other during the day in order to brag as soon as it looks like one of us is going to win. I now must face a series of big daily defeats! 😠 “Suddenly, I'm not half the man I used to be There's a shadow hanging over me” For me it is a remainder of how fragile everything is. Even when you get something as mild as cold e.g. you learn to appreciate the times that when you are well. The foot will delay “the indoor project” somewhat. I guess that the next thing I’ll be practice indoors will be more limited (...and focused). E.g. one could practice keeping the kite over the head with (for a good reason) with minimal amount of steps taken. That could only occasionally be done with the 8.2m lines during the latest session and I assume that doing it using a shorter line set would be trickier. The indoor place that I have a bit more regular access to you can just squeeze in the 3.5m lines (perhaps I should make a 3m (10foot) line set to use there instead)? (Alternatively, I wait for zero wind and practice outdoors instead) Possible practice location, but a bit on the smaller side. Another more neutral way of seeing it is that this place represents one set of practice conditions. When doing 360ies here it is sometimes required to stop the forward motion of the kite, while you back a few steps to get away out from the obstacle. Another thing to practice in the mean time are the catches (starting with the kite standing on the ground). For some reason with the Rev Indoor, lines end up on top of my hand/arm when I reach out to catch the kite. This is undesirable, since this limits how soon I can then throw the kite again because I need to get the lines in order first. The whole thing makes me think of this quote that I found on a QOTD-server: “Worrying is like a rocking chair, it gives you something to do, but it doesn’t get you anywhere.” – (Attributed to at least three different persons, the truth, if ever known, has been diluted) I think that it equally well applies to complaining about the circumstances. -
The indoor events and preparation During December I’ve attended two indoors model aircraft events at an indoor football field (“soccer” to you over there). No, there were no other kiting activities there, so there were quite many basic questions regarding sport kites. Since I’m rather new to indoor kiting (give one or two DLK 4D indoor attempts) these two events have been valuable for me in the sense that they serve as deadlines – Going there without anything to demonstrate was just out of the question. To be clear – meeting the deadlines (within about two months) would not have been possible without prior outdoors low/no wind practice. The Rev Indoor and the Rev B-series Std. The yellow package in the background contains the obstacles for the drone racing course. Those drones (as opposed to many others) are ridiculously fast and manoeuvrable with a sound of “ripping the air apart” - Scary! I dressed as for a tennis session (in shorts etc...) for the events and brought a bottle of water and snacks. Lesson learnt: Bring a large bottle so you don’t have to stop to go and buy yet one more lemonade… This large space allowed me to use the 4.6m (15foot) and the 8.2m (27foot) line sets dependent on how many RC planes, helicopters or multi rotor drones that happened to be around at the time. The artificial grass offered an advantage over ordinary indoor (non-carpet) floors – the lower part of the down spars didn’t slide away when the kite was standing on the ground with the LE up. The kites The workhorse of these quite long indoor sessions (longest one being 7h) was the Rev Indoor. The Rev B-series 1.5 Std worked quite OK, but (not surprisingly) with a slightly higher required step rate. If you really like physical exercise the Fulcrum could just be flown (only with the 8.2m lines tested), but not so much more indoors. Even fitted with the UL-spine it was not sustainable, not in this “extended mission” context at least – maximum time before rest was required for the fulcrum was about a minute for me. One of the kites required much footwork – guess which one. A close to invisible black line hung down horizontally from the ceiling causing disorder. Well, on the other side, after tightening it up, it offered some rest for a while while untangling it. I also tried the 4D to see if the quad indoor kiting activities immediately spilled over to it – no such luck really, but to be fair I should give it some more time then the minutes I spent on it here. Adding streamer tails I got inspired by videos like (Connor Doran and Scott Weider): https://www.youtube.com/watch?v=0Ko4SiESskc https://www.youtube.com/watch?v=g3Sum8M31xQ Also from the topic (about polyester ripstop and mylar streamer tails): https://kitelife.com/forum/topic/1591-revs-with-tails/ To be able to offer variation and give the indoor kiting some an extra show element I made streamers from a metallized mylar film rescue blanket. To make the streamers from (hot cut) polyester ripstop would have taken too long time for me to meet any deadline. The first streamer was 3.5cm (1.4inch) wide, but affected the kite too much – it became difficult to turn the kite from the side where the streamer was connected (when connected to a wing tip). The second (“working”) streamer I made was therefore narrower, 2cm (0.8inch) wide – This streamer had much less effect on the kite. Both streamers were 6.3m (21foot) long. The cut segments (just from sliding a sharp pair of scissors forward) from the rescue blanket were connected with patches of double sided tape. I was careful not to leave any part of the double sided tape patches exposed but was carefully covered with mylar. A mylar rescue blanket streamer of dual use. It worked well both connected to one side of the Rev Indoor and to an RC plane. Visibility was slightly higher when in motion when “dynamically” reflecting the light from the indoor lighting. I noticed that the father and son “temporary indoor neighbours” (piloting a RC plane) in the indoor flying event were in a playful mood, when they tried to to tow a smaller plane. I then offered to lend out the streamer which they accepted. They got so fond of it so they continued to use it for the rest of the evening. Moving the streamer from the tail of the plane closer to the wings affected the control of the plane less they found. Spreading kite “propaganda” and information I should not exaggerate the interest for kiting activities at the event, but till the next time I perhaps should be prepared with an indoor glider kite to lend out (I don’t own one – only heard that they should be easy to pilot) and have useful kiting links on a sign or a piece of paper for interested persons. Many of the questions asked tended to be really basic, leaving much to be explained. Personal progress so far I have stepped over the threshold, left the need of the isolated forest glade to do the practice in (was the isolated place really necessary?) and want more practice because it feels rewarding – I’m on my quad indoor honeymoon! Frankly after trying a new kiting discipline/variety, I'm proud as a child again. Kiting as an activity has so many aspects to enjoy! After this two months of Rev Indoor practice (also outdoors) there are naturally and of course many things remaining my practice list (most things actually). Some examples: To initiate the backwards flight reliably and get it going in a stable way is high up on my list. It seems to be slightly easier with this kite outdoors. Perhaps it would help getting a softer LE for the Rev Indoor? Making the left direction 360 and samurai slide as good as the ones going in the right direction. Doing a 360 but in a symmetrical zig-zag way with really crisp corners when turning up and down. Getting used to just running backwards (when the facilities offer enough space) with the kite in front of you instead of flying it in circles, e.g. when doing a clockwork. Reliably rather than occasionally do flying high over your head with lines (close to) straight up without taking any steps. When doing the catches and the closely-flying-over-the-head-dodging-it (“horizontal guillotine”), I want to be able starting the move when the kite is in the air and not only when it is standing on the ground. To be able to do the “closely flying over the head” in such a way that I actually need to step over the lines. Now I “cheat” by dragging the top lines slightly up and to the right so that the lines just slides by to the right when dodging down and somewhat to the left. Kite still unfortunately needs to be started from the ground (LE up) when doing the move. Some experimentation in an early stage I look forward to pursue: To see if a tight series of 180 deg team turns (that more bears resemblance to a DLK half axle cascade) also can be performed indoors (i.e. do the turn by briefly tugging on the top wing and getting a bit of lateral movement when the kite is horizontal). This is something that the Fulcrum “asked for” but that then could be transferred to the Hadzicki (rev) wings. When tried outdoors it was more natural for the Rev Indoor than the Rev B-seris 1.5 Std. Wing tip ladder pivots (indoors - with semi long lines). Making my “popcorn axle” attempts turn into nice “manta ray axels” (as in the video at 1:54 and 2:00 and comments in http://kites.aerialis.no/who-needs-a-field/ ).
- 3 comments
-
- 1
-
-
- rev indoor
- b-series
- (and 7 more)
-

From the album: Exult's Photos
During December I’ve attended two indoors model aircraft events at an indoor football field (“soccer” to you over there). One of the kites in the image required much footwork – guess which one. More reading in https://kitelife.com/forum/blogs/entry/350-attending-indoor-model-aircraft-events-–-the-setting-of-a-goal-with-a-deadline/ . -

From the album: Exult's Photos
Inspired by some videos I decided to add one more show element to the the indoor kiting some of the time. I therefore made streamers from a metallized mylar film rescue blanket. I found that the 2cm (0.8inch) wide 6.3m (21foot) long streamer was a good trade off. The tail also found another use when a RC-piloting father-and-son borrowed it. More reading in https://kitelife.com/forum/blogs/entry/350-attending-indoor-model-aircraft-events-–-the-setting-of-a-goal-with-a-deadline/ . -
Thanks for those words of caution regarding the use of the UL-spine. I’ll try to not to be lazy switching to the std spine when the wind gets high enough for the UL-spine to provide no benefits over the standard one. I guess the stiff spine means you are more prone to end up surprised - In a (rev) Hadzicki-wing one is reminded of that one has a light LE in by the flexing of the LE (the flex being a part of the control). For the Fulcrum one doesn’t use the flex - it’s like it’s not there (I say after only three sessions with my new Fulcrum). Without the flex one doesn’t get reminded that it is time to change the spine in the same way when the wind picks up.
-
OK a bit late post in this topic... Since May 2018 there is now an assembly video: https://www.youtube.com/watch?v=WYnJFO5gSB8 Also see the the KL topic: https://kitelife.com/forum/topic/8471-fulcrum-assembly-and-components/
-
So now I have some experience from low wind sessions outdoors with, mostly Rev. 1.5 B-series std with P90 LE and two two semi recent Rev Indoor (outdoors) sessions – still had the feeling that the 360-ies were kind of hurried. After this I have had a few (five) indoor sessions with the Rev Indoor (and some Rev 1.5) and now the 360-ies start to feel relaxed. Therefore I soon might start to ask the sensible questions. In the mean time I’d like to ask🙂: In the same situation as in the video above, could you imagine doing the same routine with the bridle removed (while kite and lines remaining the same)? If so, would there be any major changes in set up, required input and the end result of the flying?
-
Nit-picking yes..., but the Rev indoor came with 14” (carbon fibre) handles. I.e. the (curved) centre line of the handle measures about 36cm (~14”).
-
Nice 4D videos! That was way more tricking than I thought was possible with the 4D, especially in the above first video ”4D little kite in flight”: https://www.youtube.com/watch?time_continue=109&v=5dfA0NLuyWI&feature=emb_logo From reading the Youtube Alex Belov background info/initial comment one can see that the bridle has been modified. The dynamic bridle of that 4D had been replaced with a 3-point bridle as shown in ”4D kite Set UP” (below video). In the video it also seems like a leech line in the TE has been added: https://www.youtube.com/watch?v=b8C8EEoHKFQ&list=UU2TPphKeYJ3RtYpSLOp2j7A Since the Prodancer was mentioned I can’t help to link to a a favourite video(/post). Dual line tricking is not mandatory for an impressive show: https://kitelife.com/forum/topic/8173-favorite-sul/?do=findComment&comment=65913 When dealing with DLKs it is easy to end up only focusing on the tricks. I just saw an old post where there was a video where the Prodancer actually did trick by making a backspin and also entering a fade (end of video): https://kitelife.com/forum/topic/5849-whats-your-favorite-light-wind-kite/?do=findComment&comment=43537
-
I beg to differ, that is an exaggeration. After a downwards turn at the edge of the wind window you can quite easily make nice flat axels with the 4D. Other tricks could be there with a bit of more effort/luck on occasion for me (OK, OK, OK, the thing that I never thought was going to happen has happened – I have been almost exclusively on the dark side for about two years or so I need to *think back on* and try to remember how the DLK stuff was). Besides, to my understanding (though I never even seen a Pro Dancer), @RobB instead found that the trick repertoire of the PD was very limited: https://kitelife.com/forum/blogs/entry/75-light-wind-flying-in-the-windy-month/ .
-
Comparing the Prism 4D and the HQ Shadow, it was somewhat easier to do 360ies (flying around you in low wind) with the 4D than with the HQ Shadow. Actually I should really express it like this, for me the 4D had a higher success ratio for the 360ies. The 4D requires slightly less wind. Otherwise I agree with TubaKite in that that the HQ Shadow is easier to trick. It took about ten sessions to accept the 4D and consider it to be a “real kite”. What I found was difficult to accept in the beginning were the small inputs required and the low mass of the frame when tricking. To “toss around” the kite when the ”rotational mass” (i.e. the moment of inertia) was very low was frustrating. As a background, most of my general DLK style at the time had elements of (or was more limited to) tricking by flicking/lashing the arms/hands with a pre determined input, which is quite far from what is required for the 4D. But sometimes in kiting, some kites that feels strange and you don’t like very much initially, pave the way to new insights and open up/unlock (features in) other kites. I don’t say that it necessarily needed to have been the 4D here to do that (like demanding reduced inputs). The reason for getting the 4D when looking for a low wind kite was mainly that the local juggling/circus/kite shop only sold Prism kites.
-
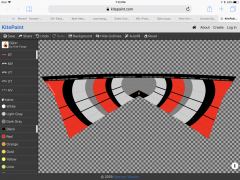
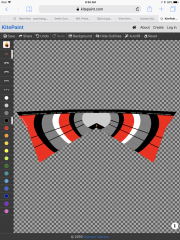
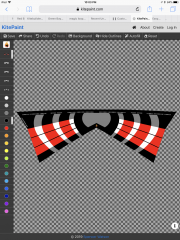
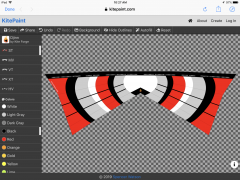
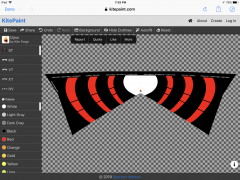
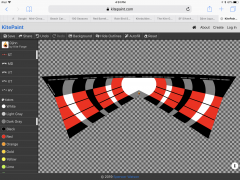
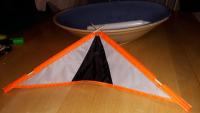
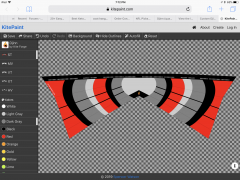 For me these patterns are all tiger themed (without the resemblance being too evident thus working on longer terms). Pattern one and four leads me to think of the heads of tigers, while two and three are more of tiger bodies.
 -
-
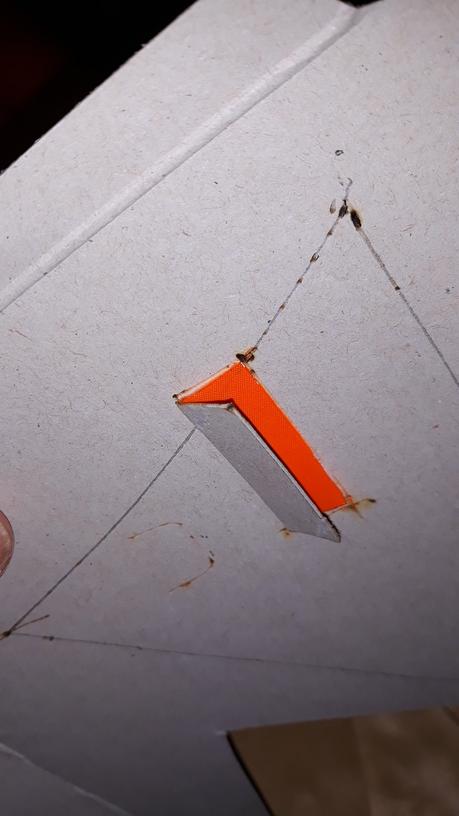
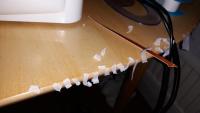
High wind is not required for this. It happened for me (see image) after two years on my B-series std and I really prefer to reach for the mid vent when the wind picks up. OK, I suppose I got some “help” cutting through the dacron from the worn bridle line - only the core of the bridle line remains there. It could have happened earlier - didn't notice it until today.
-
The heat shrink material appears advantageous when doing a read up. Apart from the sanding issue, the strength to weight ratio should increase when the excess epoxy is squeezed out. This because of two factors. First getting rid of excess epoxy leaves a higher fraction of fibres remaining which is the major contributor of strength in the fibre/epoxy (or vinyl ester resin) matrix. Second it should allow to use more epoxy during the wetting of the carbon fibres (which are more tricky to determine if wetted than for glass fibres) which should reduce the risk of not wetting the fibres properly everywhere (we don’t want any weak spots in a load-carrying beam). Written heat shrink instruction: http://www.sollercomposites.com/MakingShafts.html The heat shrink material also appear to be advantageous for reducing the bubbles: “If you are not using shrink tubing... many people complain about bubbles when epoxy is drying” ("drying"? - rather hardens/cures I believe). Vacuum bagging seem to be the next step more expensive way of removing some more epoxy: “You can vacuum bag the shaft to achieve a slightly lighter shaft at a great expense.” From the discussion in: https://www.rocketryforum.com/threads/using-heat-shrink-tape.69266/ It appears like overheating also can lead to bubbles. Sorry if providing some obvious info above – I do part of the above read up to teach myself. As I said before my experience is limited to using electrical insulation heat shrink tubing for spar and stand off repair purposes.
-
Much interesting project. You ( @Andy Klie ) mentioned sanding to even out the tube. Do you intend to use heat shrink tubing or perhaps heat shrink ribbon (since you are not using vacuum bagging)? In that case all or most of the sanding might be redundant. Heat shrink tubing: https://www.youtube.com/watch?v=jwExI_vnchE Heat shrink "tape"/ribbon: https://www.youtube.com/watch?v=wOZRALnsmwU I have only some experience of carbon fibre or fibre glass repair of kite spars and stand offs using heat shrink tubing for electrical insulation (because that was what I had available). I’m sure that was far from perfect, but it reduced much sanding afterwards because the resulting surface was smoother. It also squeezed out excess epoxy.
-
One way would be to look for spare parts for the HQ Fazer XXL, since the tube diameters of that kite also are 10mm and 12mm. (and if a shop carry a special item like this (an unusual connector e.g.) it is likely a good kite shop that could be considered to be supported by thinking one time extra if you have any current or future needs for items that could be bought there in the same order). OK this is clearly not your local kite shop, but Drachenmarkt in Germany got connectors for large kites – up to 14mm. Drachenmarkt still got the large Pure kite in their logotype b.t.w. Look for “Kategorien > Baumaterial / Ersatzteile > Verbinder, Stopper”, then navigate using the images if necessary. When comparing different thread dimensions you might get some parts of the puzzle from my rookie kite making topic. There I tried to make sense of the conventions used when describing thread “thicknesses” (actually mass per length or length per mass...) of threads. Diameters of something that is soft, like treads, is hard to measure and is therefore not (I presume) used to describe threads, but is used in a (almost sensible) way to describe the needles instead. Compare measuring a needle diameter with a caliper to trying to measure the diameter of a soft thread... See the “The Thread” section in the “List of Material...” post: https://kitelife.com/forum/topic/8756-a-first-model-kite-probing-the-kite-building-ground/?do=findComment&comment=70689