Paul LaMasters
-
Posts
818 -
Joined
-
Last visited
-
Days Won
42
Content Type
Profiles
Forums
Gallery
Downloads
KL Shop
Blogs
Articles
Everything posted by Paul LaMasters
-
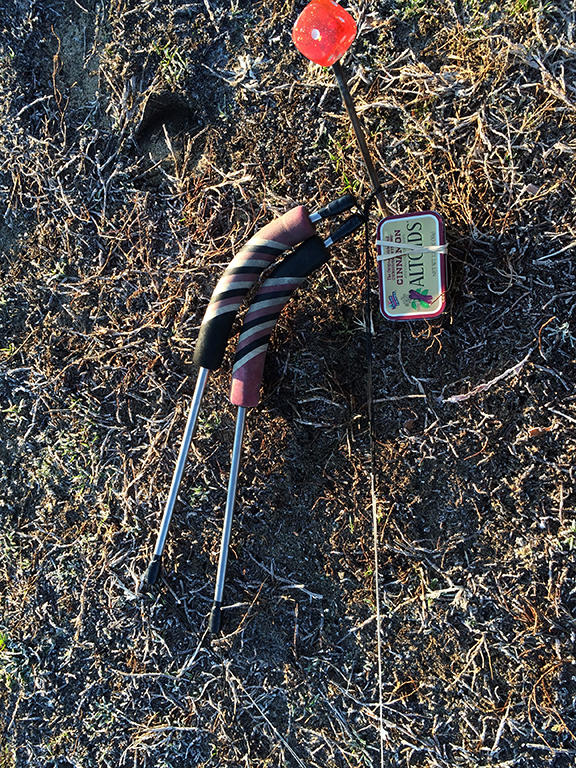
if you're making your own handles you might consider titanium tubes 3/8" in diameter instead,..... super strong stuff and light weight too (that means you can change directions (Flail) more quickly, as there's less mass to redirect into a new direction). You can bend 'em in a pipe bender easily, but should probably pack that tube TIGHTLY with wet sand before bending, so they don't get pinched. My bend is all the way at the top, gradually straightening out too and it means slight flick of my thumb translates into an 18" movement of the brake line,.. or in other words you can flick the kite inside out w/ just a snappy thumb stab! Imagine the slack line tricks you could create with dramatic moves on your arms or feet, perhaps both together + the thumb(s)?!! Grips can be acquired from a fishing supply store, what diameter of foam?, how soft should it be?, what length is appropriate? I flew on "extended by carbon tube insertion into the shorty steel" handles until I determined my needs, as the tubes of TI are expensive. Mine are grade 5 tubes 19 inches in length, they have been driven over be a car w/o bending or a mark of damage and the kite can carry them underneath if the handles are released entirely,... like to recover your field, (assume about a 300% glide length w/magic sticks or a floaty-glide capable wing = make double darn sure downwind is clear!) The photo has a Altoids Mint Box (about the size of a pack of cigs) and kite stake for scale. If you are insistent on 5/16" diameter, you could certainly use an aluminum tube, again consider a longer length too, as using 'em for low wind conditions is the hot set-up. In "big wind" you only need a slight difference, or at the end of the day your wrists will hurt from all of the torque applied by super long throw handles. What is a good length for everything? 14 or 15 inches, many use 13's to great satisfaction as well. I'm on a full vent or more venting kit with short handles, but that is personal preference. Don't be in a hurry to slap some dough down and not know exactly what you want, unless you want a whole basement full of stuff you don't use any more (like me!)
-
a couple of kites have been ordered, but not yet placed into my hands.... happy holidays to us all!
-

New Member. Cocoa Beach, Florida
Paul LaMasters replied to Corey Bell's topic in New Member Introductions
take the bottom leader off entirely and additional to the top one(s), until you find something more appropriate,... you'll have to "thread" the line thru using the sleeving as the captured point on the handle doubling the difference is a start, mine are at all times at least 3X ratios of tops to bottoms send me a PM w/your street address and I'll mail you some hi-test bridle line worthy of leaders. This line can be tied & untied easily so you can put the knots whereever you need them most and remove any excess ones so nothing is dangling down to get snagged. Eventually you'll have both handles in one hand and and be throwing massive slack lined tricks at the kite whilst blindfolded, ..... you might as well set the kite up for it now and grow into those settings with additional time on the lines! -
Tuning should be done inverted, if it will not back-up SLOW (you may not be standing stationary in low wind) then it is a two line with brakes. a quad should fly backwards! Hello, that and all the cool tricks require significant leaders installed onto the bridle, or extended on top of the handles themselves keep shortening the bottom leaders,.... and/or keeping lengthening the top leaders until you're kite will climb vertically from an inverted position on the ground. You may not fly forward flight, you may not go fast. When this level of control is executed, your leaders will be significantly different in lengths also (or you've added a leader piece in between bridle and flying line at the kite's end) if we flew locally together you could try a bunch of different "feelings" on OPKs, or worse, I would change it out, even w/o your permission!
-
ah, so now you can see the consideration of a "Randy Tom" method of appliqué, yeah it wastes fabric (huge qty!) but nothing can slip! Physically draw on a white backer sheet, all the sewing lines required. hot tack or "edge weld" all the way around the fabric sandwich Sew thru all the layers and then carefully back-cut (and front cut out) pieces until a single layer of sail is finally revealed it might be easier and what it your time/labor worth?
-
I use both solid and hollow ferrules, ... in fact have requested each for particular objectives. Hollow, I like 4 inches minimum length. On the East Coast the CLX 150 frame is very common on the leading edge and a tapered down spar of various thicknesses depending on conditions. Face it, the bottom of the sail has less surface area so it doesn't need as much framing to support it (I run magic sticks which distribute the load like a suspension bridge and a French bridle which has more "legs" of support as well) The thicker aspects of the CLX frame support a curvature OVER the leading (not L to R) edge, which promotes an increased glide (like a frisbee instead of a dinner plate). Not in any way beneficial for the "Falling Leaf" trick, but a fantastic addition if you want to fly up-wind or "throw & catch" easier. It fits the original Revolution end-caps thru the use of a plug (these will come undone eventually and need to be 2 part epoxy glued for permanence!) It doesn't fit knock-off caps, so most of us just change out those caps or use different framing choices. Knock-off caps fit Black Race and Diamond tubes just fine as an example. Several locally owned stacks are sporting CLX-350 leading edge in that first kite Can you mix tapered and straight tubes on the leading edge?,... yes but you are creating a dedicated SUL or no wind machine ONLY. One good step back and strong command of forward flight will otherwise snap the tapered end off at the junction of the down-spar/leading edge intersection. Make a 50# spectra bridle too, so you know it can't take a beating either and baby your baby with gentle control on delicate flying lines. My experiences say you need some mass to do kewl tricks, but a feather light kite CAN do accurate precision in a dead calm (you just can't stand stationary and do it!)
-
scale up a 1.5 b-series platform's dimensions (until you get to the size of a rev one ~ a 20 percent increase). A 30 inch tube is going to now become 36. a sixteen inch magic stick goes to 19.2 using this math (we actually use 18 inches) adding more curvature to the leading edge OVER THE TOP, (not left to right), thru affixing the knots, washers and end-caps down tightly on that leading edge sleeve area, such that all this crap is underneath the sail and in-between the kite and frame. Your hand should fit in there and touch nothing. It's a reflex technology without the mechanism, this creates that killer glide you will so soon come to love! flexible frame turns w/I it's center, or if you added a big curvature built into the leading edge (L-R), a stiffer frame or a straighter leading edge construction will "track" better, but not fill with power as quickly when flailing Quad wings this size will hide any construction flaws, specially during flight dynamics {unless you've really (s)crewed-up big time!} Enjoy the journey, knowledge is the objective, flying your first home-built project is just the thick icing on the cake
-
S_T_O_P you don't want a Dacron edge bind, (WAY too heavy & thick) you want 3/4 ounce nylon or 1/2 ounce Icarex,... ideally cut into strips of appropriate thicknesses AND on an angle, like 45 degrees. Lazy? Some kite building suppliers have ready-made rolls of edge binding material (1.5 inch width = 3/8 edge binding final size), but if you have curves to edge bind, making your own will allow it to bend much easier,... curves have to be stretched to fit that shaping, stretching along a curvature is easier in my experience with the material angled. TEST yours first.
-
Agreed, can't even put a price on "experimenting", that is where all of your personal preferences will rise & reign supreme eventually! What do you like on that kite right now?, ... what would you prefer IF it could be changed towards a known objective? (for instance: "I want to be able to catch 120s",... that necessitates a killer glide that can penetrate up-wind predictably.) How much bend in the leading edge construction makes a kite that turns within it's center, but simply WILL NOT rotate on a wing tip? How much stiffness in the leading edge itself prevents that difference from rearing it's ugly head? If the kite will not back-up it might as well not be a quad at all! Tuning the leaders is merely determining where on the handles that "down" (reverse flight/tricks/absolute control) takes effect. I have always been a fan of edge binding personally. Take your binding material and fold it in half, (crease that edge HARD, against a piece of glass or with a steel ruler, then fold those two outside edges in towards the middle, then crease it again, finally place that center (folding as you sew or adhering & folding to sew), such that the edge of the sail is captured in between 2 thicknesses of edge binding on each side. Most folks use a triple zig-zag to effect this binding. STRONGLY consider two rows of straight stitches slightly offset from each other instead. Edge binding makes a hard ribbon that slices thru the air when flying in reverse. The better the ribbon is constructed the better/easier the reverse flight becomes. Ah, but there's always the other side,... what is it in this example you ask? Well the great ribbon you've just finished will vibrate at a different level that a single thickness behind it. Those vibrations will create stress fractures and eventually the single thickness immediately next to the edge binding will fail. Does a shortened lifespan of the sail warrant improved flight dynamics? Only your answer matters! The venting (or holes left open, whatever your solution) along the leading edge "assists" with reverse flight. Do you have to have it? Speed Series Revs don't, they fly backwards almost as fast as a 1.5 will fly forward! Indoor and SUL quads don't need it to fly beautifully in reverse. How wide and where to locate "said venting" might be fun objectives to consider as experiments. Change only one variable at a time so you can control the experiment,... scientific principle. Four variables and wild oversteer happens, but which one made it the worst or which combination of 2 variables totaled such a profoundly negative impact? Hey maybe you'd like MORE oversteer yet, this is fun! Just change one thing at a time. Ideally, do this experimenting with a friend, cooperative projects are simply the best!
-
the knot to eliminate sleeving entirely is called the figure of eight, (actually it's "double stranded"). This knot tightens in both directions, so before that final application of tension is done, you'll flip half of the 8 over itself and pull all of the slack out in the direction AWAY from the loop end. Use a pair of forceps to hold the position where you want that knot to be finally located. Build it close to your final destination. PRACTICE FIRST though, place a stopper knot into that single strand. I go twice around and back thru, pull it tight. Next apply an overhand knot using both strands ( or sides of the knot just placed). That knot can slip,.. good you want it to move all the way down tight against those two over passed wraps. Next, you place a figure of eight knot just slight away from the end -point (3/8"). This is to form a finger grab release point, working even with gloves! Now you close off that single stand, (holding the stopper knot perfectly centered) between the 2 strands as you tie a figure of eight again, to close off the Loop. The knot can fall anywhere along the two strands. The important aspects to remember are to keep it the stopper knot centered & to make the lengths of your loops "oversized" as you can only shorten the longer lines, there's no untying for adjustment. One less thing to tangle, unless you place your fingers onto the sleeving when flying dualies, there's no purpose at all. I haven't used it in 20 years, never had a failure yet. I fly one-hand and flail violently w/both on quads also most exclusively, using string from 50# to 170# depending on conditions.
-
Riff, how about this,.... mount those irregular shapes onto a backer" (piece of solid white fabric) and then back-cut it away later on after completion?
-
I had nice session w/Dugard on his, assembly was unique, easier in wind with my assistance holding edges. It was different, but certainly a great time, doing somethings easier or impossible with a flat quad. We had enough wind and open space (sandy point state park) to honestly evaluate and compare flight dynamics. Paul also had a stock DJinn and the new 3 rivers wing, whereas I had set-up a Phoenix Ash w/French & sticks framed in SS. Swapped back and forth for a few hours, merits for each example, packed up double-quick and headed home before the downpour that lasted 48 hours!
-
next time you get a chance,... examine one of the master's kite building effort up close & personal,.. see how Ron Gibian does it? What is his seam width,.. how many stitches per inch, .... do you want "black" on both the front and the back sides, like him? The Randy Tom method (sew all the fabric colors together for the entire sail, then front and back cut out the appliqué pieces until you're left with just a single thickness). Wastes huge amount of fabric, but nothing can slip/slide/or wiggle out of alignment, there are no hot tacking holes either, no gummed-up sewing machine, your efforts are expensive but completely perfect, like your own national entry into the AKA building comps? Some folks (Lam Hoac) "mount" all the colors onto a white carrier piece of fabric, easy to see the lines, simple to butt the pieces and an accurate fit of the appliqué based upon experience. Now you have to hold those pieces in position as you slide thru the sewing machine. What is your solution?, masking tape, hot tacker, spray-mount adhesive, water adhesion thru a capillary action? You do NOT back-cut out the backing layer, the white stays one piece. Ask Lam for a black kite and oh how he howls, back-cut out the backing layer yourself and now he's concerned if you did a good job,... "cause his name is on it!" Did you know you can make the entire kite with no sewing at all? 3M's 9460 VHB adhesive tape,... I've flown single skinned quads of this construction method for 3,000 hours. Guess what?, no weight of the thread, no excess overlapped seams, no perforations (sewing needle holes) to promote early failures. It is not faster, just another choice to be made as a builder. Here's a word to explore,... if a dualie sport kite is your interest: catenary cut,.... that's where you adhere a curved surface to a straight edge, thereby making a 3 dimensional shape w/o any framing to force that shape. Like a tent instead of a tarp. Who's the master of this technique?, Ken McNeill, blue moon kites. Until you have personally experienced a kite built this way, ...... anyway, more options to consider as a builder. If I wasn't so impatient I'd be making my own kites too, alas I know my own serious flaws and deal with 'em, accordingly. I will pay for expert production by a true master class builder who signs their work and backs the product.
-
My recommendation? a lightly used Pfaff mechanical machine is what to seek-out, USED it has a "walking foot" which grabs the fabric like the jaws of a pliers, from both the top and bottom. That makes a huge difference when you finally begin working with super slippery material like Icarex and a seven foot seam! I've seen kites made with just a straight stitch (as opposed to the triple stitch zig-zag, as that was all that was available on that old model, almost like a manual with the foot pumping mechanism. After my first kite sewing retreat struggle, I gave that machine away, promised the bride we'd never own a kite I couldn't acquire w/VisaCard, but eventually a bunch of great kite builders in my local club forced me to learn how to do it myself. (particularly Dave Ashworth, he only flies stuff he built himself, never the same twice!) That Pfaff led to an even greater appreciation for the workmanship of a true master builder, such as Shook or Bazzer. I took lessons from a guy who owned 7 different brands, each time I had to learn a new one, you learned what features were most desirable and then I found machine that could provide those desired functions as a reasonable cost. Low bottom bobbin warning, needle down/stop locking, walking foot, a fitted table so more of the fabric is flat going thru the machine. Lettering and advanced (Kewl) stitching features are a computer as opposed to a mechanical feature, costs will also increase accordingly. no one will EVER care as much as you yourself do when building YOUR kite, but that doesn't mean you can't get something made as a custom, perfect and your way, for a little bit of extra cost, try ASKING for it. The best thing about doing it yourself is the sense of satisfaction when folks converse about your creation, or enjoy flying it themselves. Changing something for testing purposes?,.... what happens if? Being a builder make these considerations fun to explore, most resulting in failure, but occasionally you hit a home run with the bases loaded. These are magical moments to savor or share. Being a builder allows you to work cooperatively too. From my experience this is the single most rewarding activity in kiting,... your entertainment choices may vary -plm
-
Ha! Riff we used to travel with the whole collection too. Once time my wife had to drive her own car separately 'cause my ride (4-dr Accord) was stuffed totally full, plus the roof rack topped-off, and a hitch for our bikes a'hangin' out the back. I have owned 3 Honda vans, one after another since 2001 and that very occasion forced our 1st acquisition. The newest vehicle doesn't have a roof rack 'cause we never used all the crap in twenty years of carrying it. We used to do themed days of banner displays, just as an example; the best day of our trip got Barbara's Scott Hampton's (30-40 pieces), routinely used Shook Mini Revs (dozen) and Dalmer Ducks (150),. fish (50) and even simulated water surrounding them is another common displayed theme. Had to have shade, music, power-packs or the generator, a few different lawn chairs, fold-up tables, an easy-up, lunch and a cooler. What kind of festival doesn't get AT LEAST our club's logo banner stuck up in the air?!!? Why not bring the bag kites and the spot kite dualies too, the bols and the inflatable ground bouncers. The club has a few full sized Roks and the bride has mini-roks that kids battle with using sewing thread. (it's not about the kids, it's called the mentor's challenge!) We have more fun driving with less crap along honestly, so we are not ever needing a trailer, <LOL!> and the misses wants to narrow down the entire basement's contents as well, so we can reclaim that room for people's usage instead of mere storage. I bought my corner townhouse because it had a great shed underneath the deck and walk out basement. Last year the bride told me we had been "on the road doing this kiting stuff (crap!) for 21 years and she wanted to work on the house". I probably have twenty kites minimum with me unless I flew to that day's location, then ONLY what fits in the Orvis Case gets to go,... and we might ship some of the misses' display stuff by courier services if she joins me. An indoor Dave Ashworth, an SUL single skin by Steve Polansky, a full sail & mid-vent by Bazzer, Shook's 40%, two 75%, a 100% and a 135% Shook, a travel framed co-operative builder project Zen (ten kites,.. this is like underwear to me, never leaving home without 'em at least!)
-
Brianne's Howard kite bags are custom made, so when you finally know exactly what you want you can order it custom from her. Price and quality are both excellent! Do you want a place to sit down, dry on the bag unfolded, the ability of the bag to be suspended from Rev's pole stakes, what if you only wanted half of it that day, can it be separated, do you want a hard-sided, but still light weight protection item with handles, straps, zippers, clip-on points to tie it down too? What about an ugly fabric liner to offset the drab appearance of the black outer layer? Yeah, well I wanted all of that stuff for my stacks of baby Revs! I bought a bunch of intermediate solutions, all manner of materials and sizes. I have an into the wind bag for longish kites, an indoor kite case of a plastic expandable map-tube, an Orvis long fishing pole case, a couple of SKB golf club/bags carriers and the mini-rev case/carrier. It all doesn't go everywhere, but that's why I own a Mini-van, just in case all the case need to be there. Don't waste money, use old lawn/beach chair bags until you know exactly what is required for you purposes. It's not just a kite bag, it's your loved ones with you, protected and accessible. All your best crap in a carrier worthy of that investment! Brianne's Case.pdf
-
no video of me, but the master of this technique is Scott Weider, It is entered as a half Axel type of movement (which is a "fade" based upon this discussion, if held in position, with leading edge facing the pilot and the flying lines dangling underneath),... from there (with more practice) This fade can instantly transition into a "clam-shell roll-up" if done close enough to the ground. The is video of this but I couldn't find it
-
my quad fades have the leading edge facing/closer towards me, with the lines hanging underneath, a turtle is the opposite (facing away,... w/lines over the trailing edge) whatever they are termed A rising fade is something I've still gotta' work on some more though, HA!!!!!
-
the Spirit quad also does this move pretty easily too, .....you can "ride it" all the way to the ground, or snap back out of it, like exiting a flick-flak
-
Riff, I had to change out the end-caps for a Rev Zen test, so it could carry the latest Diamond Reflex tubes..... Yes, make all of 'em match whichever way you choose to go, don't be like me with a big bag of extra crap (in different diameters, lengths, stiffnesses, etc)!
-
Full vent has interchangeable 1/4" diameter tubes which fit with your existing kite,... that would be the major advantage in my book. Make certain you acquire 2 wraps or something light PLUS 3 or 4 wraps as something heavy/stiff. The CLX-150's from Skyshark are popular on the East coast as a light weight tube with good response when returning from flexed. "Hybrid travel framing" tubes option will also allow a greater level of customization w/o undue\excessive costs. P-90s or P-100s with some 300s at the junctions. A light weight frame in a full vent is fun to flail around alone as it instantly powers back up with a steady double digit wind speed available. By like token, you could "frame stiff" and fly that same frame in the full sail for better tracking or flying in a group setting. The best frames are likely unavailable..... the original Diamond tubes from Revolution & the Green Race w/o the green stripe/tipped label. The Spider uses a different/larger diameter tube (5/16th's) so that choice would eventually necessitate carrying two different diameters as you can vary stiffness for the local conditions that day. Fear not, we all started with one kite, it was perfect regardless of the conditions too! Eventually we go more and more kites until the layers of conditions for which they were appropriate overlapped each other. I must have six or seven kites just for a dead calm outside. We get those about 5 months out of the year, indoor conditions but with an unlimited ceiling we call it! There are lots of choices for 1/4 inch diameter tubes that fit the 1.5 sized platform.
-
bobbins running out & slicing thru all the fabric layers (when back-or-front cutting) are mistakes we all make, ....how you fix 'em is WHY a retreat is so beneficial! Or to sit with a master willing to share and pick their brain. You can make a kite with perfect stitches and every single material thing "the best that money can buy". Nobody will ever care more than you, about your kite. Are you willing to put in the time for exquisite results? I am not, I'd rather fly than build and have someone build it "my way" even if it costs extra is my current method of operation. Darkest layers go in front (facing the pilot in flight) and many folks "mount their appliqué efforts" onto a white background (you can see the lines traced easily on it, very translucent) Back-cutting is also an art, you need consistent pushing thru the layers to be removed and NOT taking anything beyond that with your scissors. Do you prevent full closure of the sides on the scissors to help? Is the bottom edge (that slides between layers) of the scissors rounded off, so you don't poke thru the wrong layer? Can you maintain the width of the overlap? Does you unthreading effort "look good"? Even seen a Lam Hoac kite? His stitches transition from zip-zag to straight in a barely perceived fashion, each narrower than the previous width, just as an example. He cares more than about anybody, you pay for that level of concern too. how do you connect two pieces of slippery fabric, such that you can control the input and steering of the materials thru the sewing machine? Some folks wet it, some use spray glue, some masking tape, the "randy Tom method" is very effect but wastes tremendous amount of fabric. Some double face tape and sew thru both layers and the adhesive,... heck there's even a tape for "no-sew" construction techniques (VHB 9460 by 3M, Very high bond). Again, attend a retreat and learn all the choices, see how they are used by those practitioners and if any are adaptable to your own personal preferences. Enjoy, ask questions and share your journey w/us. best regards, -plm
-
Go for it, but don't expect to save money until you are deep into kite building thing! The Rev shape is basically all straight lines, some reinforcements where necessary, a proper wrapped carbon frame and good lines to fly on, + handles! My first sewing project was this shaped quad-line too. Eventually I learned some folks can do "design and building" better than me, but I still direct the symphony even if I can't adequately play any of those instruments (by comparison!) Shook, Bazzer, McNeill, Reed, Hoac,... all of the best builders use Icarex as their fabric of choice. It is more difficult to sew than most other materials, certainly more so than anything fabric which your gal might have experience with,... that said it just adjusting the machine to sew "super slippery" material. It is expensive and fails catastrophically, but it doesn't stretch nearly as much or carry water's weight in tough conditions. I'd recommend attending a builder's retreat first, so you can see lots of options for how things are accomplished. "Steal the best, dump the rest" is my Motto. I sat next to Eliot Shook and we marveled at the tricks of building known by the KiteSquid (Harold Ames). Eventually Eliot went on to greatness as a source of masterpiece quad-lined kites, but Harold had a profound impact upon him intitially. Practice until everything looks like it is perfect. Spend more time on the design aspects,.... construction and the actual part of it called sewing is only 10% of the total effort. Pushing the envelope? relates to changes which may or may not prove beneficial,.. but you need enough time on the lines to feel these comparisons. what is the objective you are trying to accomplish? did it help or hurt? Change only one thing at a time so you can control the scientific variables. Did that change add "oversteer" or lessen it, just as an example? Start with a beat-up used kite so you can see what you need to address and copy what works. It will be abused is some areas and pretty pristine in others. See if there's something you could do to address these concerns. I am certain I could send you a sail (that was returned to me after seeking repairs). A note was affixed, it said "you should not be allowed to play with nice toys". four kites were resurrected, the other one could be yours, but it is not flyable, just for measurements as a starting point. Enjoy the journey of making it yourselves and insure you both learn how to fly together too. That way you have a design partner for a cooperative project. Those are almost more fun that the smile on your face during that first maiden flight!
-
save some more dough and skip directly to an acquisition of a Shook Mesh Masterpiece 75% as your next kite if you are after decent-to-big wind ranges. The sail is strips of fabric with gaps/holes in between. Lighter in weight than a full vent or an extraVent because the weight of the screening material is vastly higher than the Icarex sail material alone. I recommend a frame from Jon Trennepol (Skyshark called a CLX-150 or a travel frame of P-300 and P-90/or 100s). Ligher weight means a bigger wind range, like a 5-30 mph spread, depending on the framing choices. A light flexible frame is fun to flail around with alone, 'cause it instantly refills with pressure (after dumping it ~ doing tricks and such). A more rigid frame "tracks" better when flying in a group setting. Flexible wants to "turn in it's center", whilst a more rigid frame wants to rotate on a wing-tip. Does that make sense? The CLX frame is a fatter diameter (5/16s with plugs to fit Rev- End -Caps, so the leading edge has some curvature, ..... over the top ..... like a frisbee-shape instead of a dinner plate's edge on view. What does that matter?,.. that curvature GLIDES thru the air, as opposed to just falling like a rock. Some tricks, like a "Falling Leaf" want that glide removed,.... some like a throw&catch want the glide as pronounced as possible. The fatter wall diameter doesn't mean it can't flex and store energy. It is responsive and not at all a heavy solution. It will not replace a set of original Diamonds though (HA!) The Shook is made to your own specifications, no one else can have your color pattern. The 75% number represents a percentage, as compared to a mid-vent or a fully vented sail,... This one is in between them, but in reality it covers both wind ranges completely. Darn it, it should! they cost 600 bucks plus. But, its like buying a kite that is almost always perfect for today's conditions, even if they change during the occasion. Eliot makes 'em to your spec, call him (Flying Smiles Kites) and discuss your needs/desires/concerns/exceptations,... Sail comes in a variety of configurations: 40%, 75%, 100% and the 135%. Are you wanting a Dacron or nylon leading edge sleeve (why), a couple of bridle choices (Cath uses the French and Eliot is on a stocker), even magic sticks in a couple of lengths (16's are better) and LED lighting options, so light in weight you don't have to remove 'em. Simple seconds to install, water-proof and absolutely out of the way if you want to do "Clam-Shell Roll-ups" on the ground in the dark! You need 4 quad kites or more eventually; an indoor/SUL, a full sail, a Shook 75% and a Vicky-type, a few interchangeable frames for them, some different handle lengths, (longer for dead calm, so the action necessary to MAKE it fly,..... is in your hands, more so than in your whole body/or feet). Some different line lengths and strengths..... I recommend Skybond, it's thin, slippery and durable,... I carry 50#, 100# and 170#, but in the land of no-wind (Washington DC) the 50# lines are used more frequently. Don't waste a ton of dough on other solutions, and I pay retail+ myself, so I'm not compensated for this endorsement, just another happy customer if you are truly hooked get the Shook!
-
extra travel framed spars is never a mistake, to carry to the field! invariably, the one that breaks (either with a ferule or w/o) is the one you don't have any more of handy