Leaderboard
Popular Content
Showing content with the highest reputation on 04/05/2018 in all areas
-
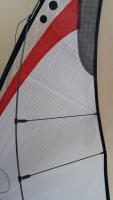
When I 1st started looking at kites the color choices were mind boggling. How do you choose? None are ugly. Not even a black and orange combo to my surprise. Not even kites with polka dorts err dots. Pretty soon I didn't care.Just get the best deal for the kite and color quickly became secondary. Colorizers sure are fun though. Picked neon green for my PDSUL figuring that would pop well in a blue sky. It does. The prairie around here is pretty much golden 9 months of the year and neon green looks good on the ground too. Noticed right off with the semi translucent neon I could see the kite better.Got the Hydra and noticed I could see the lines and flow of the kite a little better than the others. Figured that's just me getting better and the kites are different then the others. Hydra comes white with the choice of blue, red or green stripe across the center. Mines blue. Then I got the White Widow. It's not the difference in the kites or improved skills accounting for better perception. It's white!! Monday I flew the Mind Trick for the 1st time and had the same sense. It's predominately white. Yesterday morning winds were 30 mph early morning and dropped in a steady fashion throughout the day. Was not up to the 25+ of Mondays fly. Waited till winds were between 15 and 20. Went up on the Mind Trick for about a hour. Figured out I hadn't been tensioning the sail right. Those nocks are sure different. Really like them a lot. Winds went below 15 and flew the Hydra for about 1 1/2 hour .Winds dropped lower and got the Zephyr. Hadn't flown the Zephyr for a bit and wow. The inferno red was startling. Again. It's beautiful. For the 1st time ever I thought the orca color would be better. Orca color mostly white. My perception of the kites flow was not as good as the others because of the color. Not drastic at all but slightly noticeable. Wind forecast for today was a little off. Got the MT right and flew for about a hour. Was massively impressed with the 2 previous flights. Can you believe it's even better when put together properly . Winds got lower and flew the Widow Maker. Winds got even lower and wanted to get the PDSUL to see what I would think after flying 2 white kites. Had so much fun bouncing the Widow around in 0 to 2 waiting for a gust to fly that I got tired before getting it out. The shine and glitter of white in the light is stunning. Did not choose white. Just the way these 3 kites have come to me. I am so OK with white that if I had to go back in time and start over every kite would be white, mostly white or a very light color scheme. Think it helps the learning curve for me. Next kite I hope is black or midnight blue cause I want to see what that'll do too. Hmm if the deals right though don't think I'll care .1 point
-
1 point
-
In the alley, behind the local bar, line going across the railroad tracks, within 3/8 of a mile of the local airport. SLK, started out at about 50 feet but with a couple of beers that changed to over 200. The airport called the FAA people, who called the local police, who came by to visit me. Luckily they told me to bring it down and never do that again, with no fines or jail time. I felt very lucky and thankful. Definitely a feeling of I shouldn't be doing this, as it's happening, and I should have known someone would nail me, but hey -- beer.1 point
-
The most important facet of water flying is that the kite must be wet. If not, you will never master it. But seriously, the only thing you need to know is that it is exactly the same as flying in air only much, much, much slower, plus, you can't see the kite. So, if you practice flying the kite in air with your eyes closed you will learn how the kite "feels". It will "feel" the same in the water, only you can't move it as fast. In some videos, you can see JB flying, but he's not looking at the kite. It is possible to know where and how the kite is going without seeing it. It's not easy, and I have played with, but not mastered it. Once you can fly with your eyes closed, even briefly, then.......1 point
-
And if you want to go super cheap, head over to Home Depot and take a look at surveyors' tape, or over to Joann's Fabrics and check out the ribbon rack. I don't have any "good" tails, but I do carry a couple rolls of surveyors tape in my bag for when I get the urge.1 point
-
Sold out. Standing room only? @Cairncross , you're gonna love this clinic. If you are new to quads, this is just about the best way in the whole world to get started. And welcome to the forum.1 point
-
1 point
-
Wow straight to the dark side . You may shortly find out as I did, that is a massive understatement. Some people around here are so hooked they fly in parking lots and they're GOOD at it!!1 point
-
Was heading home over the weekend from a mini weekend getaway, when I realized we'd be going by the Berkeley Marina (Kite Festival grounds). Decided to stop by for the sunset, and felt so weird good being there. I met JB here for the first time along with a bunch if the other Rev/Kite community just some 9 months ago when I had just discovered the entirety of the sport of kites. The park now is sprawling lush green, grass almost a foot tall, a complete contrast from that day when John handed me his kite with dry dusty grounds around us and me gleeming with all the excitement . Just some months ago I was asking for so much help and this community so warmly welcomed all my questions, helped me find a starting kite. And now I have a bag of kites for myself, dual lines foils, my starter midvent, an Ash, and closer to my heart a rev2 and a loaner B2 with 80 & 120 sets. Hehehe. Am now a baby magnet (as the wife calls it) as I fly almost daily at the neighborhood park. I've taken the bag and flown everywhere I've been able to squeeze flying time in, including Singapore and Bali already. Looking forward to the new season and festival again already 😂😂 Just bought a bicycle with the wife so no chance to pick up a vented yet to complete the "wind range" collection. -Feeling so thankful and blessed- To anyone else interested in the hobby and on the fence about getting a kite and joining in, just do it. The amount of sheer fun you're gonna have will blind away everything else!1 point
-
Lots of informed people on here with just about every kiting experience you can ask for. As with most of us we started just like you and now can’t go a couple days without flying something!1 point
-
I'm newly retired and plan on spending lots of time on the beach in Mexico. I'm looking for a hobby to keep me busy and was blown away by some of the videos I saw featuring quad line stunt kites. I had a decent kite as a kid but haven't flown one in decades. Hoping to learn lots from these forums and look forward to many hours with the wind on my back.1 point
-
I think John described my method better above. The water at my flying spot is almost always rough, and it's important to get the downed kite out of the water as quick as possible. Also, the water is cold 8 months out of the year, and you don't want to go in to rescue the kite. This may leave you with the question... Why even mess around in the water when an unplanned landing could result in the destruction of the kite ? Well, because it's fun ! I really enjoy submarining the kite and then have it fly out of the water again, defying most logic... I don't have any video of flying four liners in the water, but I do have a video of my favorite water kite. It is made mostly out of mylar, so doesn't absorb water and become heavy as others described above...1 point
-
Ha, I'm a pure quad-head myself Exult, but once in awhile a reliable SLK indoors is great fun for beginners and masters alike. The fact that is ALWAYS flies regardless of the conditions outside is just a fringe benefit. The D/T only has one flaw, you have to make it yourself. I stopped building kites when Bazzer and Eliot Shook became available to me, but all the stuff is still in a room of the homestead. I'm an immediate gratification kind of guy, but I have tough expectations on how the kite should fly and how long it should last, even with me beaten' on it constantly. Enjoy the builder journey, almost nothing is more rewarding than the first flight with the kite you made all by yourself!1 point
-
If you’re pulling in line perpendicular to the water’s edge, you either need to keep backing up with your handles (dragging your line) or reeling in (piling up line and risking tangles)... The “stake and parallel” basically sets you up on a dogstake or “L” shape with your lines so that as you walk away from your stake onshore, you’re walking down the lines parallel to the shore (keeping them straight) while pulling the lines in from the water.1 point
-
I appreciate your comment not so much for the recommended kite model (that however seems to be a popular one), but more for a pointer to and a remainder of a place of many kite plans and much knowledge. Building this particular suggested kite model would lead me into the unknown (past petrol station/toy store kites of my childhood) territory of SLKs. There I'd need to handle scary things like kite anchors popping out of the ground and then starts to smash things and people, multi kite anchors when you want to be on the safe side, kite refusing to go down, gloved handling of kite line, (and worse) un-gloved handling of kite line, wind changing direction forcing a rapid change in the set up, wheels for walking down the kite (and really hope that you won't get hit by the anchor in your back and who knows even an (with line length) increased risk to do a Benjamin Franklin (ZZAP!). SLKs are scaaary - personally I'd wouldn't like to meet one in a dark alley... Really, I do have a respect for SLKs and think that I unfortunately haven't the time to learn to deal with them now. Another contributing factor is that I have no one locally to learn from. On the other hand I never thought that QLKs were my thing until soon a year ago, so I don't know for how long my SLK hesitation will remain. And I must confess that I have spent some time thinking on how to make tetra kites with easy handling...1 point
-
1 point
-
Water is no big deal, the waves are your enemies ! I have broken many sticks due to the action of waves, but never lost a kite entirely. Practice your water flying in higher winds, it makes it easier for the kite to take off out of the water. Use a kite stake... when you land in the water & are unable to relaunch, stake the kite & walk the lines parallel to the water line, pulling the kite gently (!) to the shore. Watch out for the waves... If you pulling too hard, that's how the kite will break, take your time & pull it in slow. It's kinda a give & take procedure, like landing a big fish. Most of what I said above is related to dual line kites. I've flown 4 line kites in & out of the water all the time, but never had a problem relaunching the four line. It is super-fun to dunk the kite, let it disappear & then surface & take off ! I rarely come home with dry kites !1 point
-
Spent 3 hours on this kite today . Wind 25 mph sustained with some gusts I'm sure hitting 30. Absolutely amazed. Love this kite. Shipped promptly and packed exceedingly well. Did I say I was pleased? No? Well that would have just been a major understatement anyways !!!1 point
-
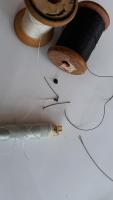
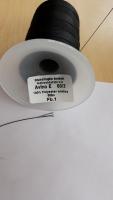
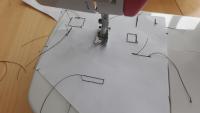
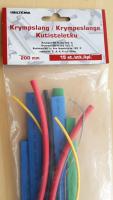
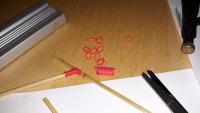
List of material and related thoughts/discussion/background The Ripstop When ordering the ripstop I wasn't certain that I was ordering the right thing, so I more or less went after what was offered at a low price. Afterwards I did some more thorough comparison... Black and white nylon ripstop M-40 44g/m^2, Metropolis Drachen. 44g/m^2 seems to be about standard thickness when seeing what is offered in kite stores. On the other hand Icarex PC31 polyester with a mass of 31g/m^2 seems to be good for the low wind kites (as stated in Drachenmarkt). For really light sails there is 25g/m^2 mylar that can be bought in kite shops. Orange 60D Polyester ripstop (70g/m^2), Wolken Stürmer. I got this polyester at a good price, 4.40 EUR per metre. This feels thicker than (most?) of my other DLKs, possibly with the exception of the Fazer XL and Fazer XXL Maesto3. For this little model kite I used it as an LE dacron substitute, but also for the trailing edge. I find the numbers appearing in the names of the ripstops confusing. I don't mean the number of g/m^2 but numbers like M-40, PC31, sometimes even just a number appearing after the type. In this context the (somewhat sad unit of - see below for an explanation) Denier becomes most sensible to describe the roughness of the ripstop. To my understanding it is the thickness of the thread used to make the ripstop. The feeling of Orange 60D ripstop is somewhat rougher then the sails of the kites that I got. So it is a question of experience and knowledge, but it would be educational to have a small (2cm2 would be sufficient) sample chart of various types of ripstop. I feel I must largely must pass on the question of the feel of nylon vs. polyester ripstop. Of the ripstop material I got at home (two colors of nylon Contender Superkote 75, three colors of nylon Metropolis Drachen Spinnaker M-40 and one polyester Wolken Stürmer Spinnaker 60D), only two ripstops does not rustle paper like - two Spinnaker nylon M-40). All other ripstops does rustle both nylon and polyester. The ripstop polyester on a few of my kites that I also compared also rustled. So summing these few ripstop observations up: polyester rustles while nylon might rustle - if it doesn't rustle it should be nylon. Correct? Btw, would mixing nylon and polyester ripstop be a big no-no (or could one use it in areas where low stretch is required - a bit like a somewhat flexible mylar?)? Though I now have done some limited work with the ripstop there are several things about the material that are still not clear. Is keeping track of the slightly more glossy side of any importance? Does the ripstop have any main/straight/lengthwise grain/warp direction (over the supposedly spongier cross grain/weft direction) of any importance? How should one orient the main grain in a DLK or a QLK? Could one draw the ideal main grain "field lines" on a sail? If bias grain strips is an improvement when applying over rounded edges (like a TE or some opening in the sail) when making a hem, it is not a huge one - I'd need to do some more testing to be able to make my mind up here. Also all spinnaker (ripstop) strips for i.a. TE are cut along the grain - not the bias. With the ripstop coating, is bias strips of any importance? Can you remove the ripstop coating in some solvent to make better bias tape? The thread Black sewing thread, Avion E, #60/3 (mass of 60m is 1g), 600m roll. This tread appears a bit thick in relation to my kite model (Just to put it into relation to something: Drachen Markt offered slightly thicker (#50/3) thread as well (perhaps a Drachenmarkt heritage of Mikael Ryll's "Pure"-series of large DLKs?) - otherwise this seems to be some kind of standard.) Used it to the black and white sail. An unknown thin white cotton(?) thread that was used for the LE. Thread dimension and colour matched the LE better than with the thick black one. You shouldn't use cotton with ripstop should you? What was the drawback? Cotton too stiff to distribute load (I think that I read somewhere)? After finishing the kite the white thread was still (big surprise) of unknown material. I therefore did a test to see of the white thread burned in the same way as the black one and some other threads as well while I was at it. All but one thread burned rapidly while leaving a blob of solid residue including the white previously assumed "cotton" one. So it seems like the white was instead a plastic thread (polyester most likely since they are common). The one exception in burning style was an old thick thread that burned slowly (and smelled differently) leaving only ash (probably cotton). Warning that old thread kept glowing after the fire itself was blown out as can be seen in the image!! Pinching the thread between the thumb and index finger put it out completely. The glow of the thread was hardly visible in the bright daylight... A combustion comparison test to figure out the material of the white thread (well at least compare it to the known polyester thread). Warning, all treads burned rapidly and the old thick black one kept glowing after the fire was blown out. Weight number wt and the number of strands/ply - a kind of sane unit of length per mass The three strands of the #60/3 thread. The "/3" part in 60/3 is the ply of the thread, i.e. how many strands it contains. The "60" part of the above thread, the "weight number", is written as 60wt in the US standard. For a 60wt thread it takes 60(kilo)metres to make 1(kilo)gram of thread. Or alternatively expressed in mass per metre: 1/(60m/g) = 0.017 g/m Denier - a seemingly arbitrary unit of mass per length Another, more messy, measure of thread thickness is denier. Denier is the mass in gram for 9000m. To convert from denier to wt: 9000/denier To convert from wt to denier: 9000/wt ( https://en.wikipedia.org/wiki/Thread_(yarn) ). So the thread above expressed in Denier would be (along with the somewhat funny unit): 9000/60 = 150 g/9000m Simplify: 150 g/9000m = 0.017 g/m = 17 mg/m I.e. 150 denier corresponds to 17 milligram per metre. Verdict Not surprisingly we got the same mass per length when calculated directly from the weight number or from the Denier of the thread. If one would like to determine how much mass the thread contributes with using deniers would be less obvious. A much easier unit for this would be the above mg/m IMO. Though the weight number would be quite OK for intuitive estimations like: I used about 30m thread for the kite, then the mass of the thread should be about half a gram". OK, it seems like the thread is not a large contributing factor of the weight of a kite anyhow. I think the convention of expressing the thread dimension without (well "proper") units adds to the confusion. So a 60wt thread should be referred to as a 60m/g thread IMO. Denier on the other hand is a somewhat sad unit. Choosing 9000m as the base length for the Denier sounds quite arbitrary as well. If on would like to express the mass per length - just do so (as above): 1/(60m/g) = 1/60 g/m = 0.017 g/m = 17mg/m This makes much more straightforward, 17 milligrams per metre! Paper-stitch drill: Make every stitch end up where you want. Make the stitch length large so you clearly can see the result. I can't guarantee that this control will make your kite fly better, but it will at least feel better when you see the result. I still don't know if/when to do a forward/backward seam to attach the thread when starting or just a backward seam. I still haven't decided if two or three stitches would be good either. When studying the stitch length the reverse stitches are shorter the the forward - you can't go into the old holes with the needle when reversing direction. Is this a bug or a feature? Anyhow it seems like two forward stitches matches about three backward stitches. When the seam is finished (after reversing to attach it) and after cutting off the thread you end up with one piece of thread on the upper side and one piece of thread on lower side. The next step I did was simply to tighten the threads somewhat. After the kite was finished I got a recommendation on how attach the threads when the seam is finished from a college at work (who is into horses and some sewing - not kites). More on this in a later post... Heat shrink tubing (for fittings) For the fittings I used general purpose polyolefin (6mm initial diameter) heat shrink tubing. Shrink ratio is 2:1, but it appears that you can shape it somewhat further with your finger tips after it has done its initial shrinking while it is still hot and soft. The fittings made from this heat shrink tubing were "semi soft" (after cooling down). The initial wall thickness of 0.28mm and the resulting wall thickness of 0.56mm (from data sheet) might sound as very thin, but it kind of suited this small kite. If one would like to make larger and stronger diameter fittings there are other sorts with resulting wall thickness of several mm, dependent on initial wall thickness and shrink rations ( https://www.elfa.se/en/cable-wire/heat-shrink-tubing/standard-heat-shrink-tubing/c/cat-DNAV_PL_090803 ). Note that I have no idea of the strength. Heat shrink tubing material vary, but I think of the polyolefin as the standard one though. The heat shrink tubing fittings might be worth checking out for light low wind fittings? Looking on my 4D I've always thought that the LS to stand off fittings looked a bit over dimensioned in relation to the standoffs. Even more so now with when my eyes gotten used to the mini speedwing heat shrink tubing fittings. Beware if you intend to use polyolefin heat shrink tubing close to sleeved dyneema bridle lines - the core will most likely melt (though heat shrink tubing around bridle lines of other core fibres might work). Other material 190cm, Climax 35kg sleeved neon orange bridle line. To me this long total bridle line length was a bit surprising. Also that the knots themselves takes up so much length (even for this narrow line) was a bit of a surprise: a single overhand knot of a double line correspond to 1.4cm (0.55"). I really like this small dimension line. This line is easy to work with and the knots last. The wing tip tensioners of my Shadow is a narrow orange sleeved dyneema. I wish I had used this nice line to secure the battens of my Fazers to get lasting knots. The most difficult cord I used was one intended for bricklayers. It was absolutely hopeless, constantly undoing itself- I had to secure the knots with heat glue. Sleeved rubber cord was almost as bad requiring occasional tightening. A fishing line would probably have worked? I'll see how the latest attempt will go - reusing some old broken kite line (dyneema/spectra) residues to secure the battens. A few cm 4mm (outer diameter) hose for the nose. Heavier but more robust nose alternative than the heat shrink tubing. No work required to make it cylindrical as when instead making the nose by heat shrink tubing. An observation, instead of shrinking when applying heat, this non-heat shrinking hose could be widened enough to slide it onto the relatively slightly too thick barbecue pin. Surgical tape. Good for holding cardboard template on the ripstop while hot cutting. The tape will be out of your way, since the heat will cut the tape as if it never was there in the first place. Also good for keeping ripstop in place when sewing and for preventing ripstop corners being poked downwards by the needle into the hole towards the bobbin. Cardboard from some empty food package. Contact (rubber) glue worked for gluing the panels together, albeit a little difficult to distribute evenly (old sample?). A paper glue stick turned out to be no good for this purpose, only to (as an alternative to surgical tape) somewhat attach the card board templates to the ripstop before hot cutting. 3mm barbecue sticks (bamboo I believe - very hard anyhow). Used for the frame of the model kite. Also used as a tool to remove the tape when close to the presser foot of the sewing machine. A detour: When discovering how strong those bamboo sticks were when cracking one I found these (hardly original) inspiring to use in kiting. Hmmm... Imagine something like this reed kite looking like something like a dragonfly/bird/moth ( http://www.firstkites.nl/vliegend riet.html ), but a little more lasting and portable. Could one make such a kite out of bamboo strips? Looking around on the topic of slitting bamboo strips I ended up on this very precise handling of it when making fly fishing rods ( https://www.youtube.com/watch?v=BYfeeyYaXgY ). There for a second he shaped the strip with a heatgun. Immediately I thought ahh perhaps something to shape the wings of a insect bamboostrip SLK? Making the wings into an elongated "8" of a curved bamboo strip. No, no, no, straighten up now @Exult, you are never going to learn something properly if you don't stay on track and choose not to do things sometimes. If you think that double sided tape is missing from the above list you are right - got a roll now, but that is for a next project.1 point
.thumb.jpg.53aabc63a639af8d375b2c92cf2e13f8.jpg)
