Leaderboard


Popular Content
Showing content with the highest reputation since 05/10/2024 in all areas
-
Oh man, thank you sooooo much for your patience. Lets get us a winner! *drum roll* The winner is subscriber #1513 - @LarsHH! Thats a German destination and per the drawing rules, international recipients have the option to split shipping costs or allow for a new winner to be drawn - hard to imagine he'll pass this up though. Stay tuned for a new prize very soon, another good one! As always, infinite thanks for your good faith, support and patience. 🙏5 points
-
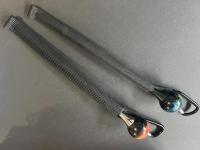
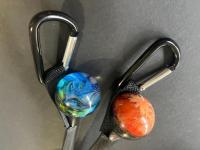
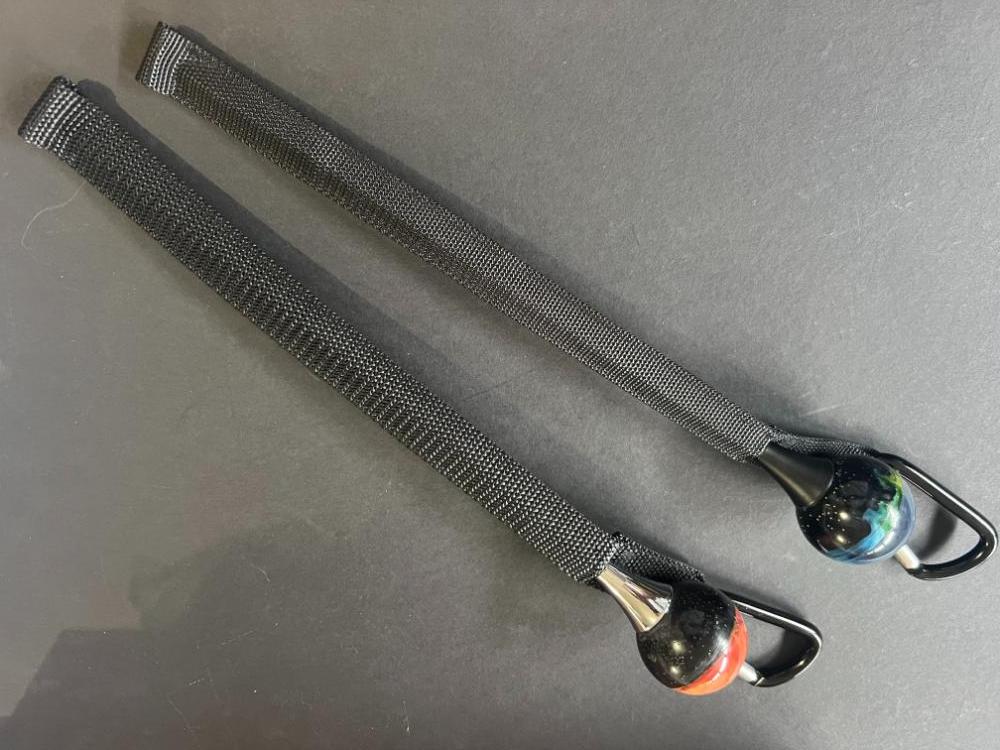
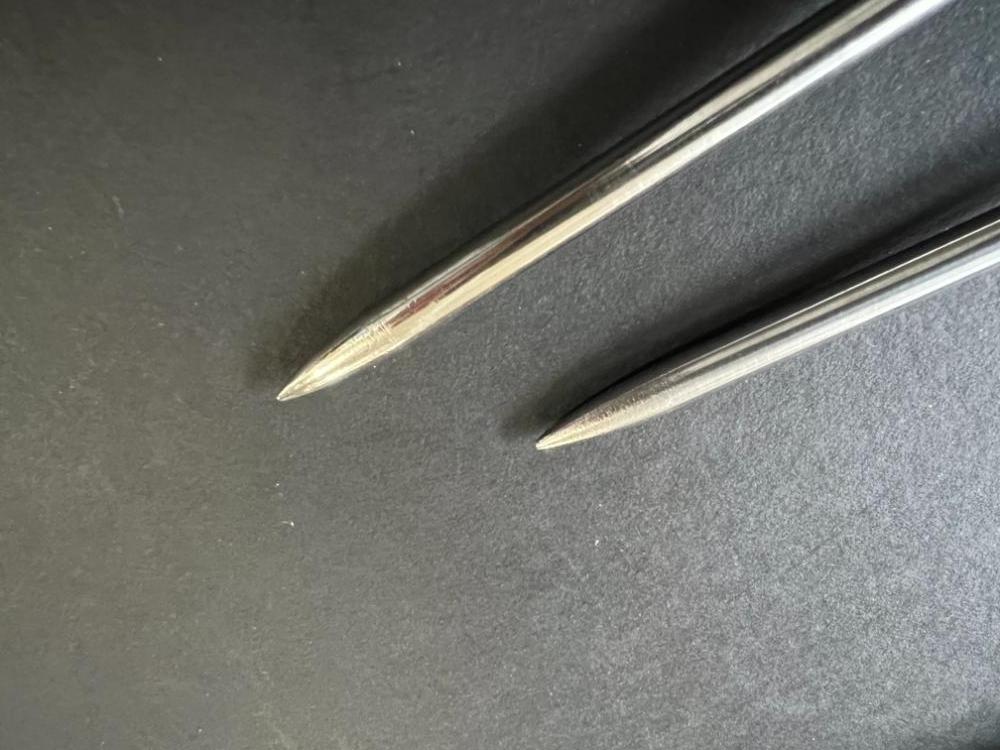
We're pleased to yet again announce the next prize being given away to our most appreciated supporters, the Kitelife Subscribers... For roughly 10 cents per day they play a major role in keeping KL growing in every way. Handmade Ground Stakes from John Barresi, $80 value, with holsters! These are brand new, handmade wpoxy resin art groundstakes with 416 stainless steel shafts and really good points on them - holsters fit well, have sand release gaps at the bottom and each include a carabiner. == You can sign up here. Odds of winning for this prize is currently 1/346, and will be drawn on January 10th, 2025! Our thanks, and the very best to you... Let the drooling begin!
 4 points
 -
We're pleased to yet again announce the next prize being given away to our most appreciated supporters, the Kitelife Subscribers... For roughly 10 cents per day they play a major role in keeping KL growing in every way. LaserPro Gold 75 ft x 90# quad line set from Kite Forge, $90 value! == Full info - https://kiteforge.com/product/laserpro-gold-quad/ This package includes a ready to fly line set on an official LaserPro winder! NOTE: This is exactly the same line set that I fly myself - it's ready to fly right out of the bag... We should be able to ship from existing inventory when a winner is drawn, worst case should be 1-2 weeks for restock. You can sign up here. Odds of winning for this prize is currently 1/339, and will be drawn on April 15th, 2025! Our thanks, and the very best to you... Let the drooling begin!3 points
-
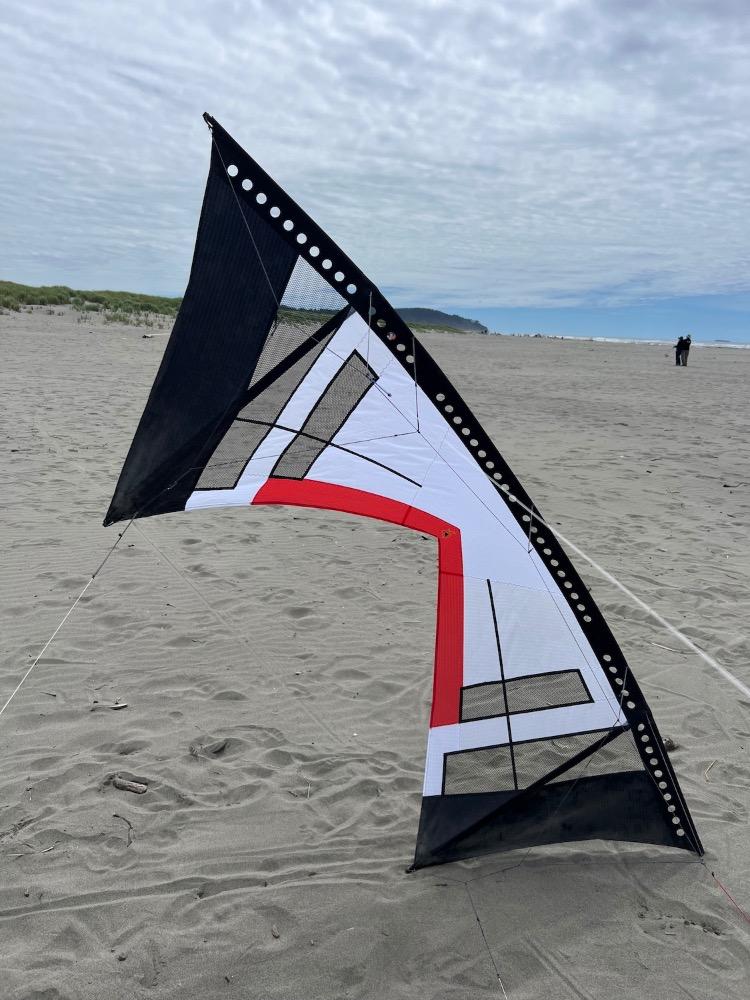
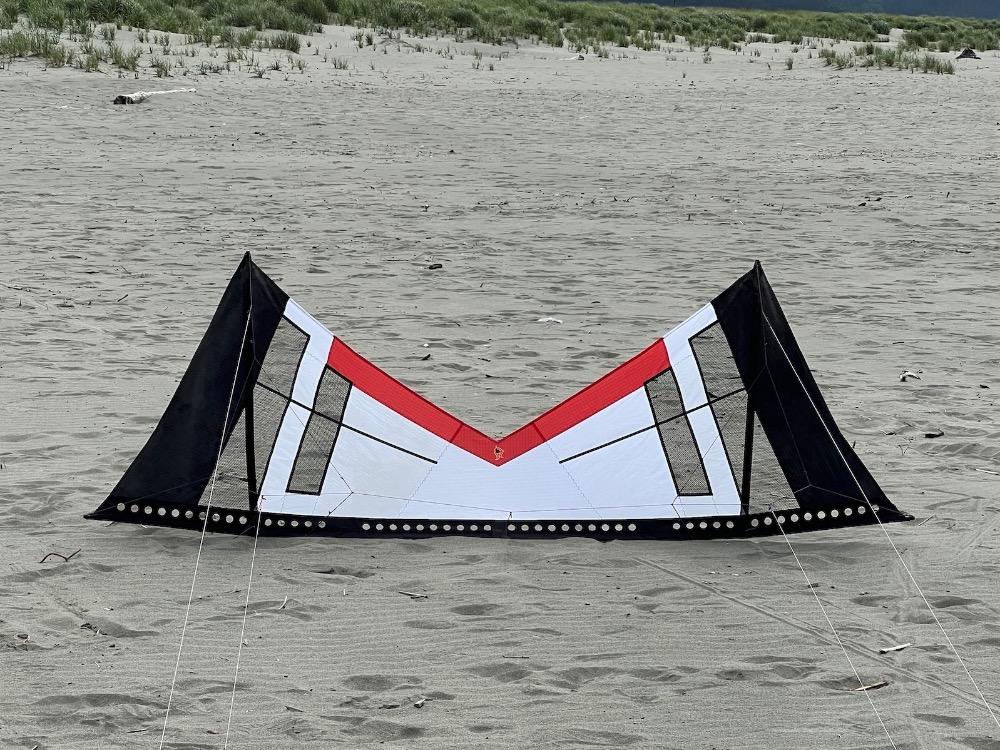
We're pleased to yet again announce the next prize being given away to our most appreciated supporters, the Kitelife Subscribers... For roughly 10 cents per day they play a major role in keeping KL growing in every way. Djuice VT from Kite Forge, a $210 value, in white and red! == == Full info - https://kiteforge.com/djuice More videos - https://kiteforge.com/videos/ This package includes a Djuice VT (standard) sail, Dynamic 15 frame and kite sleeve with a pocket! You can sign up here. Odds of winning for this prize is currently 1/346, and will be drawn on Mar 1st, 2025! Our thanks, and the very best to you... Let the drooling begin!

 3 points
 -
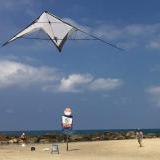
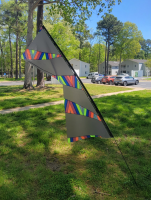
Hello! I am posting an old video of mine, per John B's request (thanks man! 🙏). Las Vegas, NV is a very special place to fly kites of all kinds. I miss flying (and living) there, partly because of parks like the one featured in this video. I was "shoo-ed" away by park security from flying near the butterfly and flower fixtures due to their canvas sails.. In the end I received special permission from the city to make this video. ALWAYS be respectful when Urban Flying! 🤙3 points
-
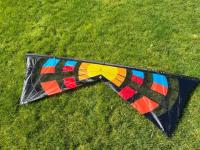
We're pleased to yet again announce the next prize being given away to our most appreciated supporters, the Kitelife Subscribers... For roughly 10 cents per day they play a major role in keeping KL growing in every way. This is a previous prize that wasn't claimed by the winner after multiple attempts to contact them through email, forum and Facebook messages so we're turning this around and putting it back up as a prize for all you good folks. Djinn XT from Kite Forge, $475 value, in these UNIQUE COLORS! This is brand new, unflown, colors that were made in error for a customer and is now going home with one of our loyal subscribers! == == Full info - https://kiteforge.com/djinn More videos - https://kiteforge.com/videos/ This package includes a custom Djinn XT (EXTRA VENT) sail, Mystic 18 frame and a kite sleeve! NOTE: This is exactly the same Djinn XT configuration that I fly myself - no special mods needed, it's already a boss right out of the bag. You can sign up here. Odds of winning for this prize is currently 1/357, and will be drawn on November 25th, 2024! Our thanks, and the very best to you... Let the drooling begin
 3 points
 -
We're pleased to yet again announce the next prize being given away to our most appreciated supporters, the Kitelife Subscribers... For roughly 10 cents per day they play a major role in keeping KL growing in every way. Djuice ST from Kite Forge, a $200 value, in white and blue! == == Full info - https://kiteforge.com/djuice More videos - https://kiteforge.com/videos/ This package includes a Djuice ST (standard) sail, Dynamic 12 frame and kite sleeve with a pocket! You can sign up here. Odds of winning for this prize is currently 1/358, and will be drawn on Juuly 20th, 2024! Our thanks, and the very best to you... Let the drooling begin3 points
-
We're pleased to yet again announce the next prize being given away to our most appreciated supporters, the Kitelife Subscribers... For roughly 10 cents per day they play a major role in keeping KL growing in every way. Djinn XT from Kite Forge, $475 value, in these UNIQUE COLORS! This is brand new, unflown, colors that were made in error for a customer and is now going home with one of our loyal subscribers! == == Full info - https://kiteforge.com/djinn More videos - https://kiteforge.com/videos/ This package includes a Hot Fade XT (EXTRA VENT) sail, Mystic 18 frame and a kite sleeve! NOTE: This is exactly the same Djinn XT configuration that I fly myself - no special mods needed, it's already a boss right out of the bag. You can sign up here. Odds of winning for this prize is currently 1/358, and will be drawn on Juuly 20th, 2024! Our thanks, and the very best to you... Let the drooling begin
3 points
-
Dang! Terribly sorry, been wrapped up in prep for the biggest kite event of my year, Cervia Italy, and spending quality time with my son beforehand... I'll try to get this taken care of on one of my planes tomorrow! Thanks for the nudge!2 points
-
There has been a real shortage of nice ground stakes (at least in the US) since Walt Ellis stopped making his marble stakes - the two in this drawing are from my recent journey learning about making art stakes - they're not 100% perfect, but they are pretty and have my energy in them. Here are are some of the others I've made so far: (playlist - let it play through) https://kiteforge.com/product/kite-stake-skull/2 points
-
Hey All, This is SkyPuppet Dave, I am so glad to have won! This is my second time winning in 8 years! So lucky. I haven't made a kite video forever, I will definitely need to make a new one to show this Djinn off 😎😎 Thanks all for the congrats!2 points
-
Thanks all for your patience, as always! Our lucky winner this time around... #957, a brand new custom Djinn is headed to @SkyPuppets LimitVoodoo ! Congratulations, and thanks to all for your continued support - stay tuned for a new prize soon! 🫶2 points
-
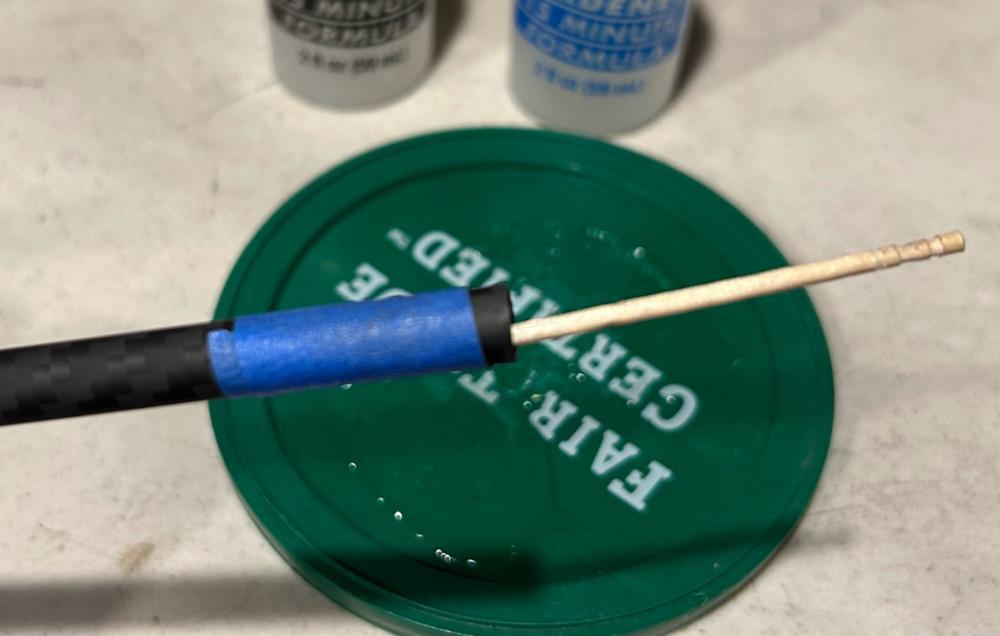
The spar pieces for my Rev XX are too long to fit in a large suitcase, even diagonally. I decided to build a couple of frames so my kites would fit in a piece of carry-on luggage. First, it's important to understand how roll-wrapped carbon fiber tubes are made. Carbon fiber fabric is impregnated with resin, and wrapped around a mandrel. The fabric can be any type of weave, or even a combination of different types in layers. Plain weave Twill weave The fibers of a plain weave make sharp turns in close proximity to each other, which reduces its strength slightly. Twill weave is the most common carbon fiber pattern. Rather than alternating between top and bottom every row or column, the alternations are in a 2x1 pattern, which provides a bit more strength. The finish after some light sanding is matte. Glossy tubes are made by adding a super-fine sanding step at the end. You can also get pultruded tubes, which aren't woven at all. The fibers are parallel to the length of the tube. Pultruded tubes are very stiff against bending, but weak in terms of being crushed. A roll-wrapped CF tube is made by wrapping resin-impregnated cloth around a mandrel, vacuum sealing or taping the assembly, then heat curing it. The mandrel is a highly-polished metal rod, so the inside diameter of the CF tube is precisely controlled. The outer diameter is determined by the initial thickness, and the amount of sanding done afterwards. Medium sanding will produce a matte finish. Following this with fine sanding produces a glossy finish. The spars on my rev XX kites are 9mm outside diameter, and 8mm inside diameter. You can get 50 cm carbon fiber tubes from Aliexpress in a wide variety of outside and inside diameter combinations. Usually they come in pairs, for a total length of 1 meter. This is more than long enough for one spar of the largest quad kites. Just search for "carbon fiber tubes." Be careful - sometimes one vendor will allow you to choose from a wide range of sizes, and also between twill and plain weave. And you may also have the choice of matte or glossy. I prefer matte, as it is better for gluing. You generally have to sand the gluing area anyway, so maybe it isn't important. The outside diameters are usually slightly larger than the specified dimension. This is great, because you can sand the pieces down for a perfect fit. You can cut a carbon fiber tube with a cutoff wheel on a rotary tool. Carbon fiber generates a lot of fine particles, so it's a good idea to have a powerful vacuum near the action. And you may want to wear a mask. Finally, eye protection is a must - not just for CF particles, but the cutoff wheel can break and send shards flying. Mark your length by wrapping a piece of painter's masking tape around the tube. The rotary tool can't quite make a flush cut when the piece you are cutting off is more than a few cm. No problem! Cut it off just a bit longer than the marked length. Don't worry about it being nice and flat. Try to prevent the small piece you are cutting off from going into the vacuum. You may be able to use it for a ferrule on another frame. Now make a precision cut right at the tape. With practice, you can get a clean, flat edge. If you would like to clean it up a little bit, wrap the other end of the spar with tape and put it in a drill. The tape is to provide grip, and to prevent scratches. Now sand the end with one hand, while holding the drill trigger with the other. To make an interior ferrule, sand the outside a little bit at a time, until it has the right fit inside your main tube. Don't go too quickly, or you may remove too much material, and the fit will be sloppy. Once you are happy with the diameter, bevel the edge for easy insertion. Flip the ferrule around and sand and bevel the other side. Before you glue a ferrule into a tube, try to scuff the inside of the tube. Remember that it came off of a very smooth mandrel! Mark the insertion depth of of the ferrule with a piece of tape. Apply some 2-part epoxy to the inside of the tube with a toothpick, being careful not to get epoxy on the outside. If you do, wipe it immediately with a paper towel. And if it gets messy, put some rubbing alcohol on the towel. Slowly insert the ferrule into the tube using a screwing motion. This helps spread the epoxy around. Don't back the ferrule out once you've started to insert it! The epoxy on the ferrule will make a mess on the second insertion. Glue the ferrule into one half spar. Don't glue the other half spar onto it. Remember the goal is to make spars that you can pull apart and fit into a small piece of luggage. I made a frame for my Rev XX kites with 9x8x50mm tubes. The ferrules are made from 8x6x50mm tubes. This is the simplest configuration for that particular kite - an internal ferrule connects two 9x8 pieces, each cut to half the length of the total spar. The center leading edge spar has an internal ferrule on either end as well. Note that the center leading edge is a different length than the other spars. Make all of your measurements carefully! Unfortunately the 9x8 mm tubes are not common, and tend to be more expensive than the other sizes. Another one of my kites has 8x7 mm spars. They are lighter and more flexible than the Rev spars. So an 8x7 set made for my full sail XX seemed like it would be a fun project. The internal ferrules are made from 7x5 mm tubes. Those are used to join each spar half, and also for the joint between the center leading edge tube and the outer leading edge tubes. I didn't want to use an external ferrule anywhere inside the leading edge, as they may rub against the leading edge of the kite. Since the kite still wants 9x8 mm tubes for the plastic fittings at the outside ends, and at both ends of the vertical spars, I chose to cut the 8x7 mm spars short, and extend the length with external 9x8 ferrules. I've flown the 9x8 mm frame in very heavy winds, to the point where the person next to me said that the kite might explode. I haven't tested the 8x7 mm frame in heavy winds yet. The 9x8 mm frame is indistinguishable from the stock Rev frame. My expectation is that the 8x7 mm frame will be more flexible. Here are the weights of the various frames, not including the Reflex springs: Rex XX Stock Frame: 96 g 9x8 mm frame: 100g 8x7 mm frame: 88g The 9x8 frame is just a tiny bit heavier than the stock frame, which makes sense because of the extra ferrules. The implication is that the stiffness should be very similar. The 8x7 mm frame is appreciably lighter than the stock frame, even with its extra ferrules. Once you arrive at your travel destination, you may find it convenient to tape the two halves of each spar together. This make assembly and disassembly much easier. Try building some travel frames, and post your experiences here!


 2 points
 -
I know, I know... I'm here now! Lets get a winner... The lucky recipient of this brand new Djuice ST is subscriber #457! Warmest congratulations to @cerfvoliste, I know this one will go to good use. Thank you all, always, for your immeasurable patience and support over the years. Stay tuned for our next prize announcement very soon.
 2 points
 -
2 points
-
Dang, sorry, on a last minute family trip to Utah and juggling the release of my new Djuice kite... Will get to this soon as I can, thanks for your patience!2 points
-
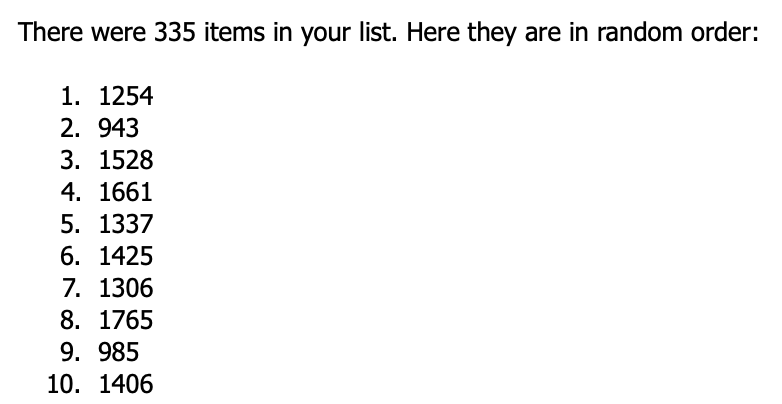
Alrighty, subscriber list reconciled and drawing completed... A very hearty congratulations to subscriber #1254, @snapper5! Endless, endless thanks to all for your support and patience, stay tuned for a new prize soon!
 1 point
 -
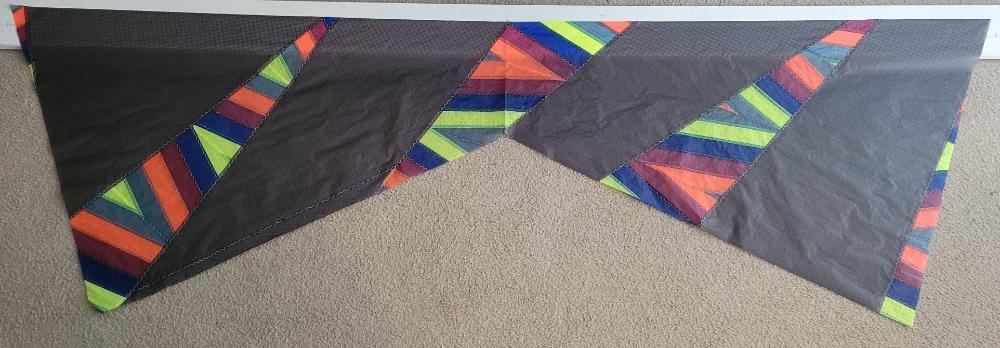
Making this kite from scraps of a previous kite. This will be Kite #95

 1 point
 -
It might also be worth looking simply for sake of discussion, at how fliers hold their handles during flight... My leaders are tuned first and foremost so that when I go "full gas", it's the right amount of gas with no oversheeting or loss of pressure - I've tuned out any additional amount of thumb back / forward that might cause the sail to flutter or loose pressure (key signs of oversheeting). Basic looks at how I'm holding my handles during flight... https://kiteforge.com/tutorials/quad-line-kite-tutorial-figure-8-and-180s/ https://kiteforge.com/tutorials/quad-line-kite-flight-and-control/ What you might notice is that I'm not "holding" my brake lines back when I'm in normal forward flight, not really managing them at all - bottom of the handles are nearly straight out, thumbs at full tip back. Another pilot, using more forward in the settings, but almost always managing or balancing the brake lines through forward flight, a balancing act between top and bottom lines throughout: Neither right or wrong, but good visual contrast between the two different approaches to tuning.1 point
-
I can't stress this enough. You only get to cut someone's lines once. By yourself fly what's working for you. Fly in a group or a crowded field you are going to likely lose some respect from other fliers if you cut their lines.1 point
-
Congrats Andybenson. Enjoy your winning, my friend. 👍1 point
-
Congrats 😁1 point
-
Congrats CliveWanstall, enjoy this beautiful prize. 👍1 point
-
Alright folks, a day late (my weekly/bi-weekly 6 hour drive to pick up my son from his mom's) but I'm here, subscriber list has been updated and its time to pick a winner! *insert drum roll* Our lucky winner this time around and receiving two handmade ground stakes: Subscriber #1737, Mr @CliveWanstall! Congrats to Clive and deepest thanks to all for your good faith. 🙏 Stay tuned for a new prize soon!1 point
-
And once again you offer a prize that is highly sought after. Thank you John. 👍1 point
-
Just saying hello, am in Brisbane Australia have had been flying since back in the 90s, had some duals and some traction kites then, did some kite surfing but kind of went away to do other things and only had a Benson Gemeni that I flew very occasionally in the last decade or so. Got a few days of flying in about six months ago and have caught the kiting bug again. Picked up a exp rev and wanted to get some tips for it for the forum. Heard about some tuning tips on the sport kite podcast where John B said he could even tune a exp so seeing if I can glean some of that from this site. Just making some leader lines now from shoe laces. Now to go test it Thanks1 point
-
A warm welcome here Nita, hope you and your little man are doing fine. 👍1 point
-
Thank you John, you provide many great prizes. It is greatly appreciated.1 point
-
Congratulations and have a lot of fun with it1 point
-
Congrats cerfoliste and thank you (again) John for the wonderful prize. 👍1 point
-
Hi, Quadkites.org is now in 2 languages : English and French. From now on, you can read our content in English without an automatic translator: https://quadkites.org/en/ Here some examples of content: North american team maneuvers Build your quad line kite We hope you enjoy all our content for learning to fly, team flying and kite building. Share your suggestions and impressions with us. Alban1 point
-
The date, my friend. You probably mean august 20th.1 point
-
Very true, but my eye just fell on it.😉1 point
-
John, you have really amazing prizes, my friend and I love to win but the date picked for winning is not so good. 🤣1 point
-
Just received and installed my KIteForge leaders last night! I am super stoked, I ordered a pair of JB 13" handles with the leads installed and 2 other leaders sets to modify my Rev handles. Installation was easy, pulled the factory rubber caps from rev, untied the stock lines and then used a sew-all needle to pull the new leaders back through the cap - it took some time and patience to get the knots parallel and equal on both handles but I couldn't be happier. More adjustment overall and a bunch more positions to fine tune! Can't wait to try them out with my new short lines! Thanks John!1 point
-
Truly, Start here.1 point
-
Riffclown - thanks for the offer! I found someone closeby with a Rev Tarantula for sale, and when I bought it, he threw in an Albatross quad for me to learn on. He didn't want me learning/beating up the Tarantula so he sent me a bit of a beater, I guess. Kite flyers sure are good people!1 point
-
Wow! Someone is surely gonna go home happy!1 point
-
Had my eye on this, glad to see its still up for grabs!1 point
-
Newest members! 1764 - @flyinghigh5280 1765 - @Dan H Current subscriber count, 358**. ** I've just started a gradual audit for subscriptions that are actually expired but had never been removed from the master list so you will see the total number of subscribers dropping pretty dramatically from time to time as we go through another batch (it's a bit painstaking). However, NOTE, any time we draw a winner the subscription drawn is checked via our PayPal and credit card processing list to be sure they're active so only eligible folks are in the running - its totally fair. Thanks to all as always for your support past and present, it does make a difference and helps us keep the entire KiteLife website up and running for all to enjoy.1 point
-
Congrats! Have fun :-)1 point
-
Hi! I do not want to belittle your effort and work. But with the right line management you do not need to wind the lines separately. In fact, it is more effective and faster to knot the upper and lower lines together and wind the left and right lines together. @John Barresi has a video about this in his tutorials.1 point
-
Also available are replacement bridles for the Djinn, the quad that JB is making. The bridle for this model of quad has a design change from the original Rev bridle that improves some flight characteristics and makes certain tricks and maneuvers easier. It also fits the 1.5 size Revs just like the original. It may be worth a try to see how you like it. As far as being a fix for beginner blues -- forget it. There's no such thing. You'll get better and have less issues each time you fly, so just hang in there. It will come. We all went through the same stages. Just smile and keep going. After all, you're just flying a kite. Relax. Have fun. Pretty soon you'll be flying well and you won't even know when it happened. Keep watching the tutorials. Rinse. Repeat. Repeat until you're sick of them. Every word you hear, every move you see is Gospel. Tried, tested and proven. You can acquire your own style once you're comfy with the kite.1 point
-
Windy.com point forecasts comparing the models, windfinder.com, and the us weather service point forecast hourly chart. (Start by picking the spot, then pick the hourly chart lower on the page.) I also check willeyweather's hourly UV graph to estimate how frequently to apply sunscreen.1 point
-
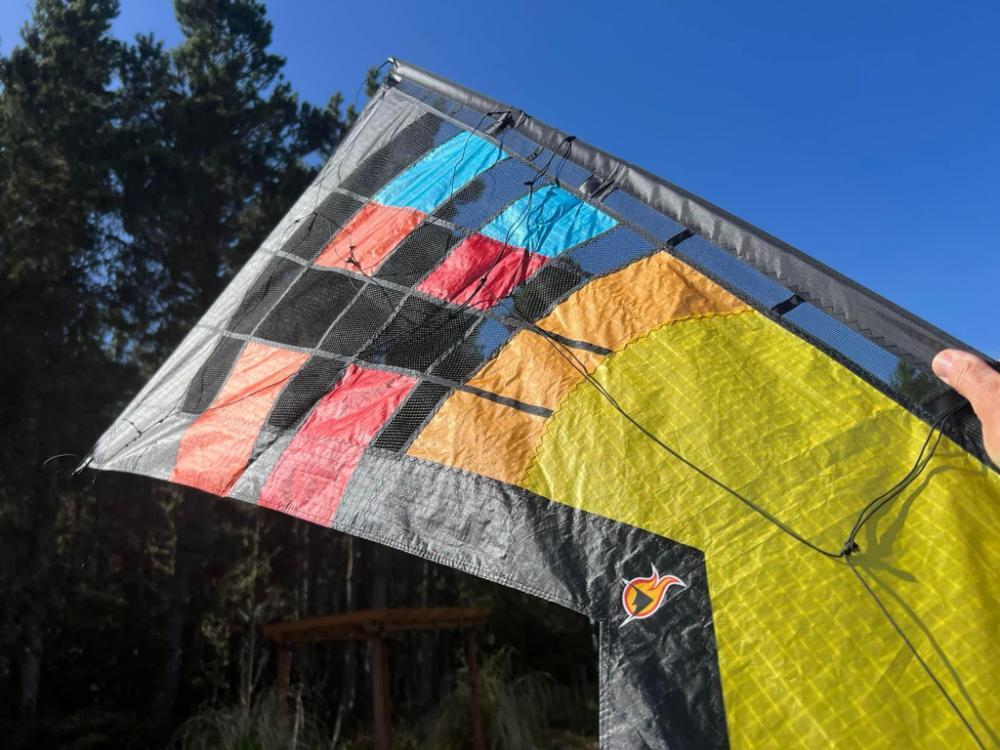
I haven't found any lists of common changes people make but I think it could be a useful list to create. So here goes. Leading Edge Tabs The leading edge mesh eventually wears out and tears through. Instead of leaving the kite in two pieces, a series of short tabs are sewn in place along the leading edge. The modification adds typically 7 or 9 small strips of mesh or webbing sewn across the mesh to connect both sides. This can be done to support the mesh and help extend its life, or as a repair after the mesh fails. The tab material should be a non-stretch material such as 1/2 inch nylon webbing used in backpacks. Typically one is sewn into the center, a pair is sewn near the fold points (see the next modification) others spread across the mesh. Fold Point Leading Edge Tabs The leading edge mesh at the two points where the kite is typically folded wears out quicker than other sections of mesh. While they can be the same as the other leading edge tabs, these are typically wider because the kite does not typically fold at precisely the same point each time. They may use 1-inch nylon webbing, 2-inch nylon webbing, or patches of Kevlar fabric. Wear / Stretch Strips The kite sail stretches as the fabric bears the forces of the wind. The biggest stretch tends to be along the lines of the vertical spars. The modification adds a strip of less-stretching material along the sail down along that same path to reduce how quickly the fabric stretches. The most common material seems to be 1-inch insignia tape (a 3.9 ounce Dacron tape) sewn in place directly along the path of the vertical spars, but other sail repair tapes, lightweight webbing, or materials could be used. The Revolution Reflex uses a heavy tape for this reinforcement. Reinforced Bungee/Shock Cord Mounts Some kites have minimal extra fabric at the connection points where the kite sail is attached with elastic cord to the caps for the spars. The reinforcements depend on what is already on the kite. Adding a piece of Kevlar fabric with adhesive, with stitching, or with both, adds stiffness and makes the material more difficult to rip through. Adding larger washers to the bungee spreads the forces even more. Knot Covers The knots and washers on the trailing edge vertical attachment points can sometimes snag on the lines, especially when performing slackline tricks like an axel or catch/throw. Adding a strip of fabric that covers the knots but goes behind the spar (between the spar and the knots) will cover up the knots and washers, reducing the risk of snagging the lines at that point. Reinforced Leading Edge The leading edge of the kite rubs along the ground, and over time abrasion can tear, scuff, weaken and eventually wear through the leading edge material. Urban flying on concrete can quickly damage the leading edge material. This reinforcement adds additional layers of fabric along the leading edge. A strip of adhesive Dacron tape or Kevlar tape is stuck along the leading edge folding around it to provide extra layers of material. In a pinch other tape like masking tape or painters tape could be used. The tape can be removed and replaced as needed. Glued Sail Repairs When there is a tear on the sail that has clean edges it might be repairable with glue instead of a ripstop patch. After cleaning the surface with rubbing alcohol, align the tear so the edges are touching and secure it with adhesive tape. Be as precise as possible to align the torn edges. Flip the kite over, find the tear, and smooth out the material. You can use Superglue (cyanoacrylate glue degrades in water and is stiff) or a waterproof glue like Seam Grip (urethane glue is waterproof and more flexible). Apply a bead of glue along the tear. After the glue is dried remove the tape from the opposite side, smooth the fabric out, and apply a bead of glue across the opposite side. Magic Sticks A pair of standoffs for the rev kite. I think these were created and are sold by Eliot Shook, who runs a kite shop and sells these as a kit. 12-inch or 16-inch standoff spars are attached to the vertical spars, with short lines that attach to various mount points on the kite. The standoffs allow the kite to stay upright and stationary when landed without using a ground stake, and make the kite frame more stiff and less prone to bowtie effects. LED Lights Small LED lights can be beautiful when flying at dusk. I've seen small "finger lights" that can be ordered in large packs online, which have a small elastic and power switch on them. The finger lights can be slid over bungees or spars to put light along the kite. If the kite uses Magic Sticks the lights can be pointed directly at the sail to provide a bright backlight. LED light strips are heavier, but provide an interesting option. Some searching on eBay can find strips of color-changing lights with wireless remote controls and a USB power source (e.g. phone charger battery packs) which can be secured with adhesive tape. They add weight to the kite but add quite a visual flair. Tails and Streamers Easily attached and removed, they add some flair while flying. Any ribbon-like material could be added. In my own bags I've got bright spools of flagging tape (from the hardware store) that can be any length I choose. Unlike tails for single line kites, these can be unbalanced and attached at any existing mount points at any desired length. Several performers use them occasionally. Scott Weider has a custom black indoor rev with a silver strand design flowing through the length of the sail, ending at the wingtip where he attaches a long silver streamer. I've seen some amazing pair performances where two revs were tied together by a long ribbon. You can use tails and streamers to help tell a story with your music or as a decoration to the flight. Any other modifications and adjustments for your quad-line kites?1 point
-
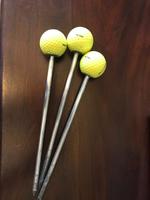
Decided to give a DIY project a go. I took a tent stake, golf ball and drill and went to town! Took a bit of trial and error but after first ball... Three great stakes! I just need to find (or make) belt holsters for them.
 1 point
 -
Interesting mix of scenarios, The grocery bag bowling ball is common sense. As for the baseball through the window, accidents do happen. In your other two cases though, you have a reasonable expectation of quality and thus the warranties involved. If you new car's brakes failed pulling out of the dealer lot and you got hit because of it, don't try to say you wouldn't be all over the dealer and the manufacturer. There's normal wear and tear but there's an expectation of quality in a product purchased. Especially one with a premium price point. That's why there's recalls on products like certain Airbags and even TV's whose capacitors failed and left users with black screens. The current Galaxy Phone issues also seem to be relevant.. If you phone catches on fire is it your carrier or the manufacturer that is to blame?.. Same deal with iPhones a few years back. If I need a kite repaired, I send it to me. If I can't repair it, I'll contact Eliot. I didn't ask Rev to repair my Trifinity when the spar broke and I had to rebuild the LE. I was flying it in higher winds. It was possibly my fault. I didn't ask Rev to replace a cracked SLE on my vented I loaned them for the Rogallo. I'm not positive it was in their hands when it happened. I'm sure they would have responded if asked in that case. When my Reflex Handles started falling apart in the first few months, I posted on their forum and expected a response. I got crickets. Lesson learned, they don't read their own forums. I don't do Facebook. There's a reason that decades long loyalists to Rev, including DEALERS are considering alternatives. The quality has gone down while the prices have increased. Rev has increasingly decided to compete with their retailers to get a bigger piece of every single sale. There is a reasonable expectation of quality in a product with their reputation. Kiting is about having fun, not having exclusivity. Two years ago, this topic would not have even been possible on any forum. If you will be flying Rev's forever then I applaud your brand loyalty. I hope you've stocked up on Non-Green Trimmed rods. You've also answered my question as asked and there are tons of people that agree with you. I like Rev, I like their kites and I have several. I'll personally buy a used Rev in a heartbeat depending on the frame included. At this time though, I'd only consider a new one if it was a Shook Mesh. I'm not against the brand at all.. I'm against some of the more recent changes in the brand. I'll probably have several Revs in my bag forever myself.. like the special ones. Old Glory, My Stack, and even a few others.. After the feedback with the Green Trimmed rods was ignored, I can say that I can't personally justify paying the NEW premium for their baseline product any more. No rod should break in multiple places at the same location every time and on first flight. They've tanked their own product for exclusivity. Their stated purpose for the change was their Rods were getting copied too and this information is First Hand. IMO, change should be for improvements, not for profit. There's a problem and they are ignoring it. If Rev listened to feedback, the screen wear issue would have been solved YEARS AGO. The Spar pockets would have been sealed to deter fraying and the green trimmed rods would have been recalled and replaced. Interestingly, many of the design changes in both Bazzer's Phoenix and the Freilein Exodus are based on public feedback that Rev ignored. It seems Rev is no longer trying to innovate, they seem to be more focused on something new they can patent to protect their price point. .. That's exactly why they released the Reflex.1 point
-
Hi folks, greeting from Israel. So the nose on my Widow NG was torn and beaten for a while, probably from all the nose pop-up and such. It was time for a nose job. I decided my sawing skills were not up to the task of putting a new one, so I went with an option that was discussed by many before on different forums, all recommending it. Since I haven't seen anyone post a "how-to" manual, I'm showing here my process. Hope you enjoy it. The before shot + The material and tools I started applying the first layer with a brush, very runny and fluid compered to the original mix, after I thinned it with the Naphtha. This was so the fabric would be soaked with the plasti dip . After waiting 1/2 hour, I applied the second layer, which was reduced through natural vaporizing in open air. https://lh3.googleusercontent.com/-LVP1l5PKHM8/VWngdhq4BSI/AAAAAAAAPb4/msThFWnumdY/s288/20150530_125737_SUPER.jpg https://lh3.googleusercontent.com/-RGsNSV1QY2g/VWngdm15B5I/AAAAAAAAPb4/BP1o6igfQdo/s288/20150530_124939_SUPER.jpg https://lh3.googleusercontent.com/-pRMYEokzh4k/VWngds3y7_I/AAAAAAAAPb4/ABk8o47vhwI/s288/20150530_133654_SUPER.jpg After another half and hour I put the leftover plasti dip in a cut-out plastic dish so I can dip the nose in the now-more-concentrated material. I dipped only 1/3rd of the nose this time. After another 1/2 an hour, I dipped a final time in the almost-original consistency dip, and only the tip of the nose. The result was a fully protected nose. Hope I helped someone, in some small way. On another note, if there's anybody on this honorable forum from my neck of the woods, I'd be happy to get together and fly happy flying everyone. Iftah.1 point
-
Mr. Dugard? Here? I thought having LeMasters over here was bad enough! Welcome!!1 point
-

From the album: Mystainedskin
1 point


.thumb.jpg.53aabc63a639af8d375b2c92cf2e13f8.jpg)